
How to Make a Colorful Tassel Blanket
Psssst… this post *might* contain affiliate links: see my disclosure here.
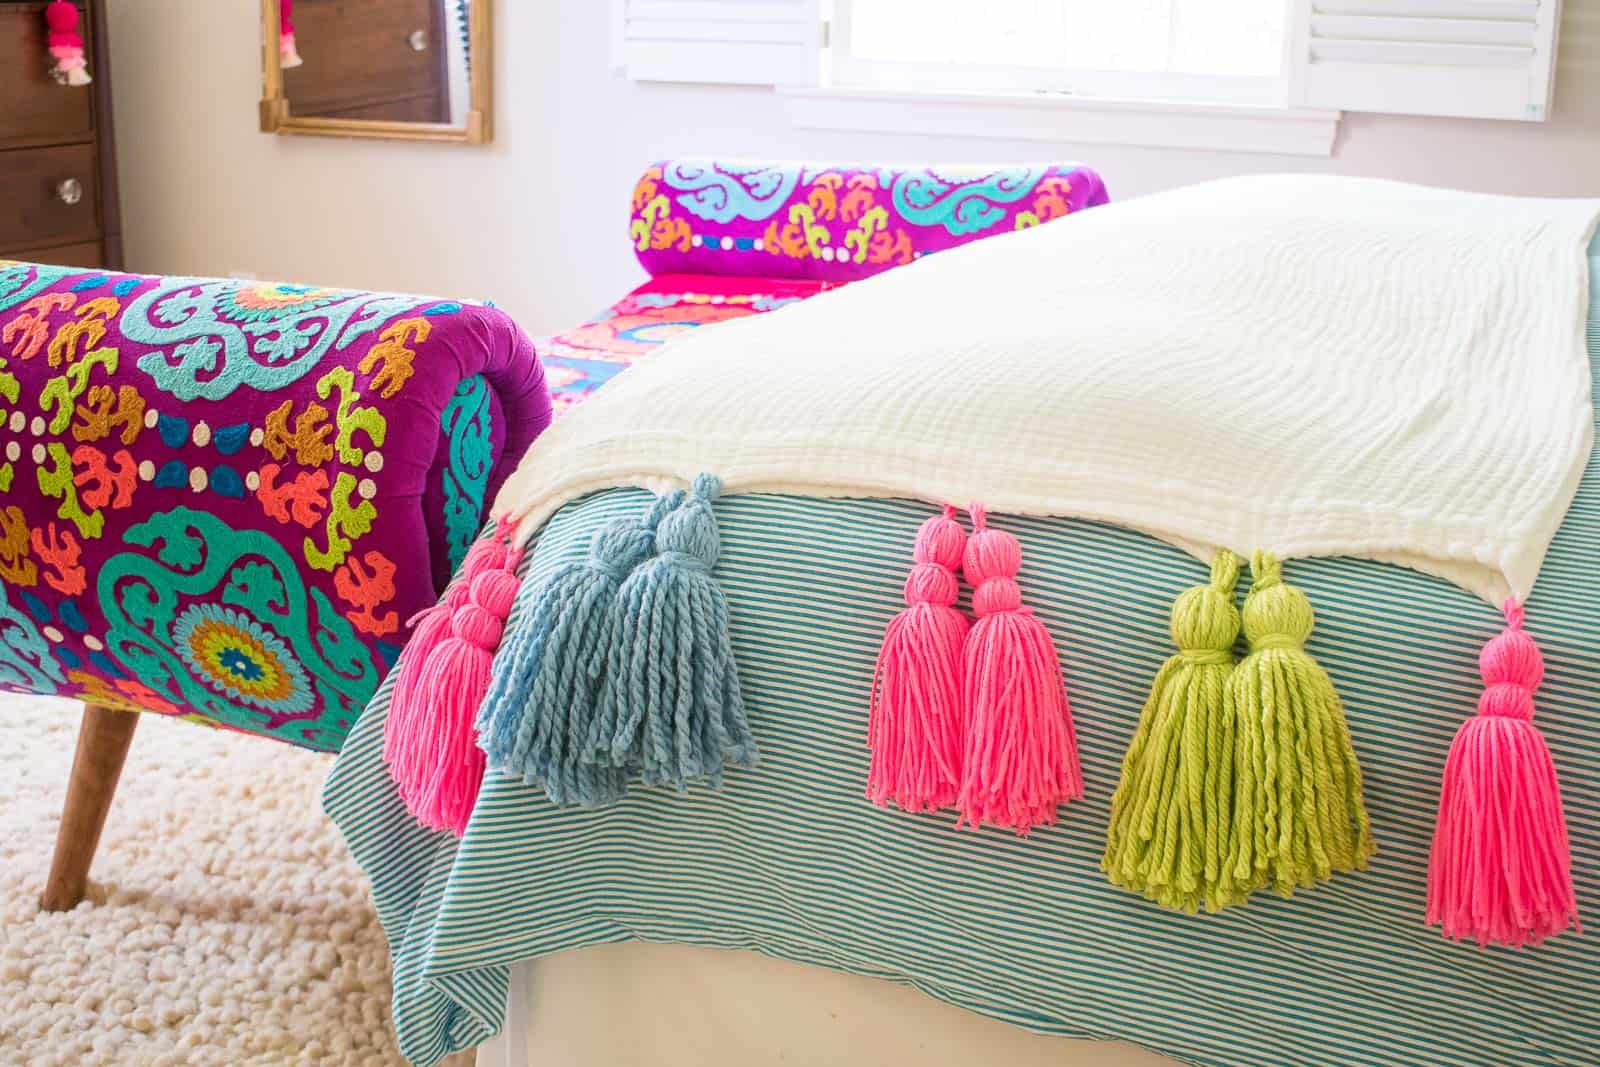
DIY Giant Tassel Blanket
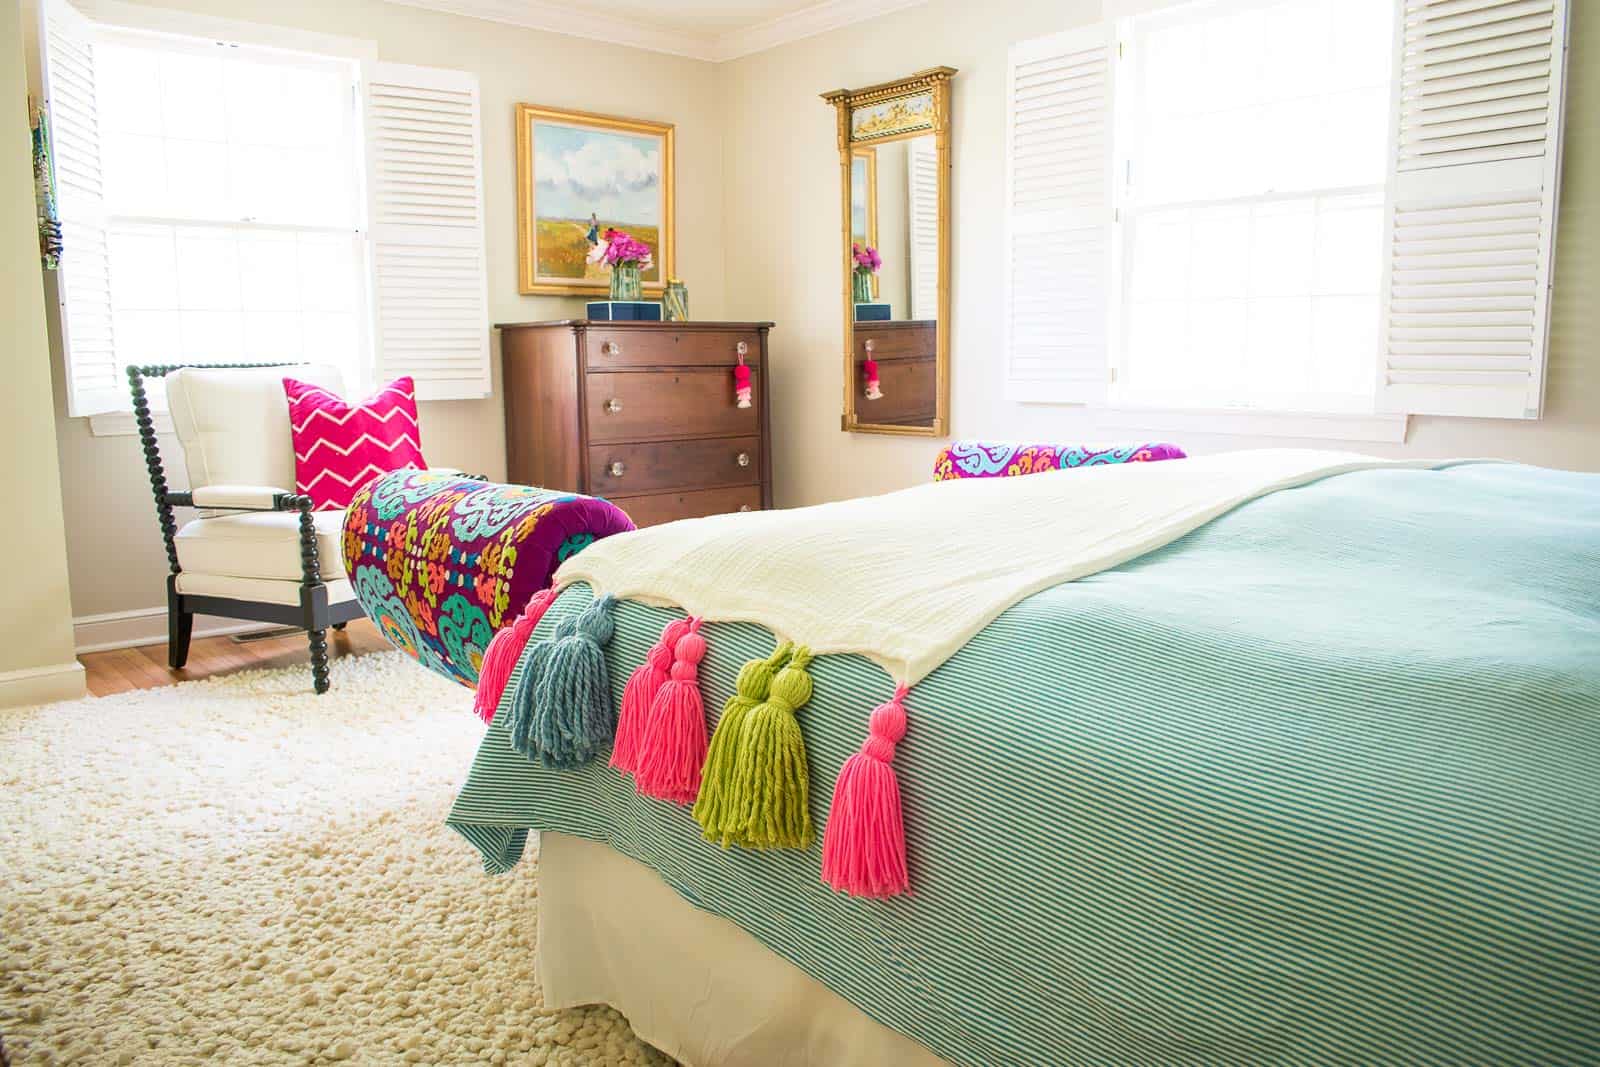
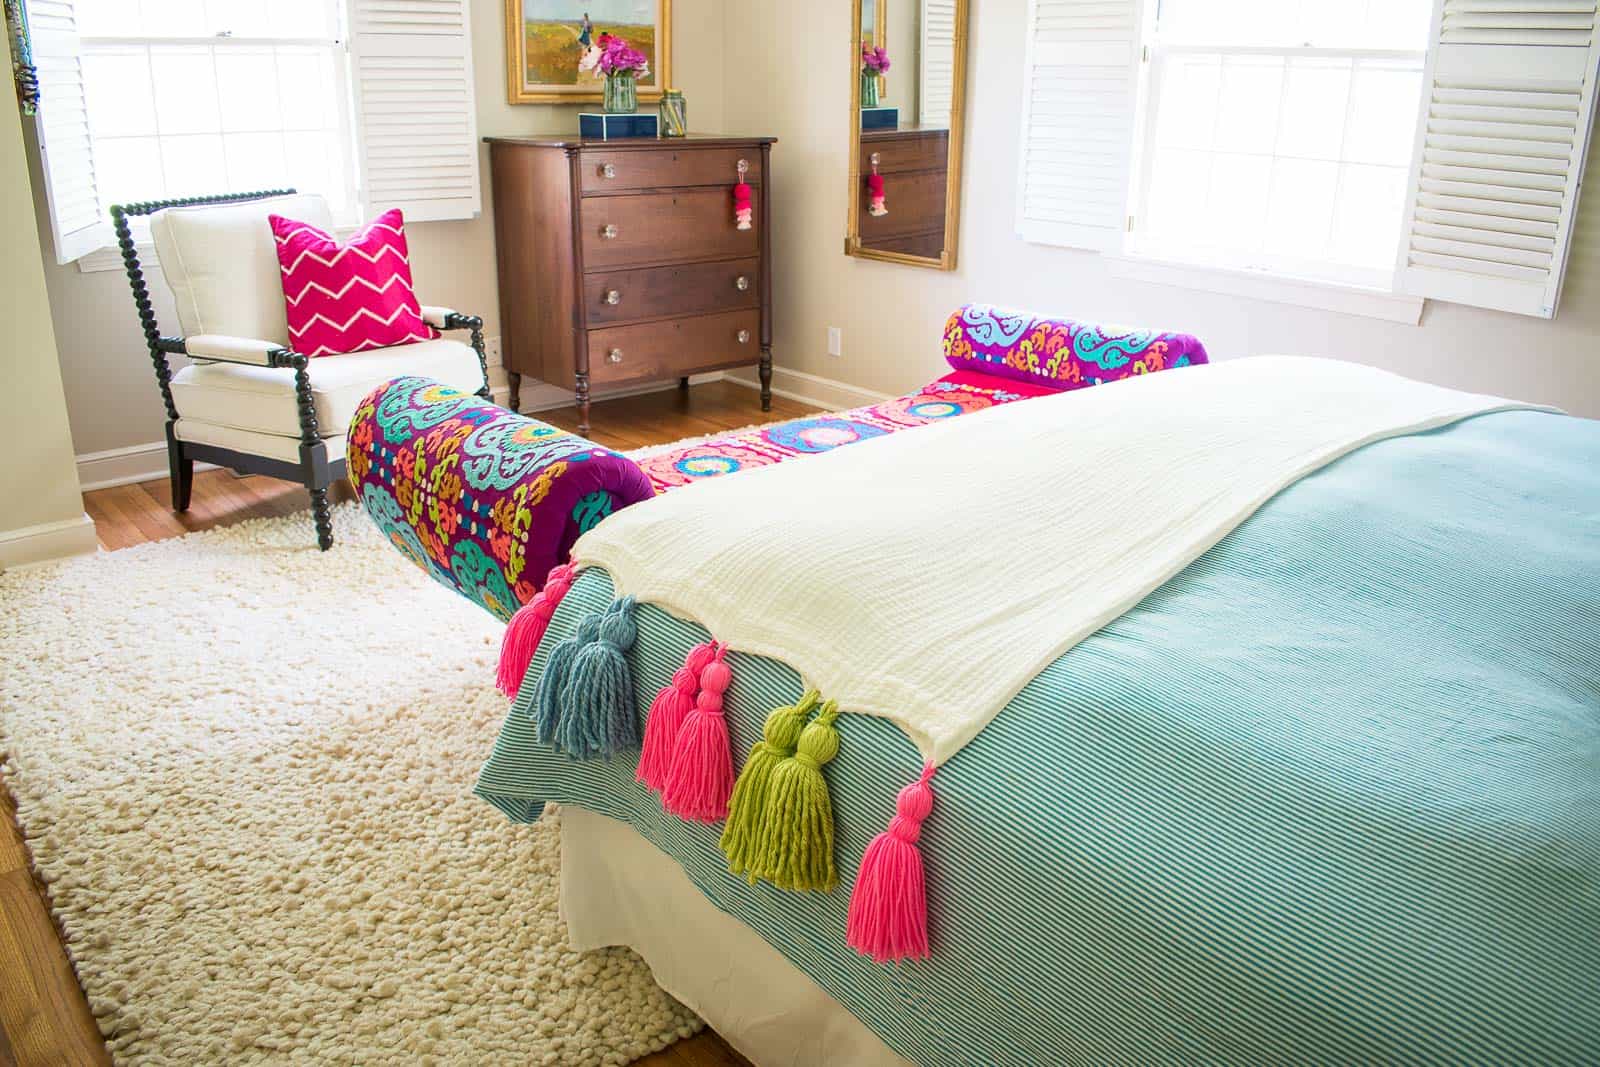
I made this colorful oversized tassel blanket to help bring our master bedroom together.
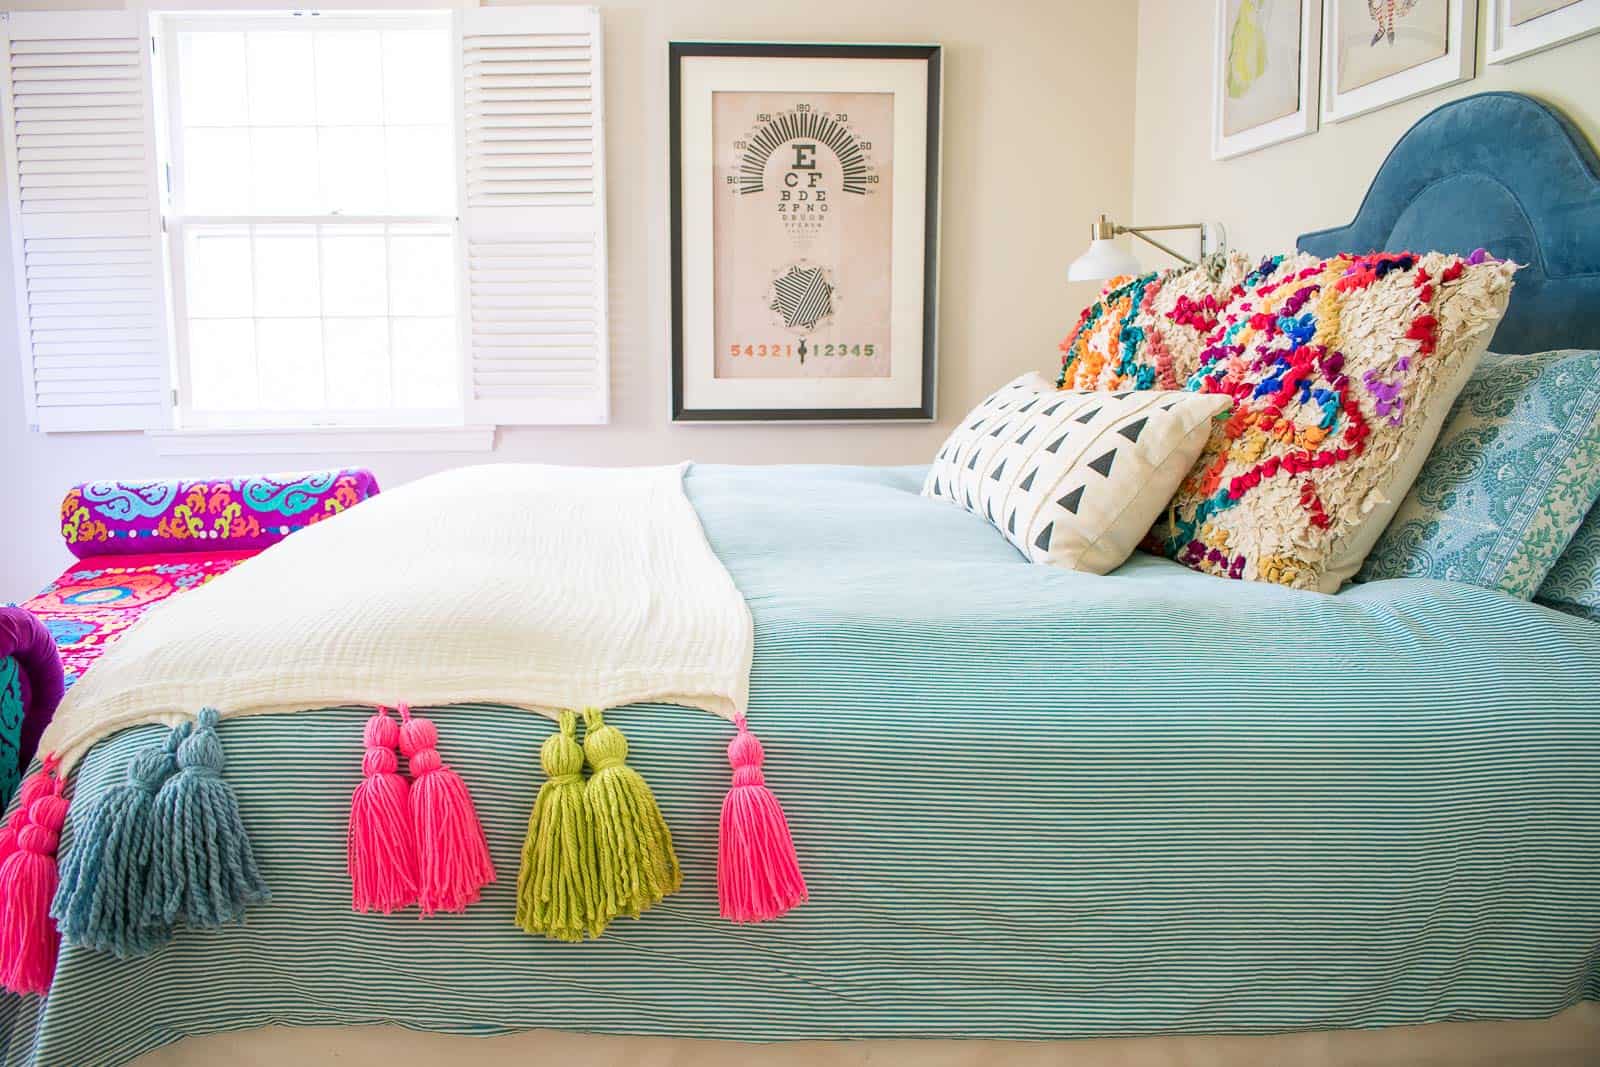
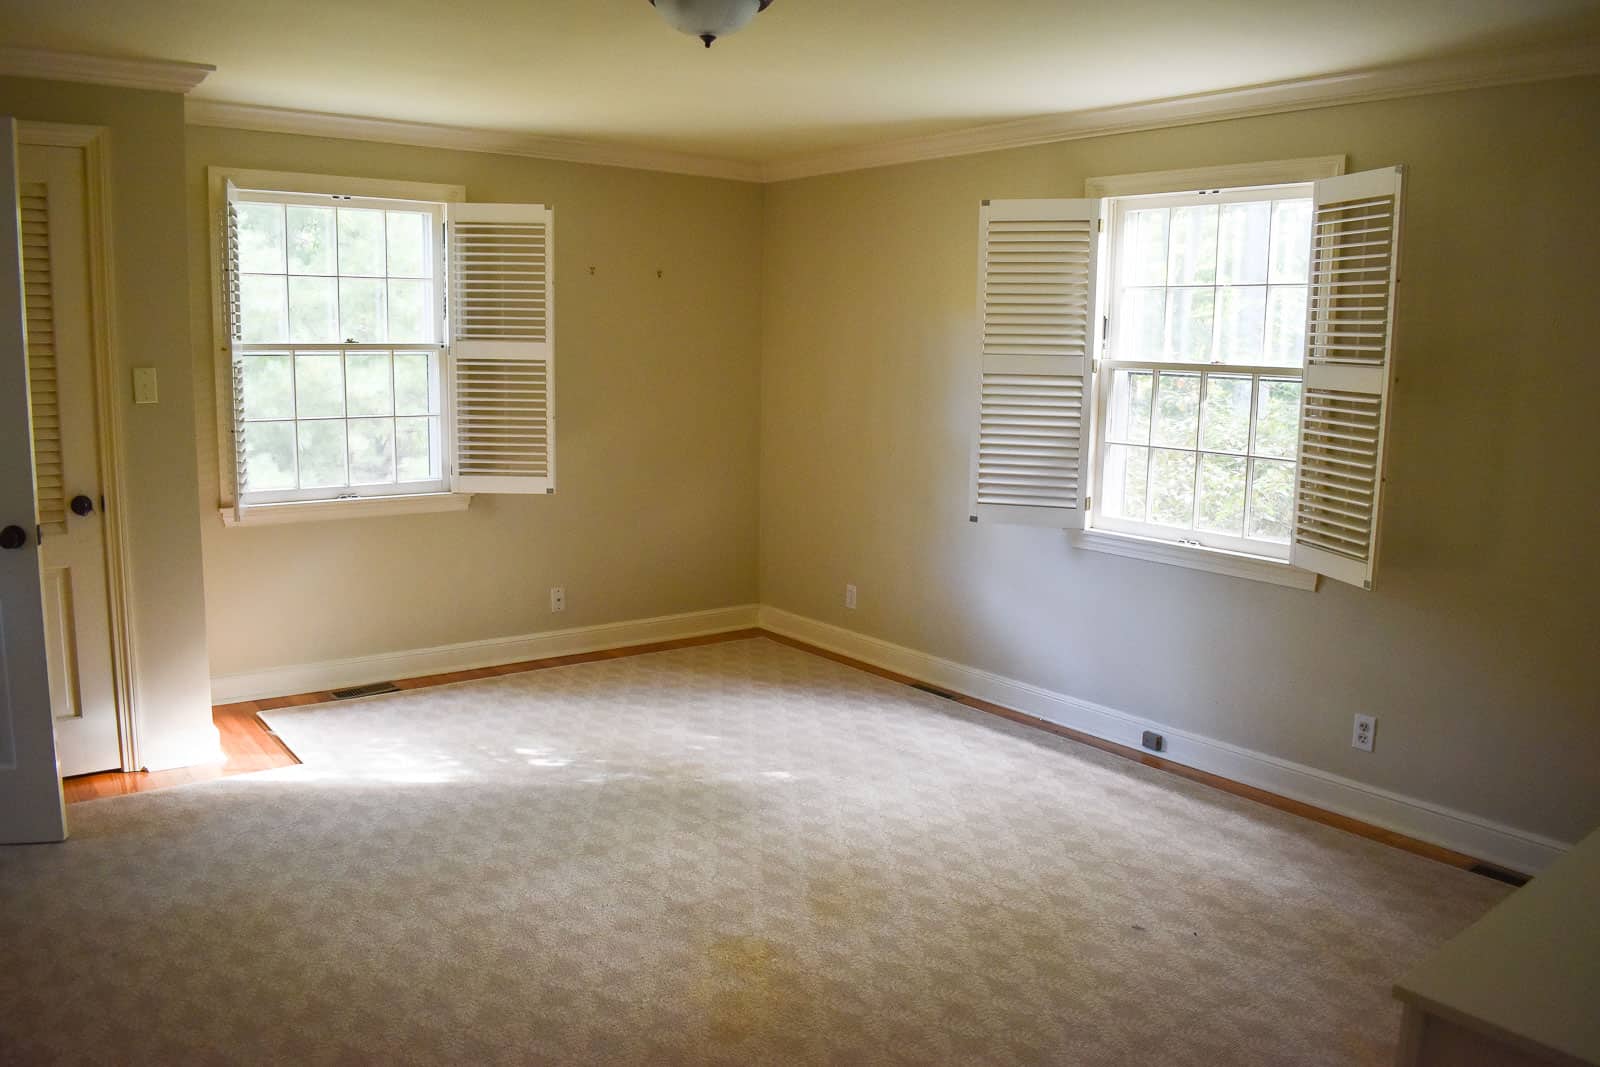
I’ve never showed our entire master bedroom because… well, because it’s not great. I added a new headboard and framed some amazing flea market art for above the bed so one angle looked cute, but the whole room… no bueno. But then I got the itch to make a blanket with giant colorful tassels and I figured it might be the perfect way to bring the rest of the space together. Here’s the magic of this makeover… I couldn’t change any of the furniture in the master because there’s nowhere else for them to go, but I was able to make them work a little bit better with just a few little changes.
Shop my favorites!
Let’s start with the blanket DIY, because hopefully that’s why you’re here and that was truthfully a springboard for the rest of the space. Step one is buying a blanket. Any style blanket will work. I grabbed this muslin one from Amazon.
How to Make Tassels
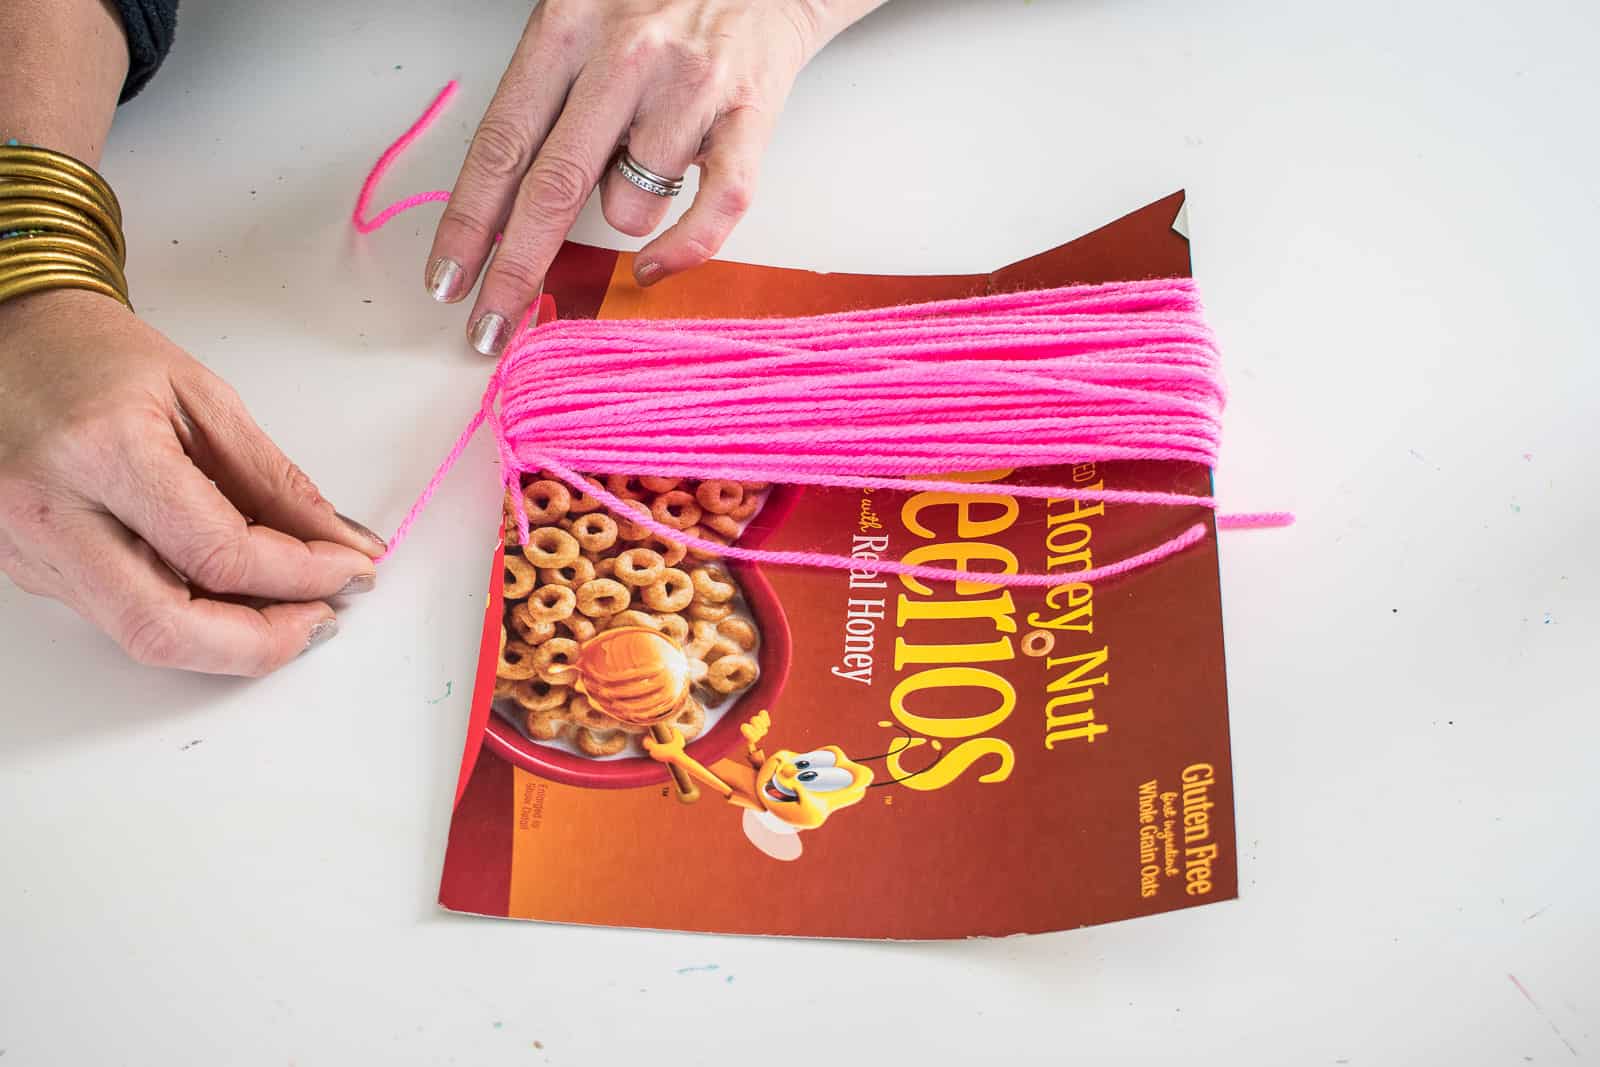
I’ve shared with you how to make tassels in this post when I jazzed up a basket, but I’ll review the steps again here. It’s SO EASY and so satisfying. Cut out a piece of cardboard; obviously you can see I used what we had: cereal boxes. The size of this cardboard will determine how LONG your tassels will be so the wider the cardboard, the longer the tassel.
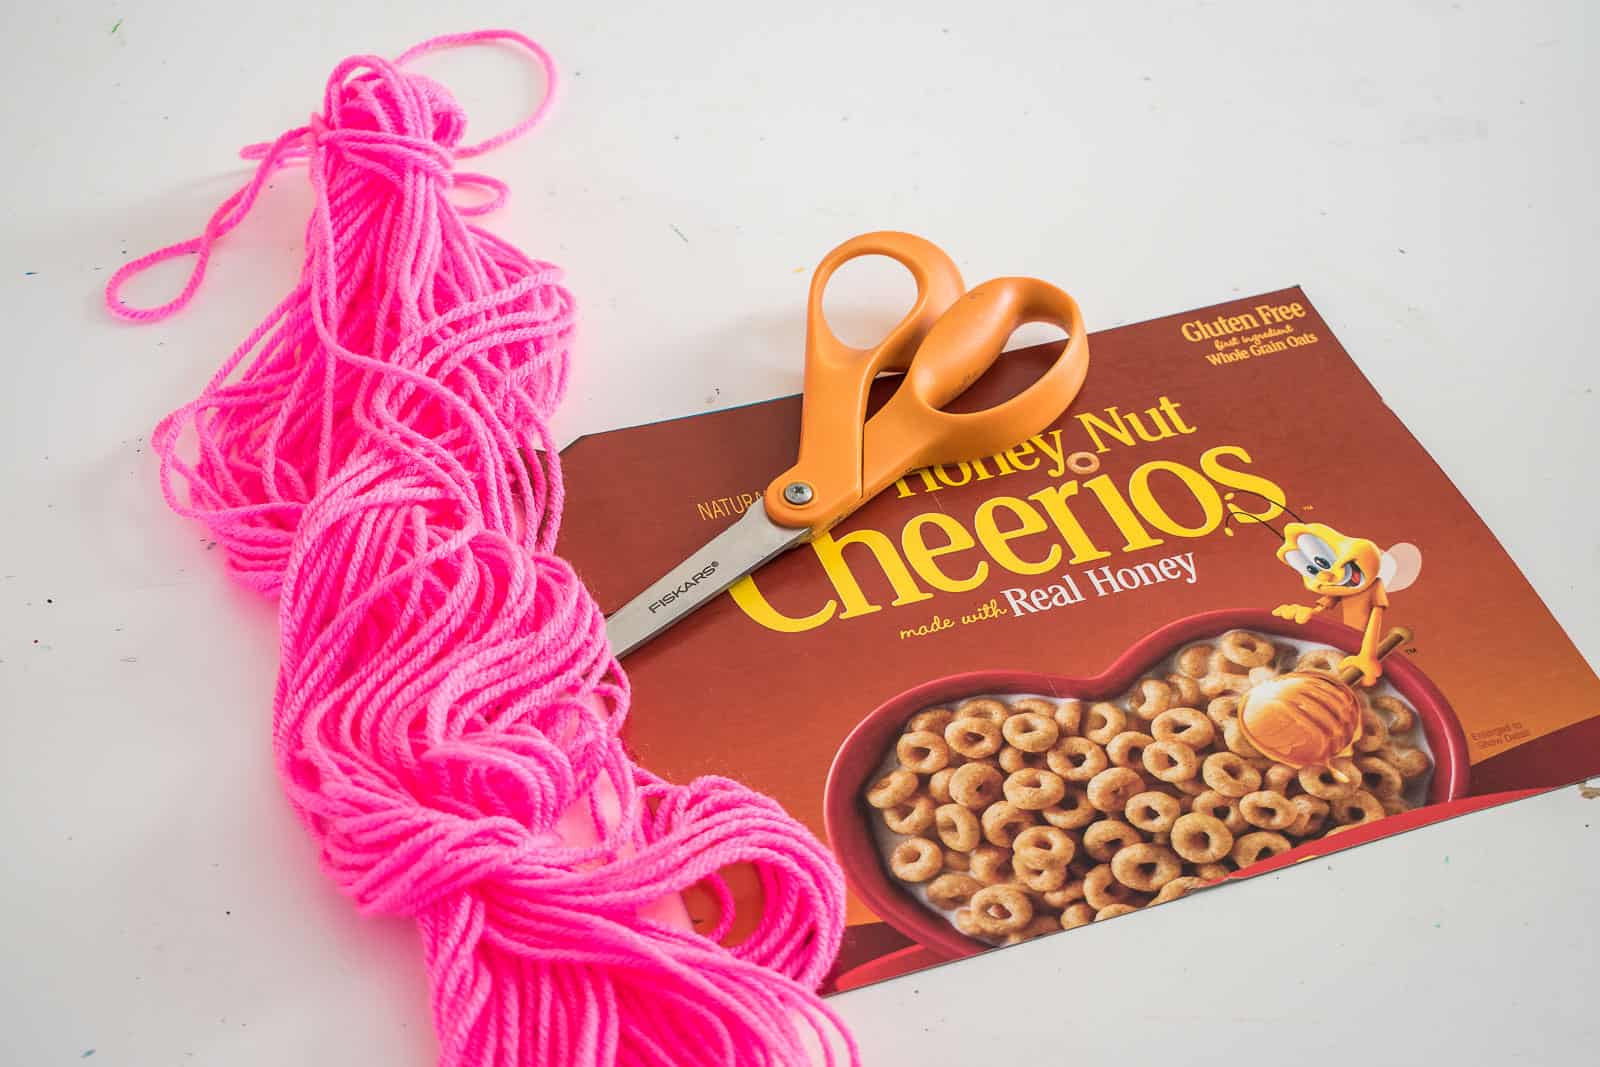
I’m using leftover yarn, but anything will work really… embroidery thread, thin rope, raffia…. I made a small cut to ‘hook’ my yarn and then I wrapped it around the cardboard. A lot. The more you wrap, the chunkier and thicker your tassel will be. For this blanket I wanted the chunkiest tassel I could, but I was also aware of my yarn supply since I knew I couldn’t just run out and grab some more…
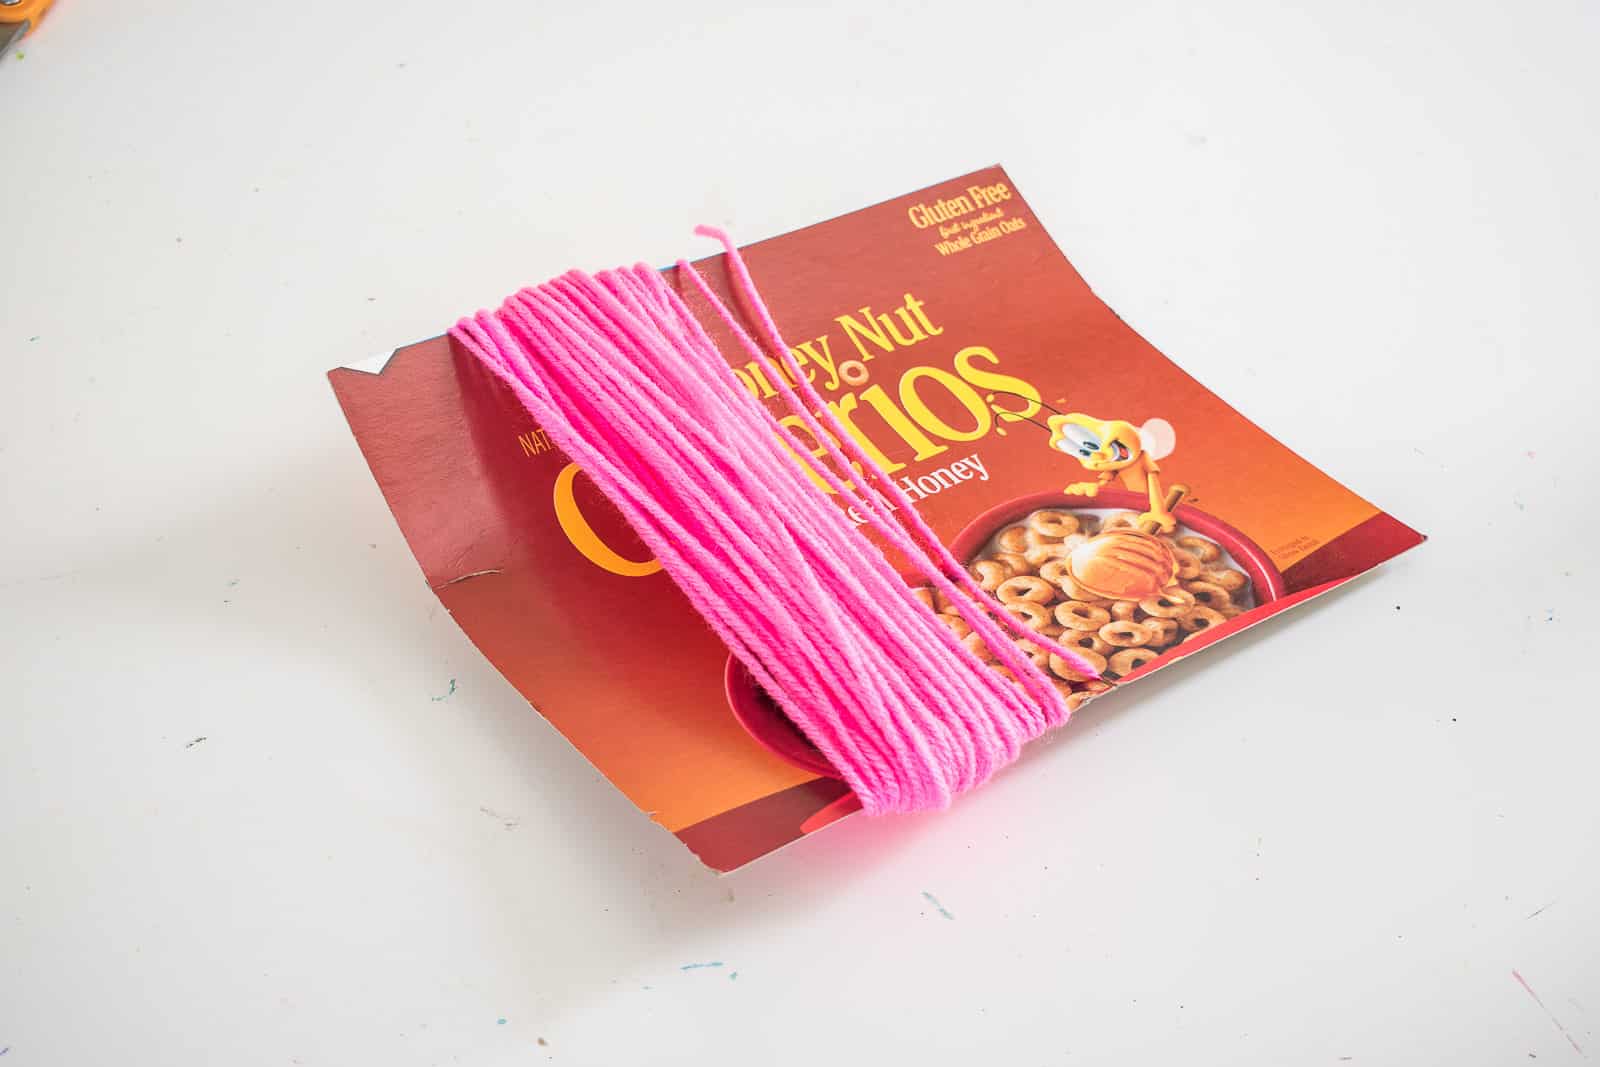
Once you’ve wrapped the yarn around the cardboard quite a few times, cut 18 inches of yarn, loop it through the yarn wrapped on the cardboard and tie a tight knot. Slide the wrapped yarn off the cardboard.
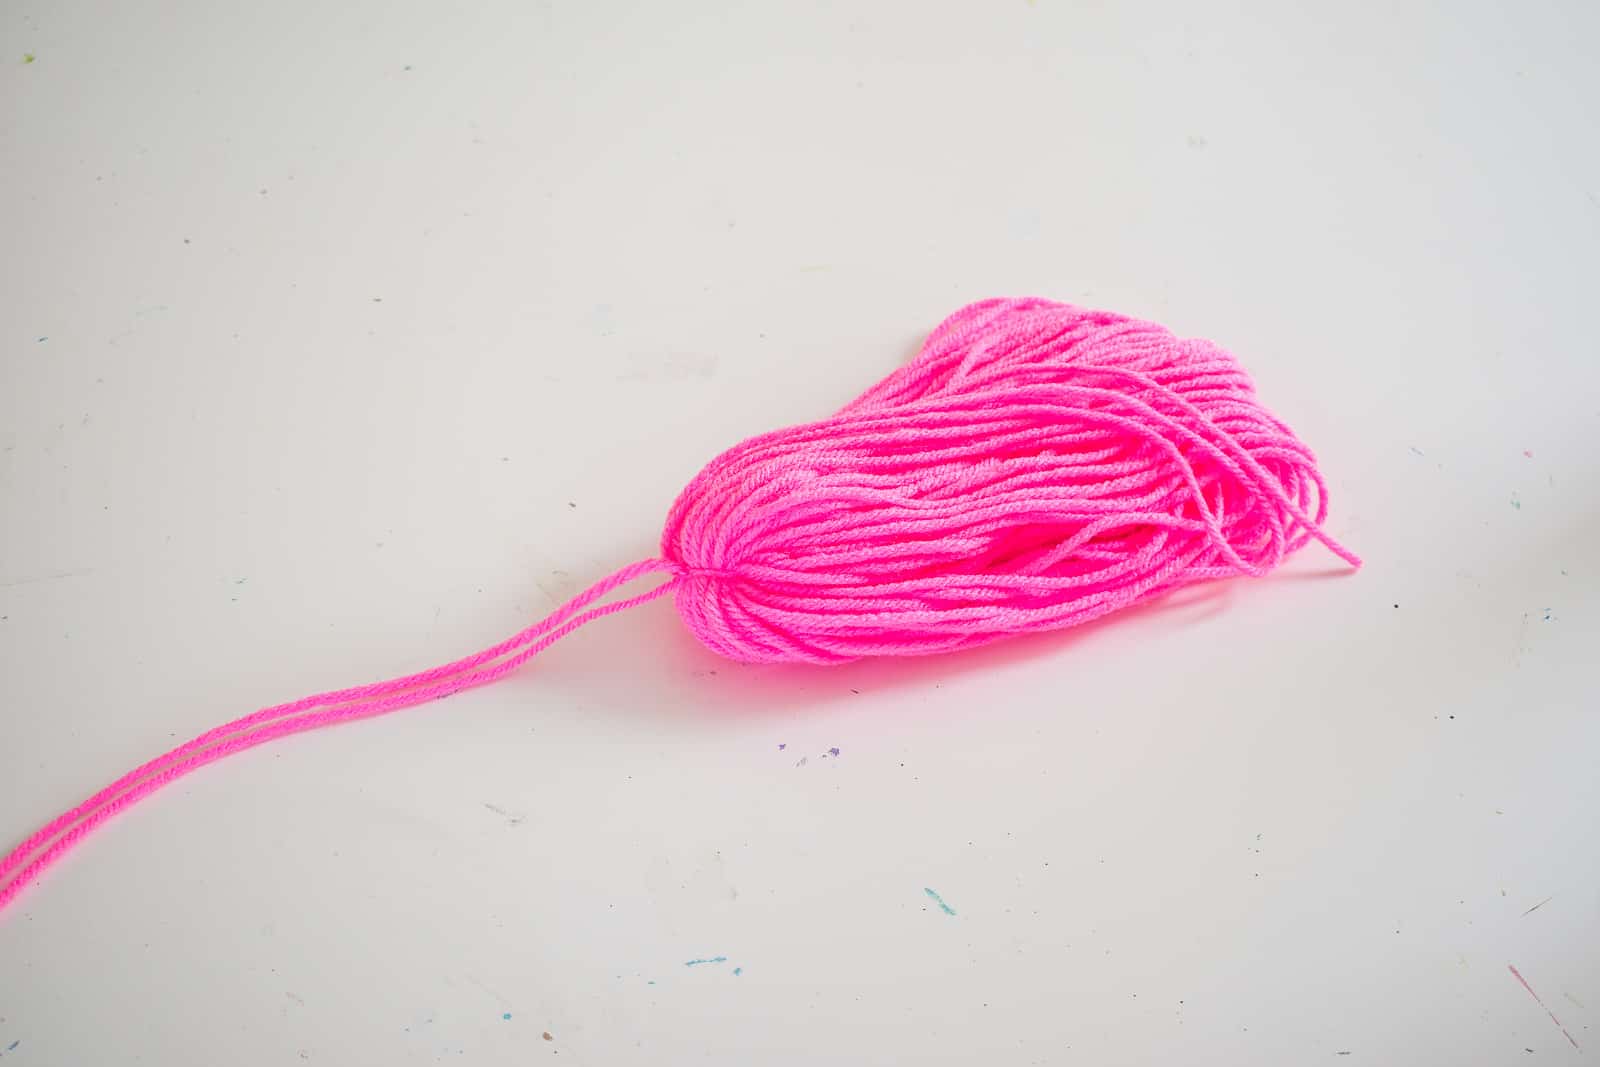
With another length of yarn (1-2 feet), wrap around the tassel about an inch from where you first tied it off. Secure with a knot. Optional: repeat this step and wrap the yarn around the tassel again just below your first wrapped section.
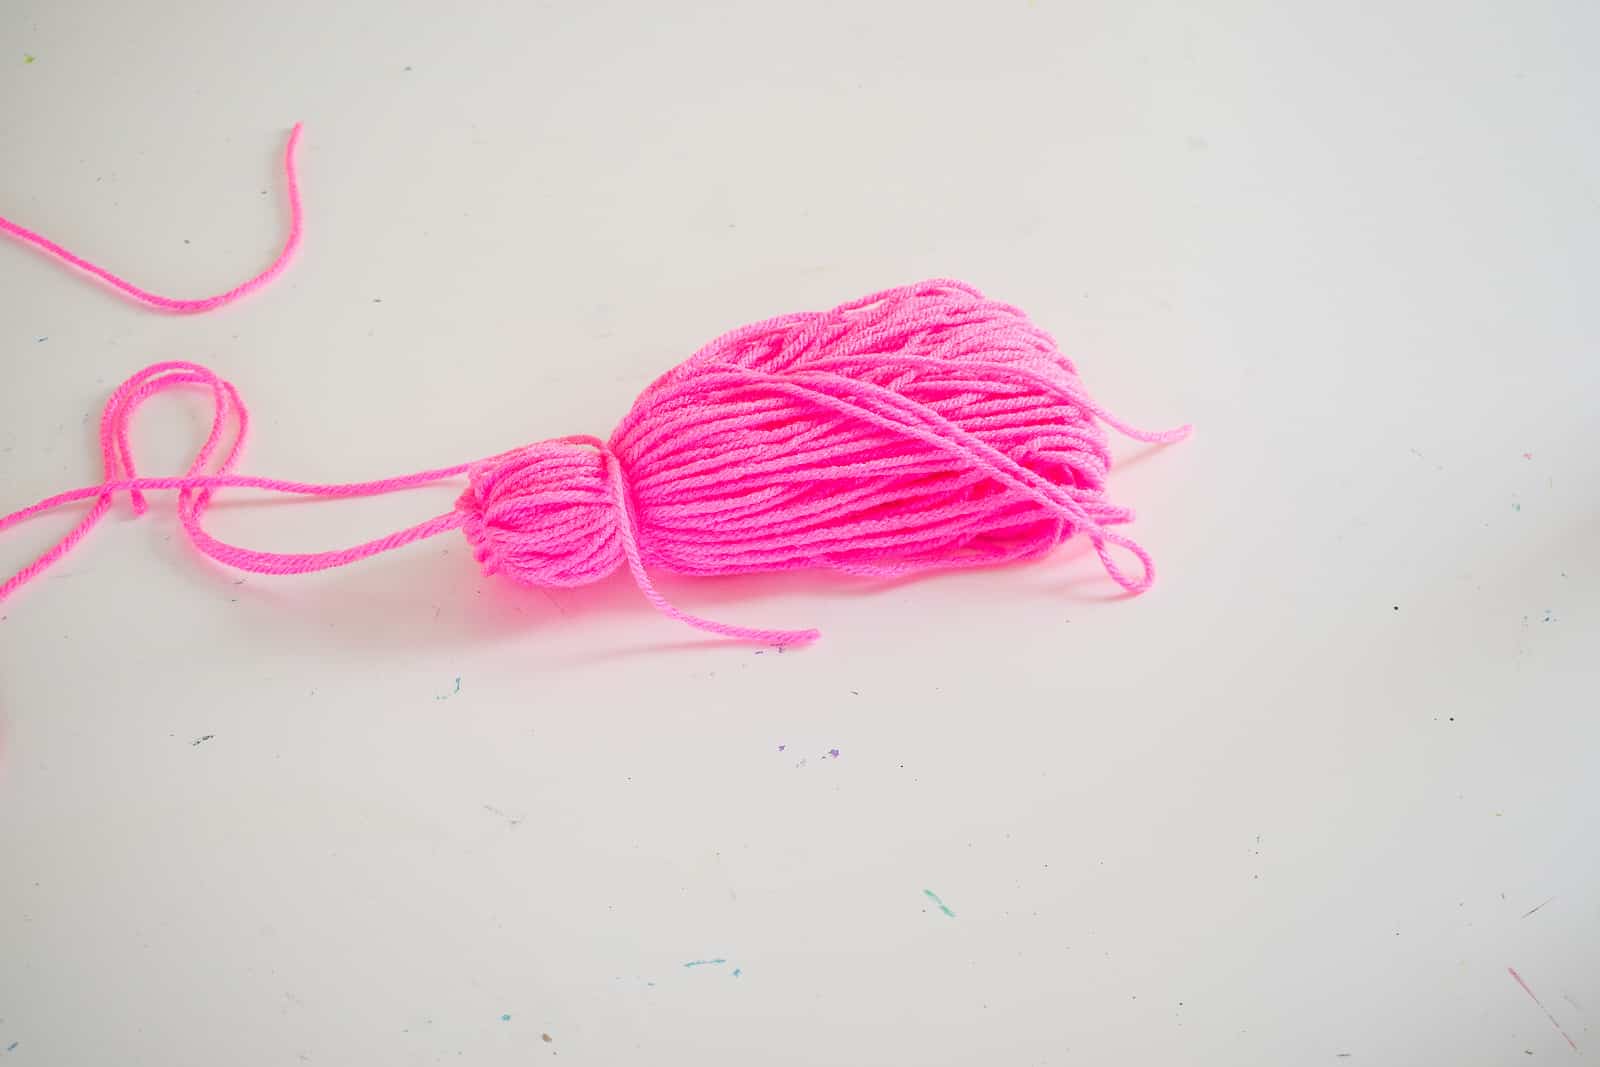
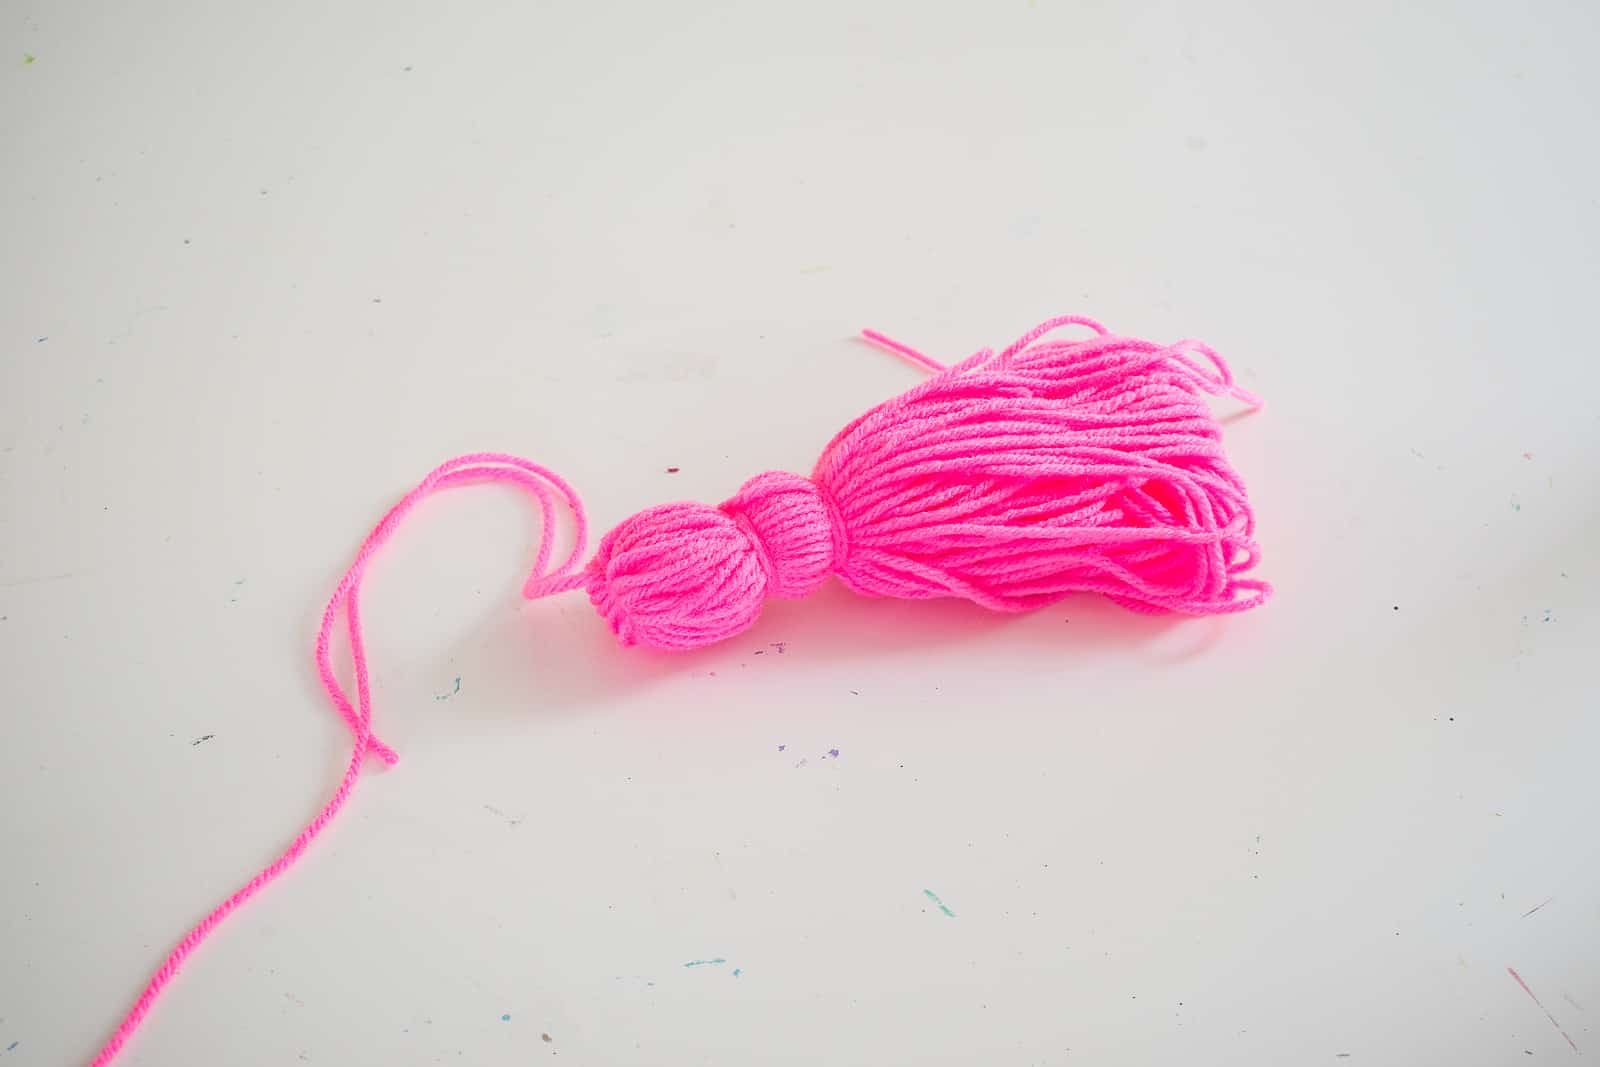
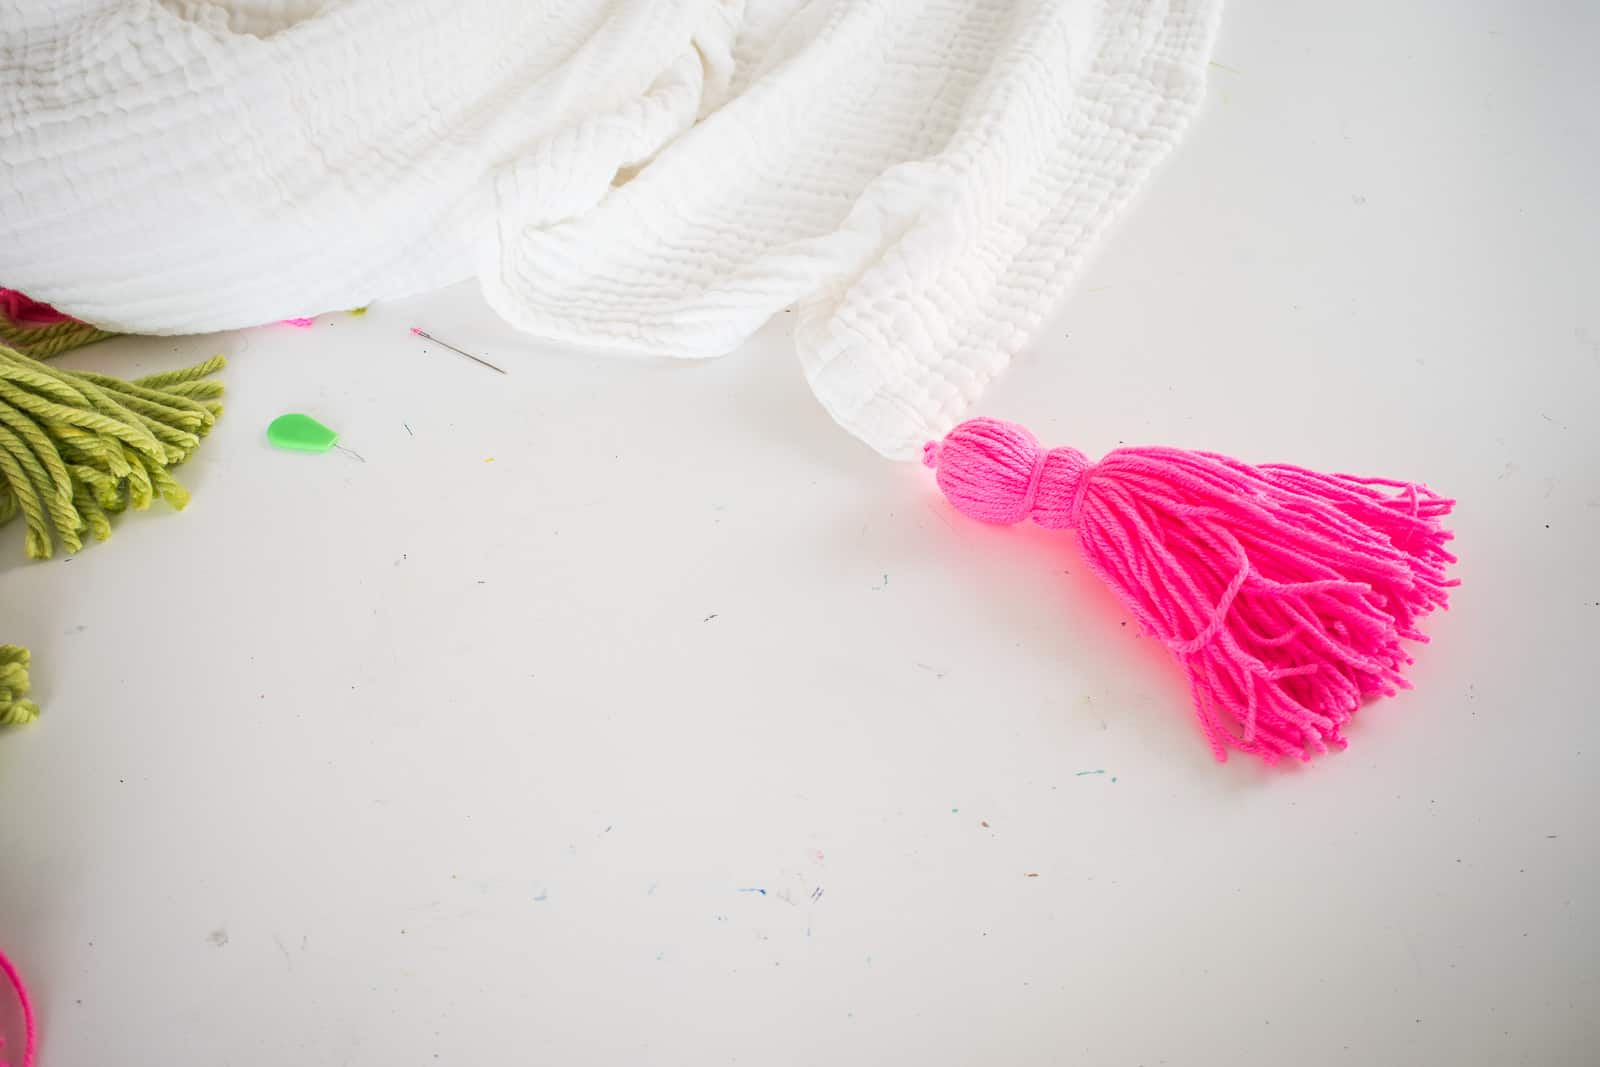
With sharp scissors, cut the loops of yarn at the bottom of your tassel and trim as needed. And yes… this pink IS that bright!

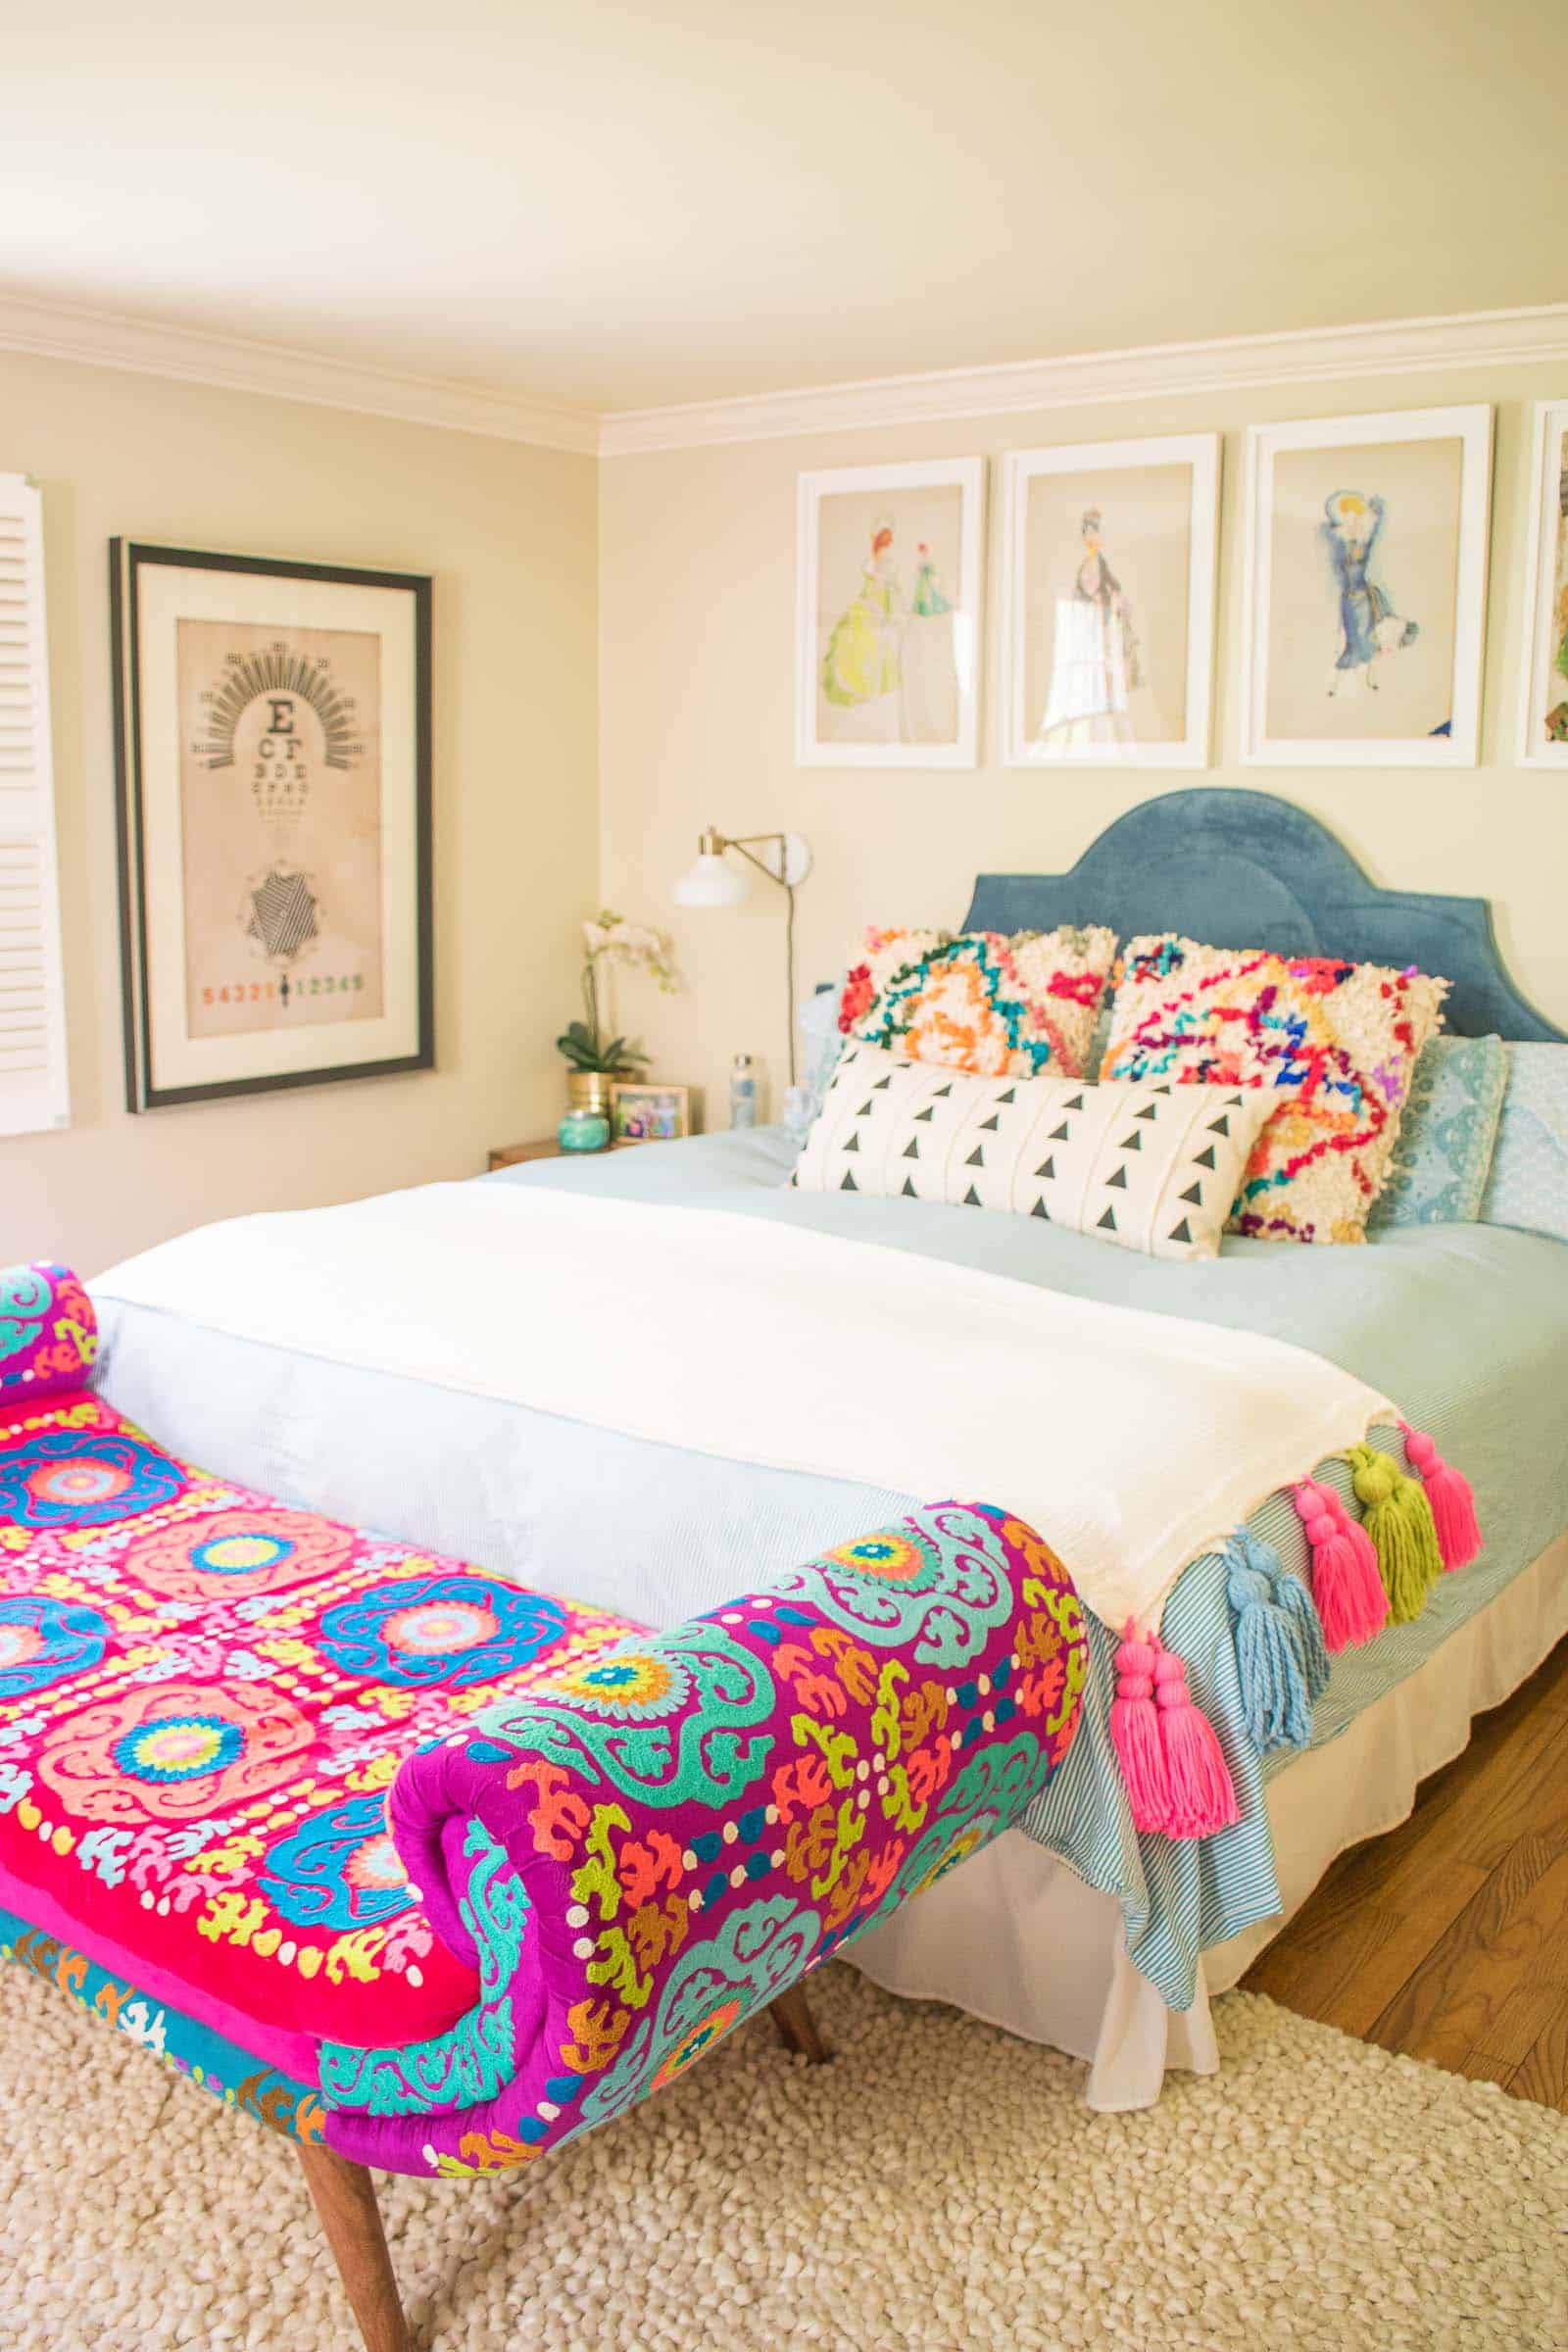
Make a Tassel Blanket
I used 9 tassels on each end of my blanket (so 18 total), but this is totally up to you! Check out Pinterest for “tassel blanket” to see some different versions. I marked my tassel location with sewing pins. Because muslin has a wider weave, I was able to string the yarn from the tassel right through the muslin.
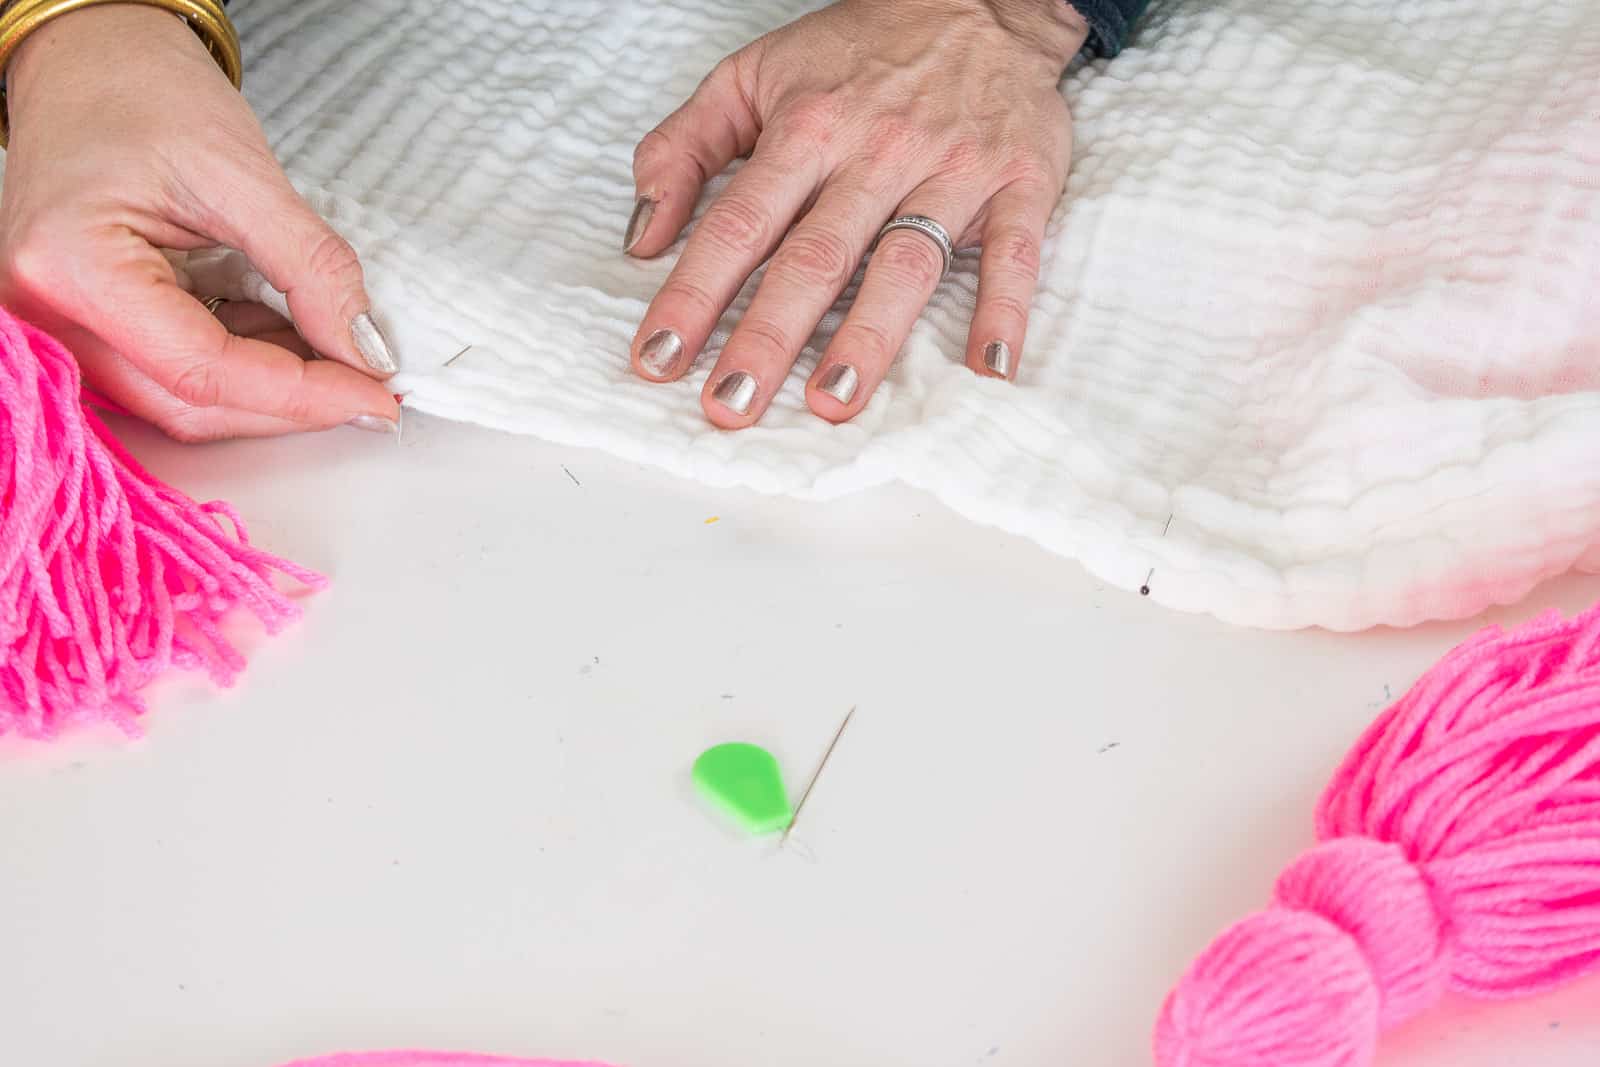
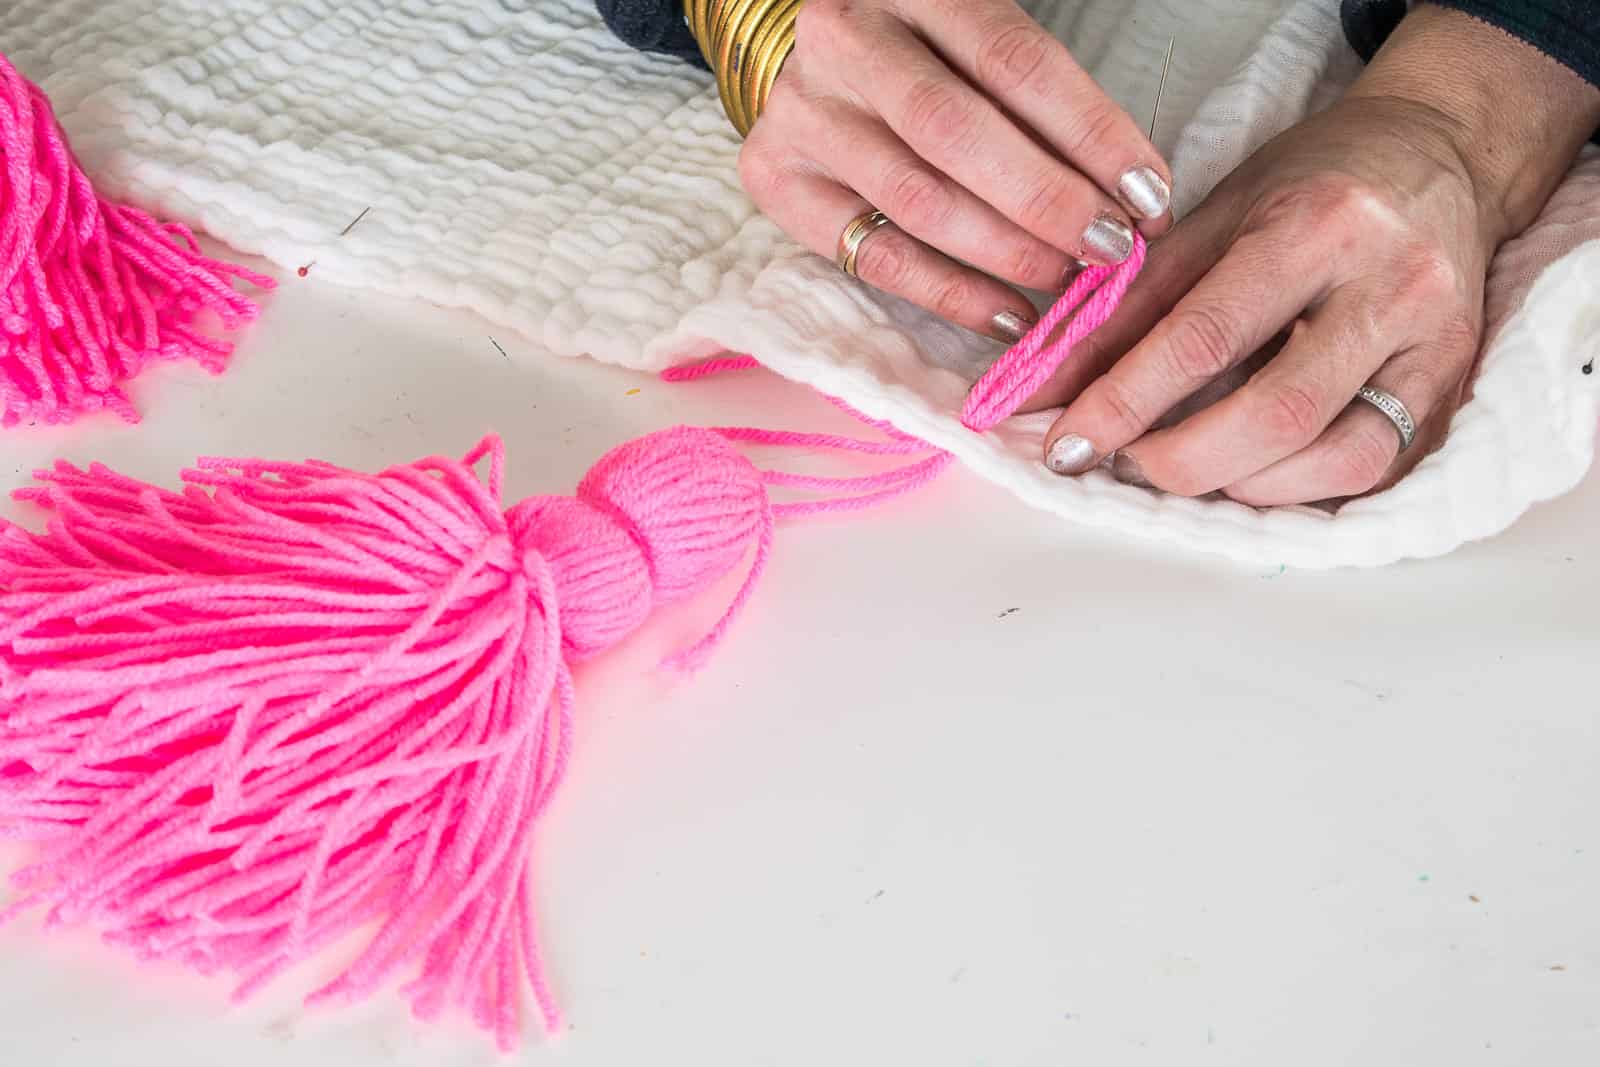
If you’re working with a blanket with a tighter weave, try a thinner embroidery thread perhaps. Essentially, you’re going to sew the tassels onto the edge of the blanket. Some tassels are tight against the blanket, some have a bit more of a tail… again… these are all personal preference.
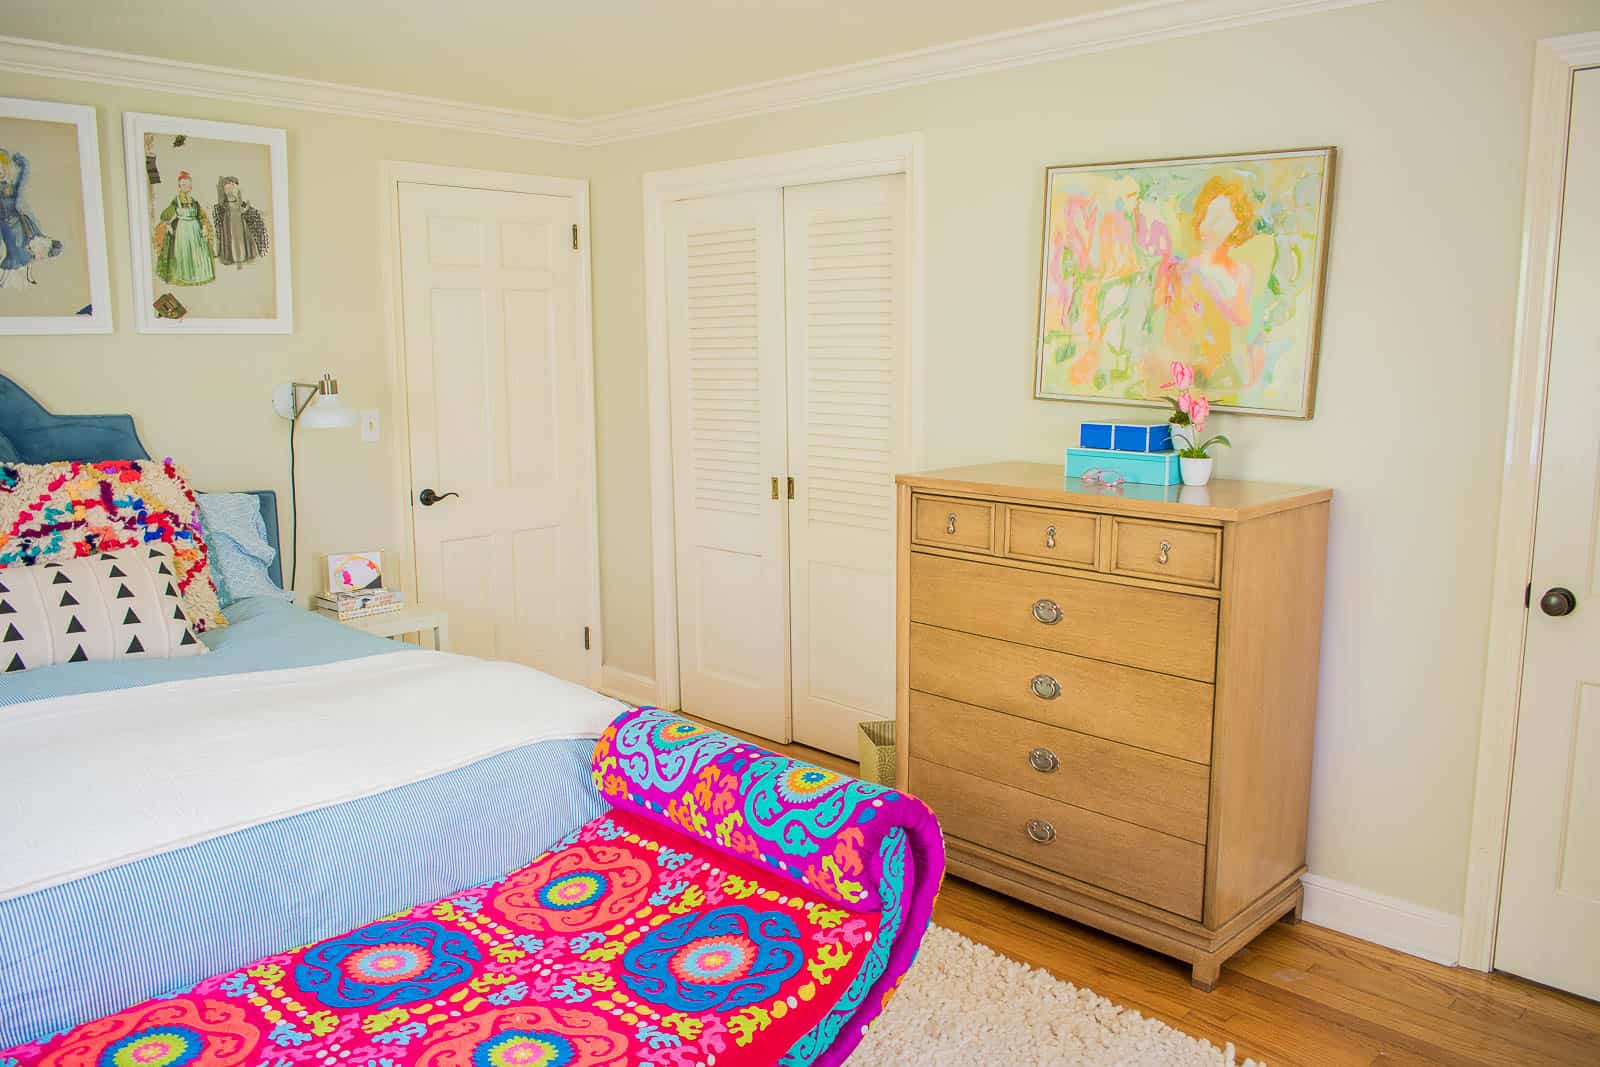
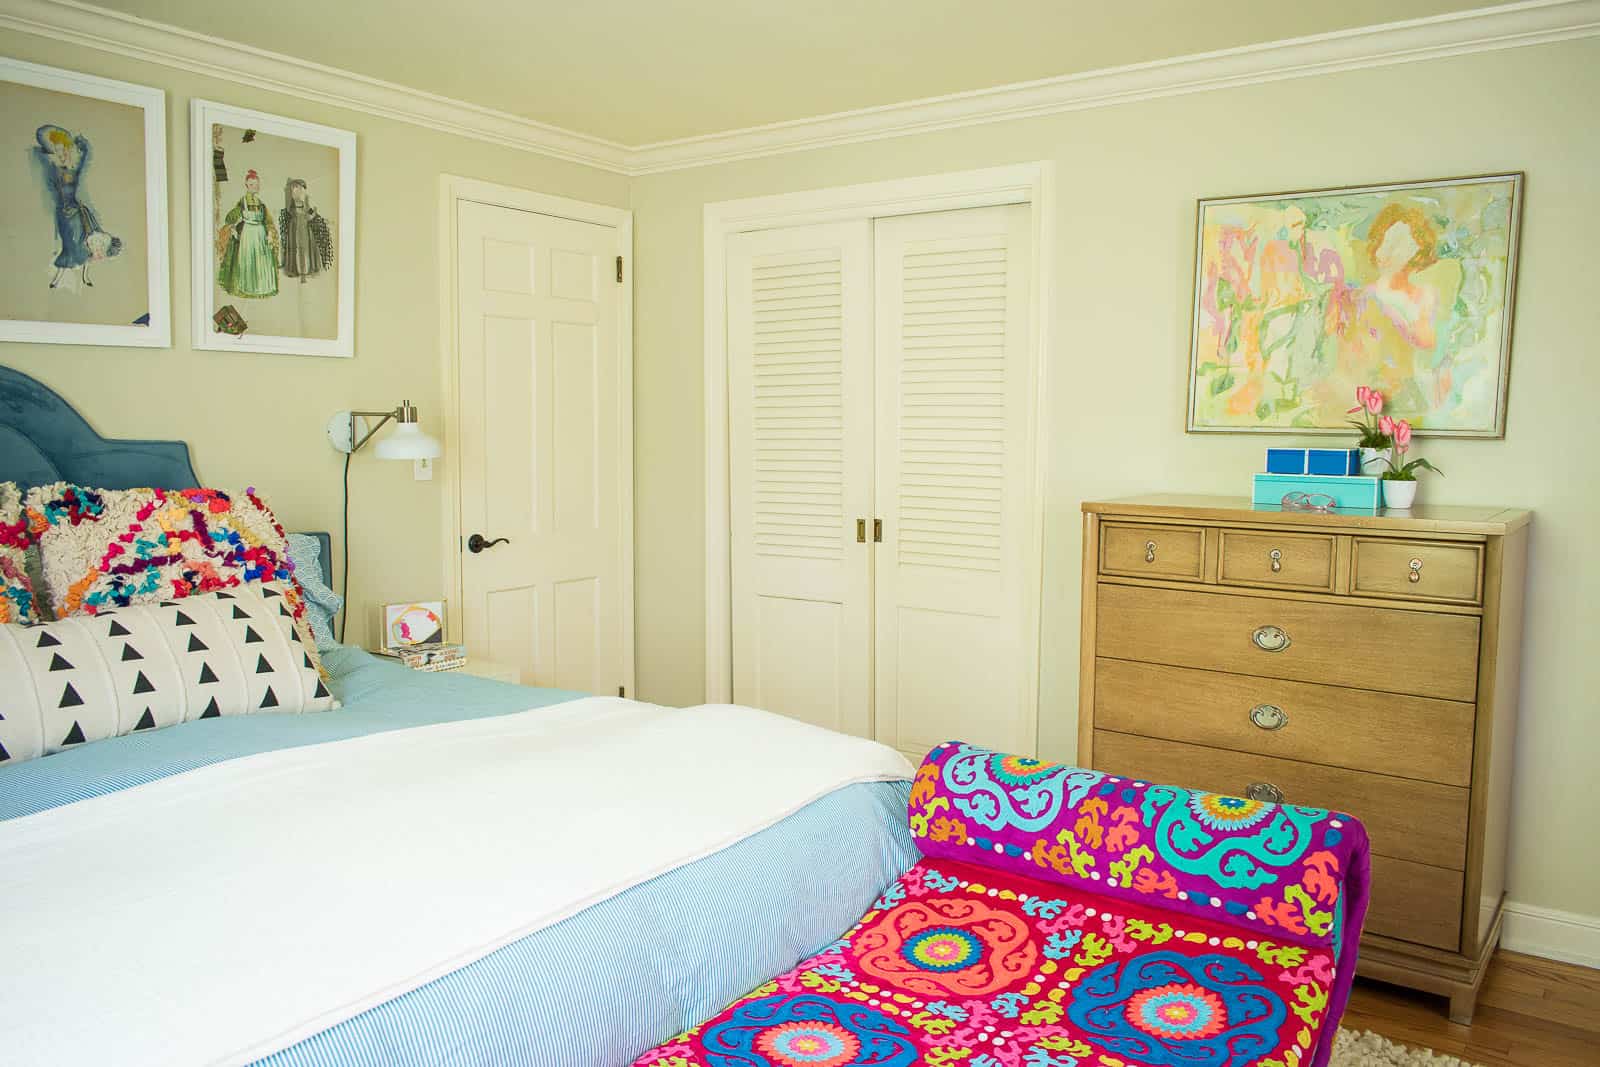
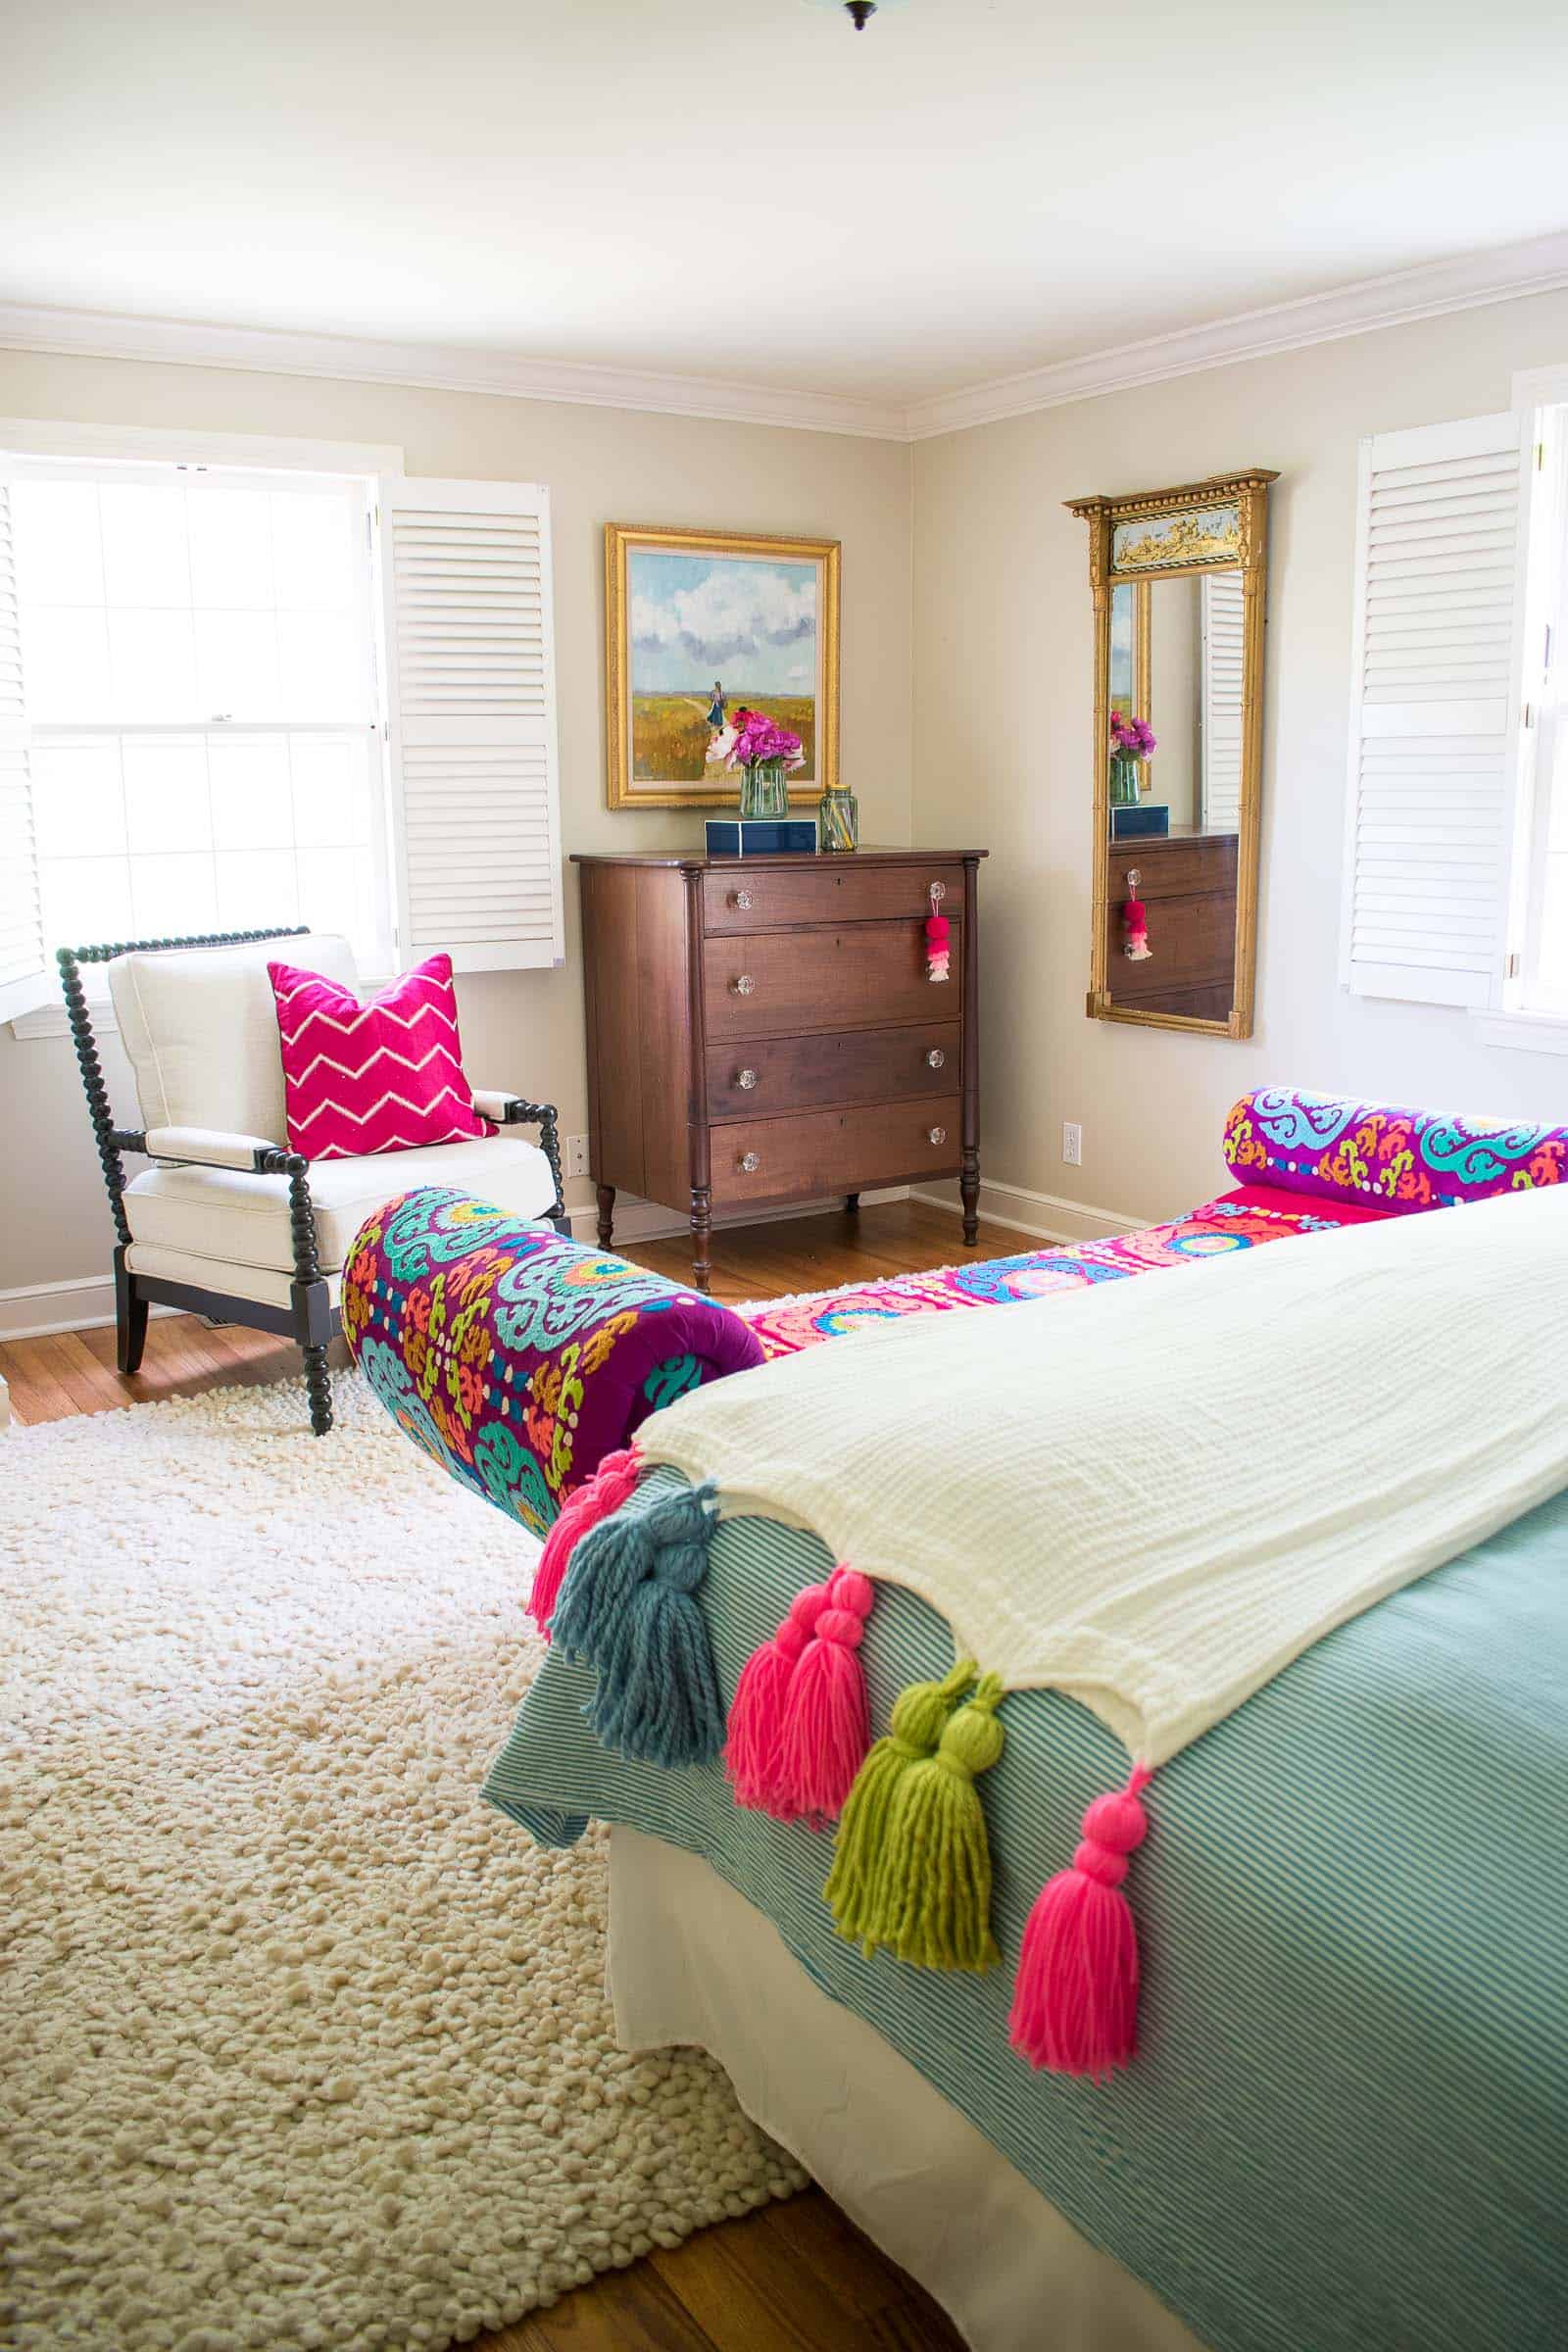
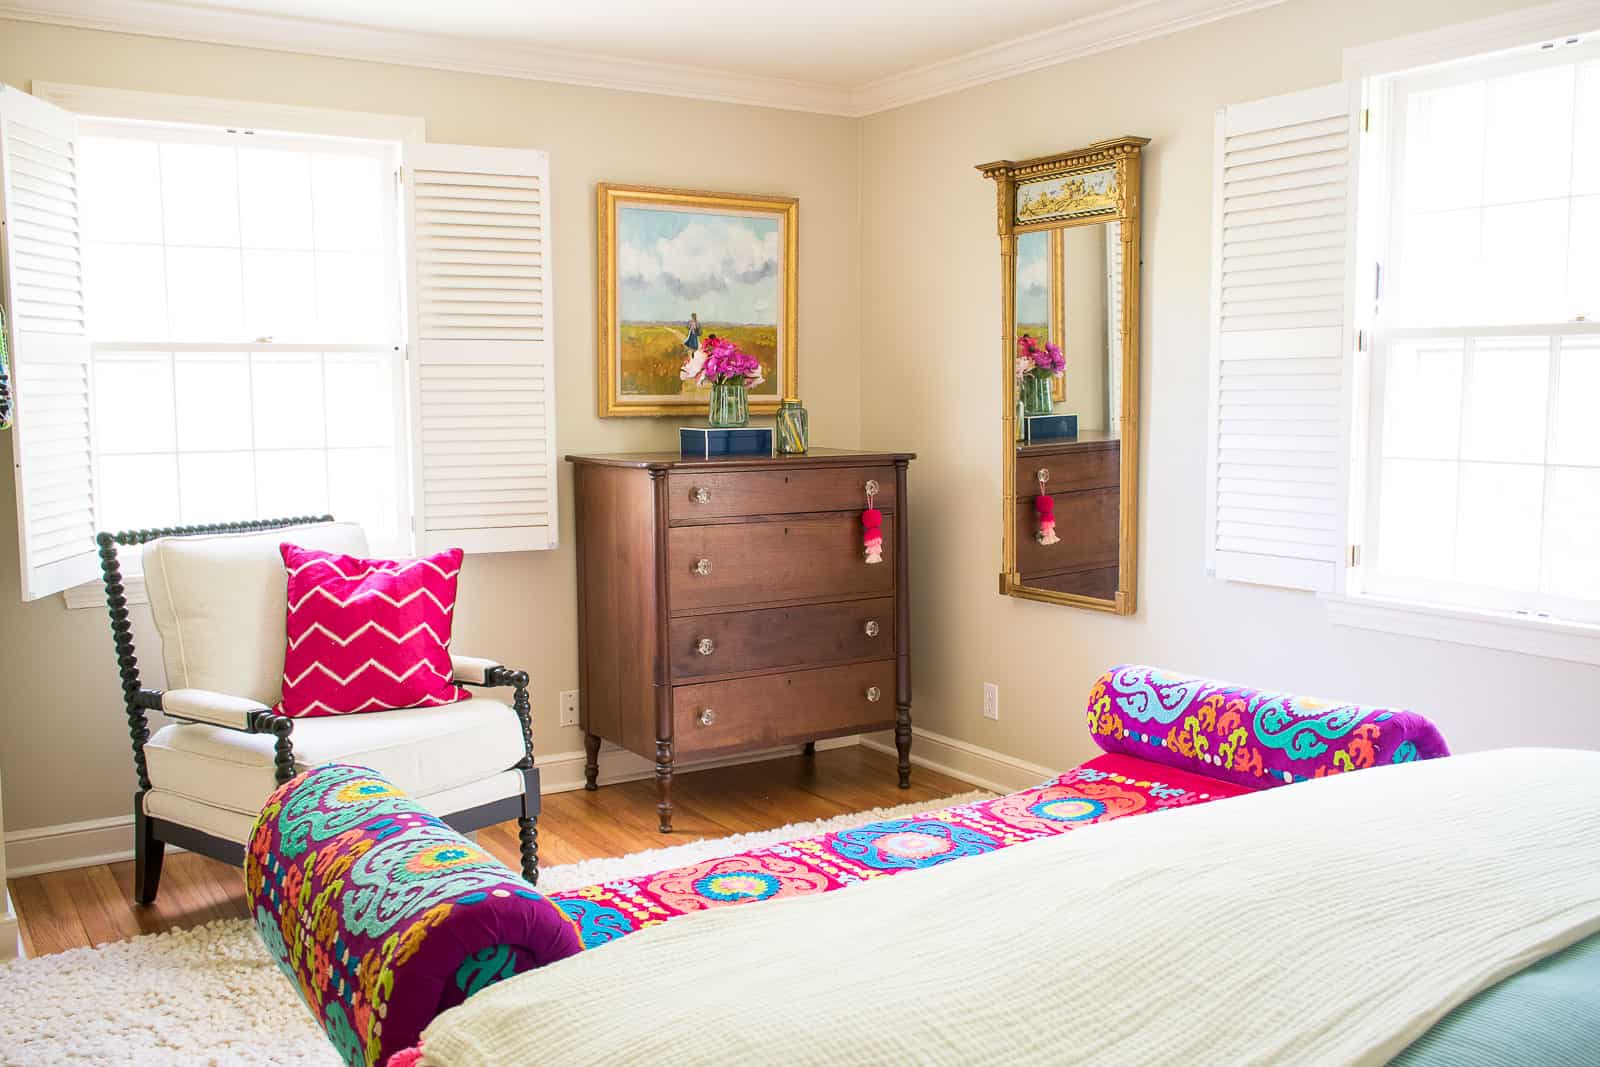
With my blanket complete, here are a few things I did in the master bedroom to make it feel a bit more cohesive and “pulled together.” The biggest issue with this space for me is the mis matched dressers… they are different colors from different time periods, but they’re also super functional and one belonged to my grandmother so while we’re renting… this is where they have to remain. My biggest hack to pull together the room without changing furniture was to bring some of the fuchsia from the bench and the throw pillows over to the rest of the space. I added a pink throw pillow to the spindle chair as well as a bright pink tassel to the drawer on Mark’s dresser.
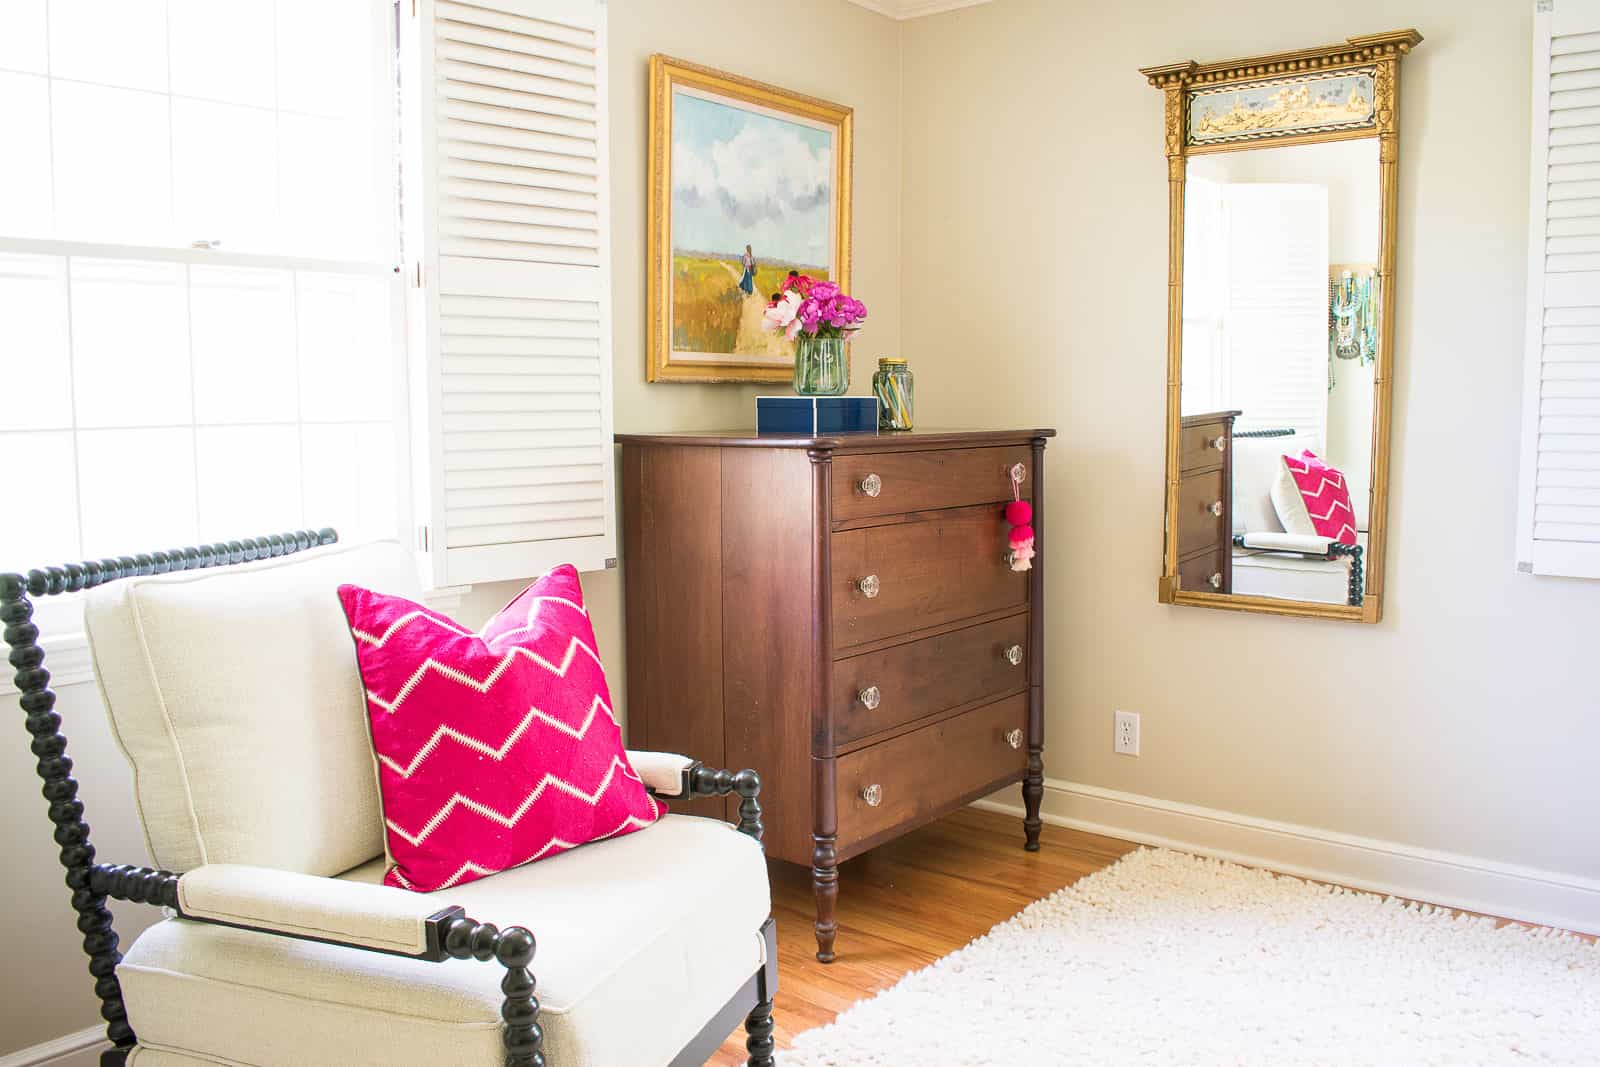
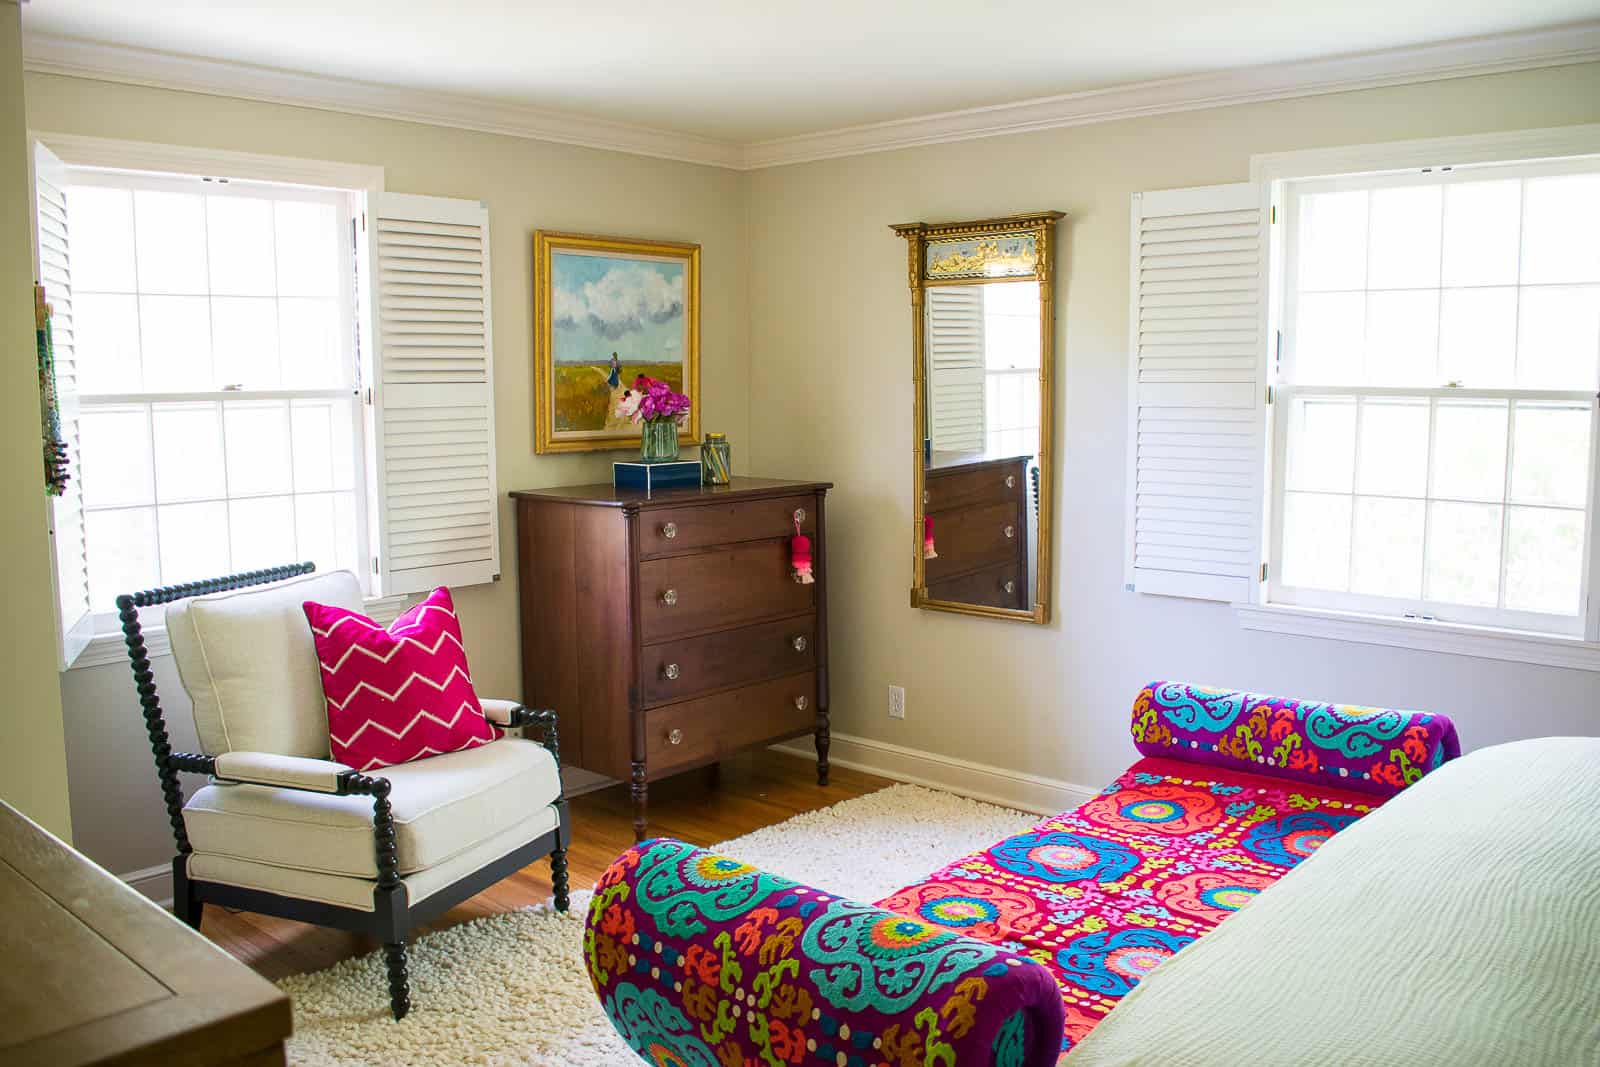
Small pink flowers on my dresser continues the pink thread throughout the room. I also should mention… cleaning the clutter helps A LOT! (Oh… I checked and double checked… the frame on the painting above my lighter dresser is wonky… I kept thinking it was hanging crooked until I noticed the frame.)
Isn’t it wild how a few simple changes like the fuchsia throw pillow and a new blanket somehow make the mismatched furniture come together a bit? How cute does the DIY tassel throw look on the end of the bed? Just having the same colors throughout the space makes SUCH a difference!

I’m often asked how I coordinate patterns or colors in a space and sometimes it’s as simple as balance. When I walked into this room at first, it felt out of whack. The headboard wall was great- lots of color and some fun artwork- but the rest of room seemed flat and monochromatic by comparison. The two sides of the room weren’t very cohesive. Bringing a bit of the color from the colorful side of the space into the not-so-colorful side was all it took!
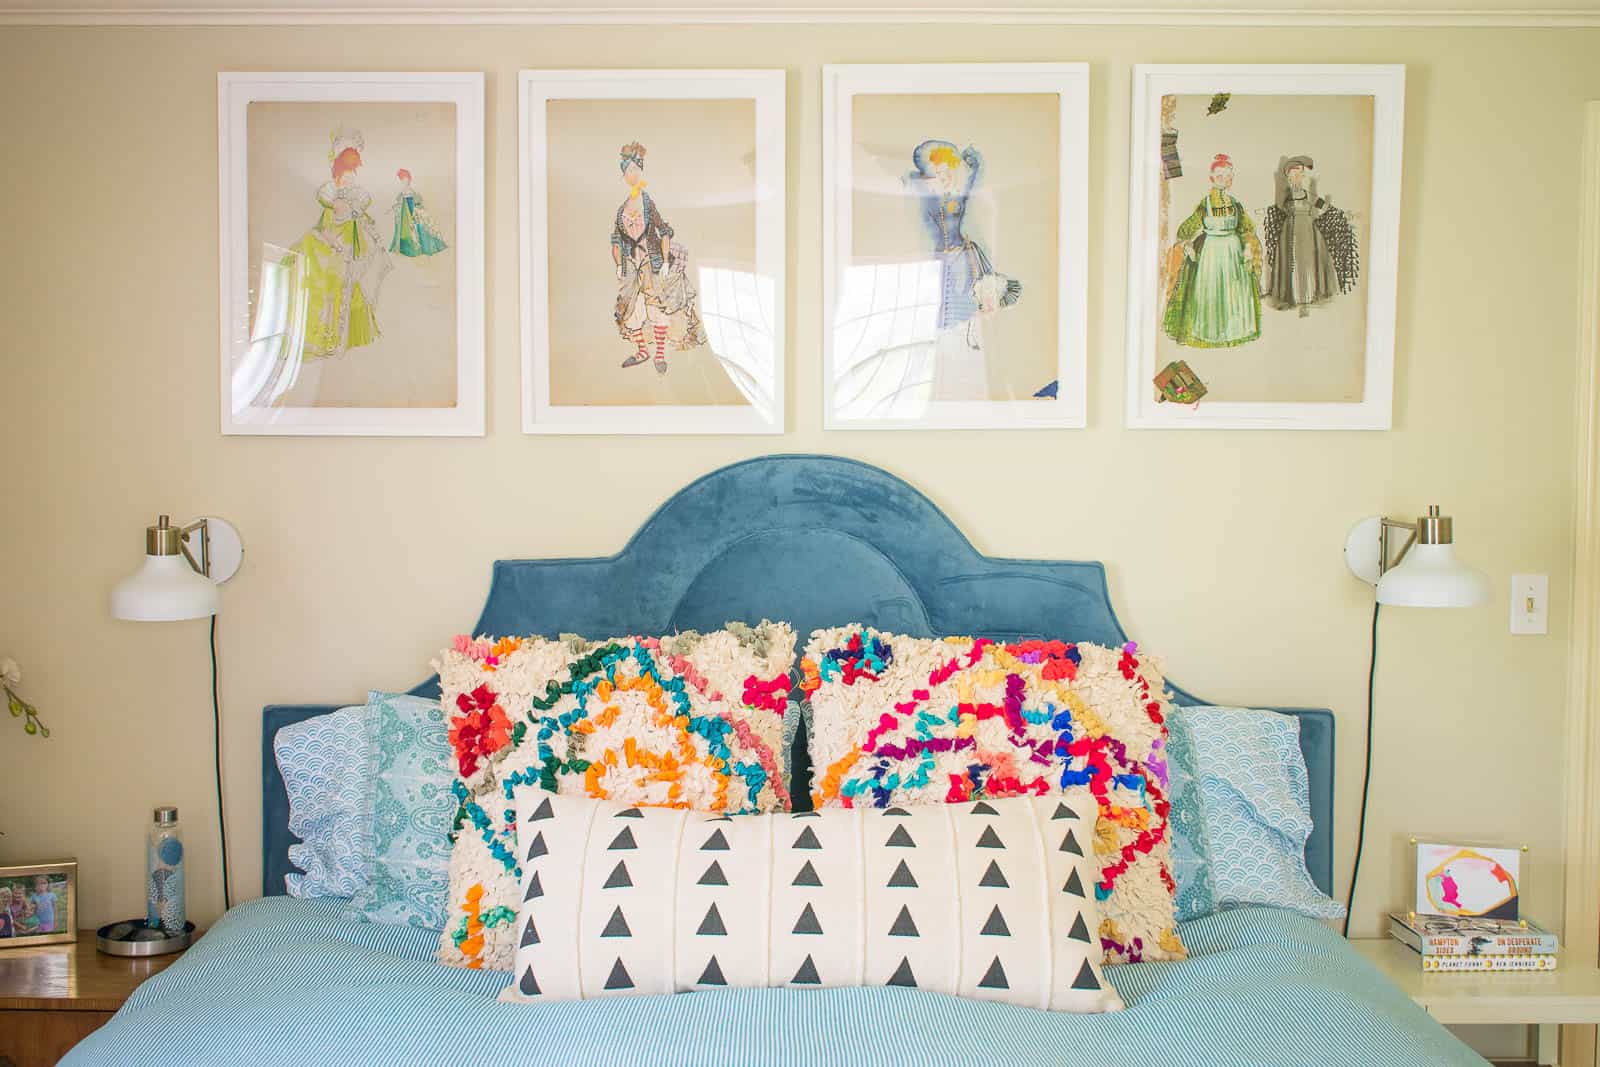
I’m also crazy about the black and white graphic pillow on our bed. That brings in the black from the spindle chair on the other side of the room! The paint color in this room isn’t my favorite and it makes everything feel a bit “off”… One day I may take a day to paint the walls white, but it’s not awful and it’s just never been a priority for the rental.

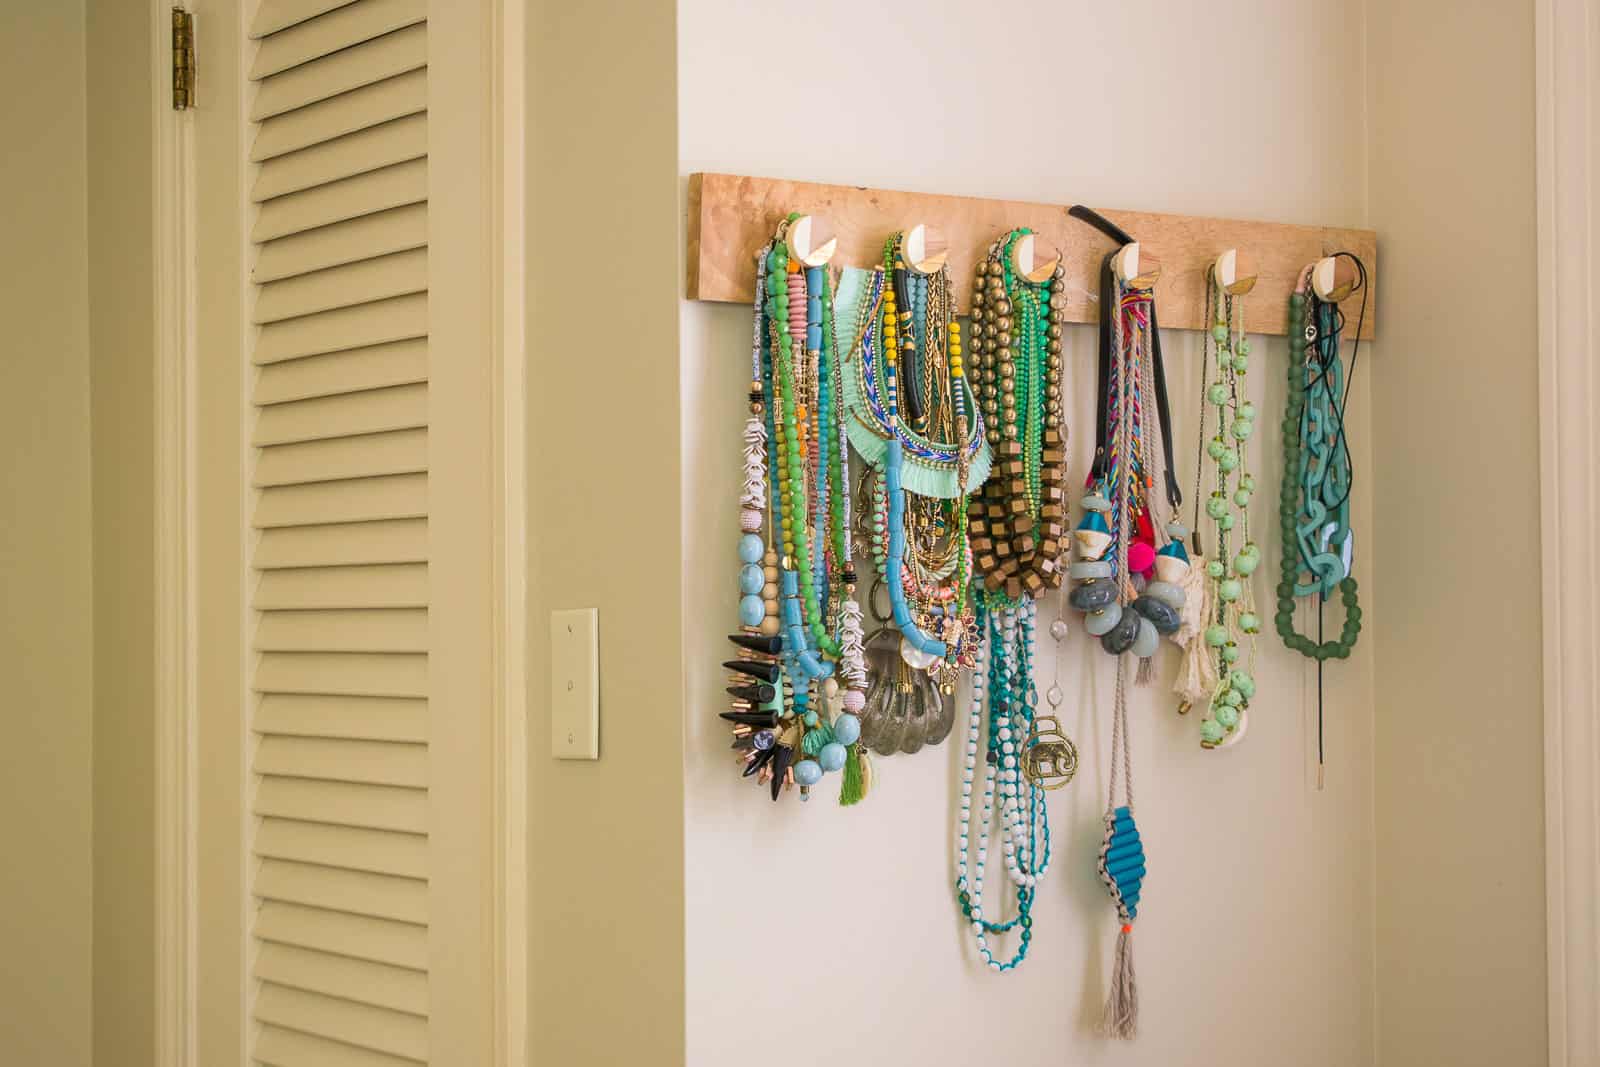
The windows have shutters which work fine at night. One shutter in the corner doesn’t open entirely so it’s not the best design choice. I may bring in curtains, but these ceilings are so low that any curtains I make for this house will most likely need to be tailored to fit windows in a future house. I hung that cute rack for my necklaces over by the spindle chair. I think it looks pretty and… easy way to store my baubles.
The moral of this story is that an hour of decluttering and bringing a few isolated details into a space can go a long way in decorating and designing a ‘pulled together’ room! Also tassels… tassels always help. One last look at the before/ after!
Check out how our master bedroom looked in the old house by clicking here.
For more information about the fun flea market artwork over the bed, click here.

![]()

I love those tassels! They look so good with your other colors