
One Room Challenge Week 4- Incremental Updates
Psssst… this post *might* contain affiliate links: see my disclosure here.
Small Projects for the One Room Challenge
Two more weeks. I repeat, TWO more weeks until I get to show you the whole hopefully amazing hopefully glorious space! I’ve tackled most of the DIYs (although I just got a bee in my bonnet to reupholster a loveseat to see how that works in the space… TBD) and am now just waiting on the new furniture! This week I’m chatting a bit about how I brought together the pattern and print in the space as well as sharing some of the smaller individual projects that make up the whole space. (For the bench tutorial, click here.)
Mixing and matching patterns and prints is a big part of design and although there’s not a rule book persay… there are a few things to keep in mind. While we’re waiting on furniture, I thought it might be helpful to walk you through my thought process. And please consider my use of the word “thought” VERY loosely there. Haha.
Shop my favorites!
Step 1. Figure out the Super Star
Every room has that one piece that inspires the space. It may be a painting that sets the color pallet. It may be a rug with a big bold graphic pattern. It may just be a chic modern vase or a sleek brass planter. Your dreams for the space starts with *something* so figure that out first. For the One Room Challenge, I had 2 somewhat distinct spaces so I had 2 somewhat different ‘super stars’: the patterned rug in the living room and the wall mural in the dining room.
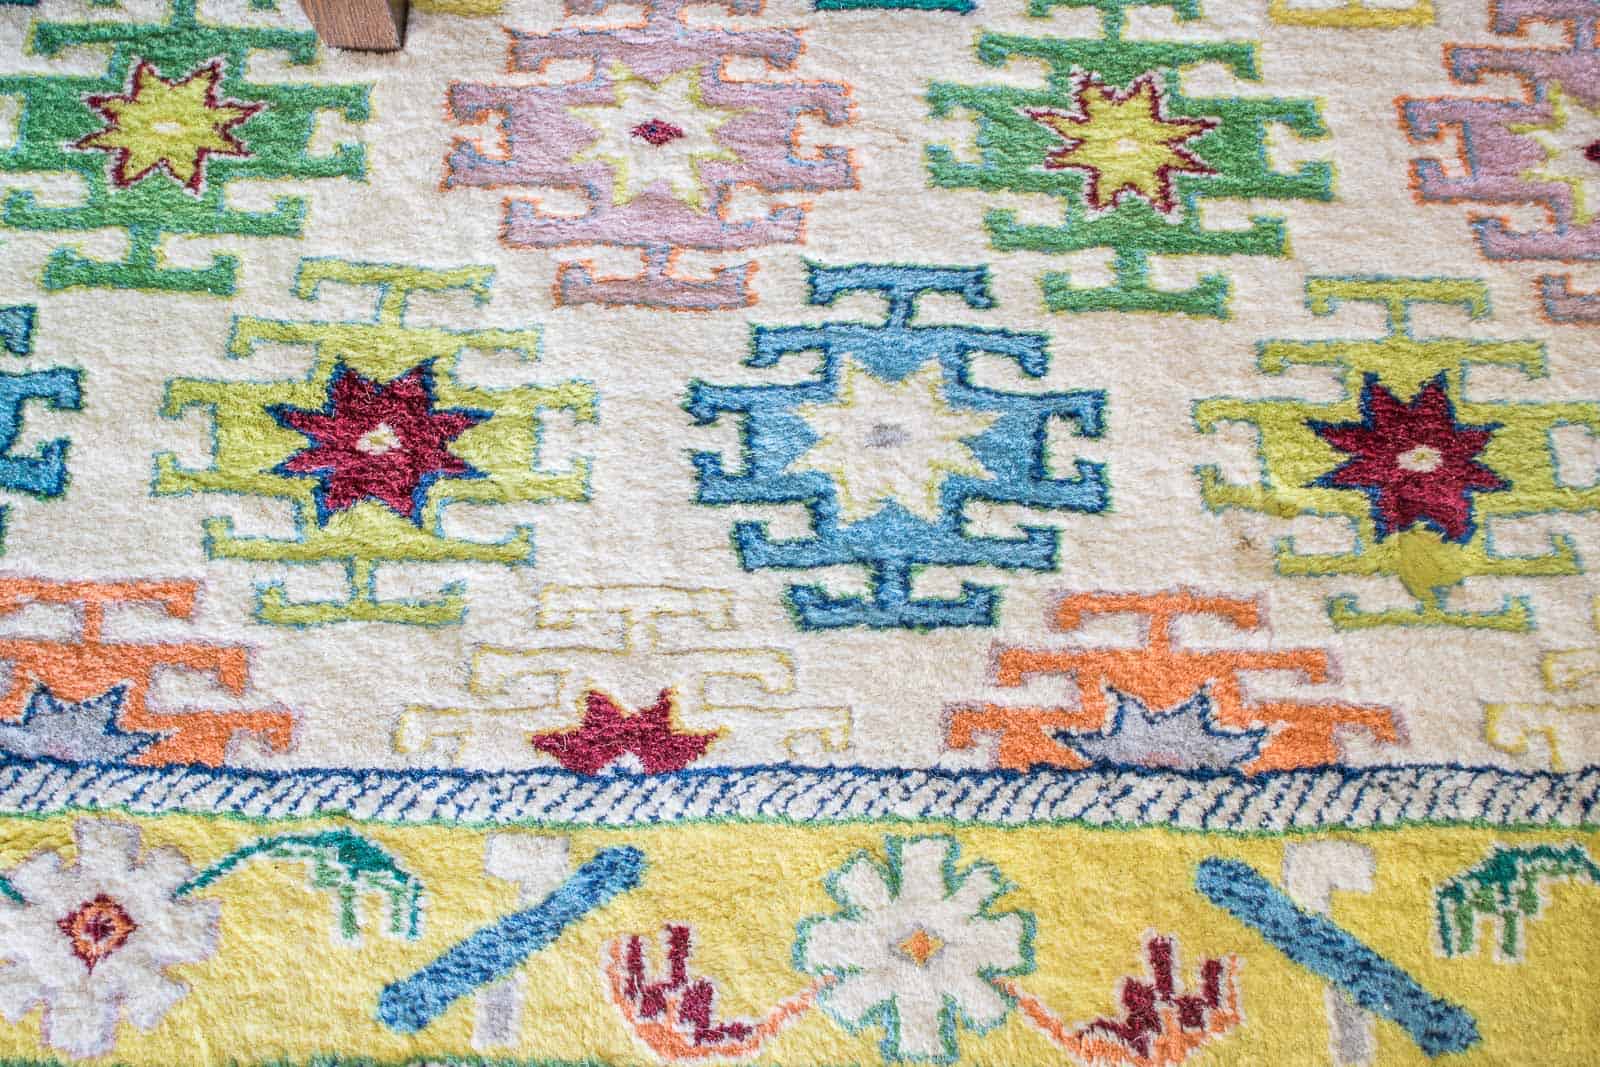
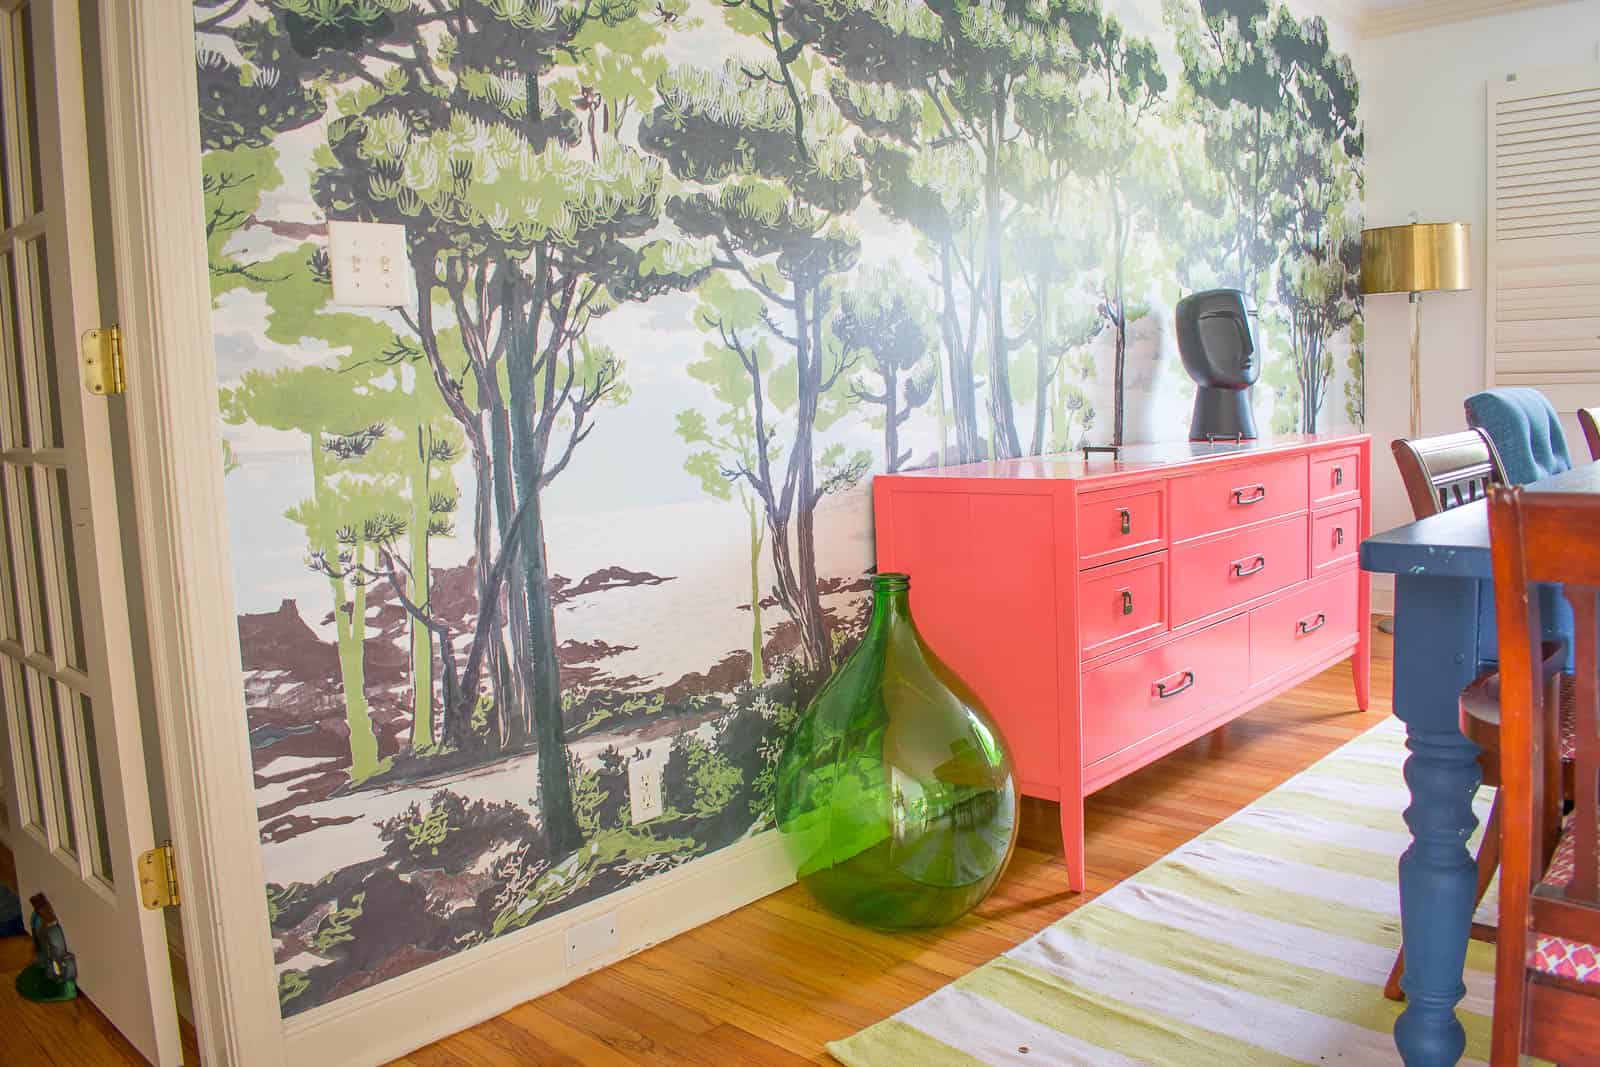
A word of explanation about these two details and why I think they go together. 1. Color: the color from the wall mural is the same green as the pattern on the rug. 2. Pattern: In this case the fact that the two patterns are TOTALLY different is why I think they work. The graphic of the rug is very different than the natural softness of the trees on the mural. 3. Proximity: the wall mural is quite a ways away from the rug visually. Yes… they are indeed in the same space, but there’s a visual break between the two of them.
Step 2. Layers
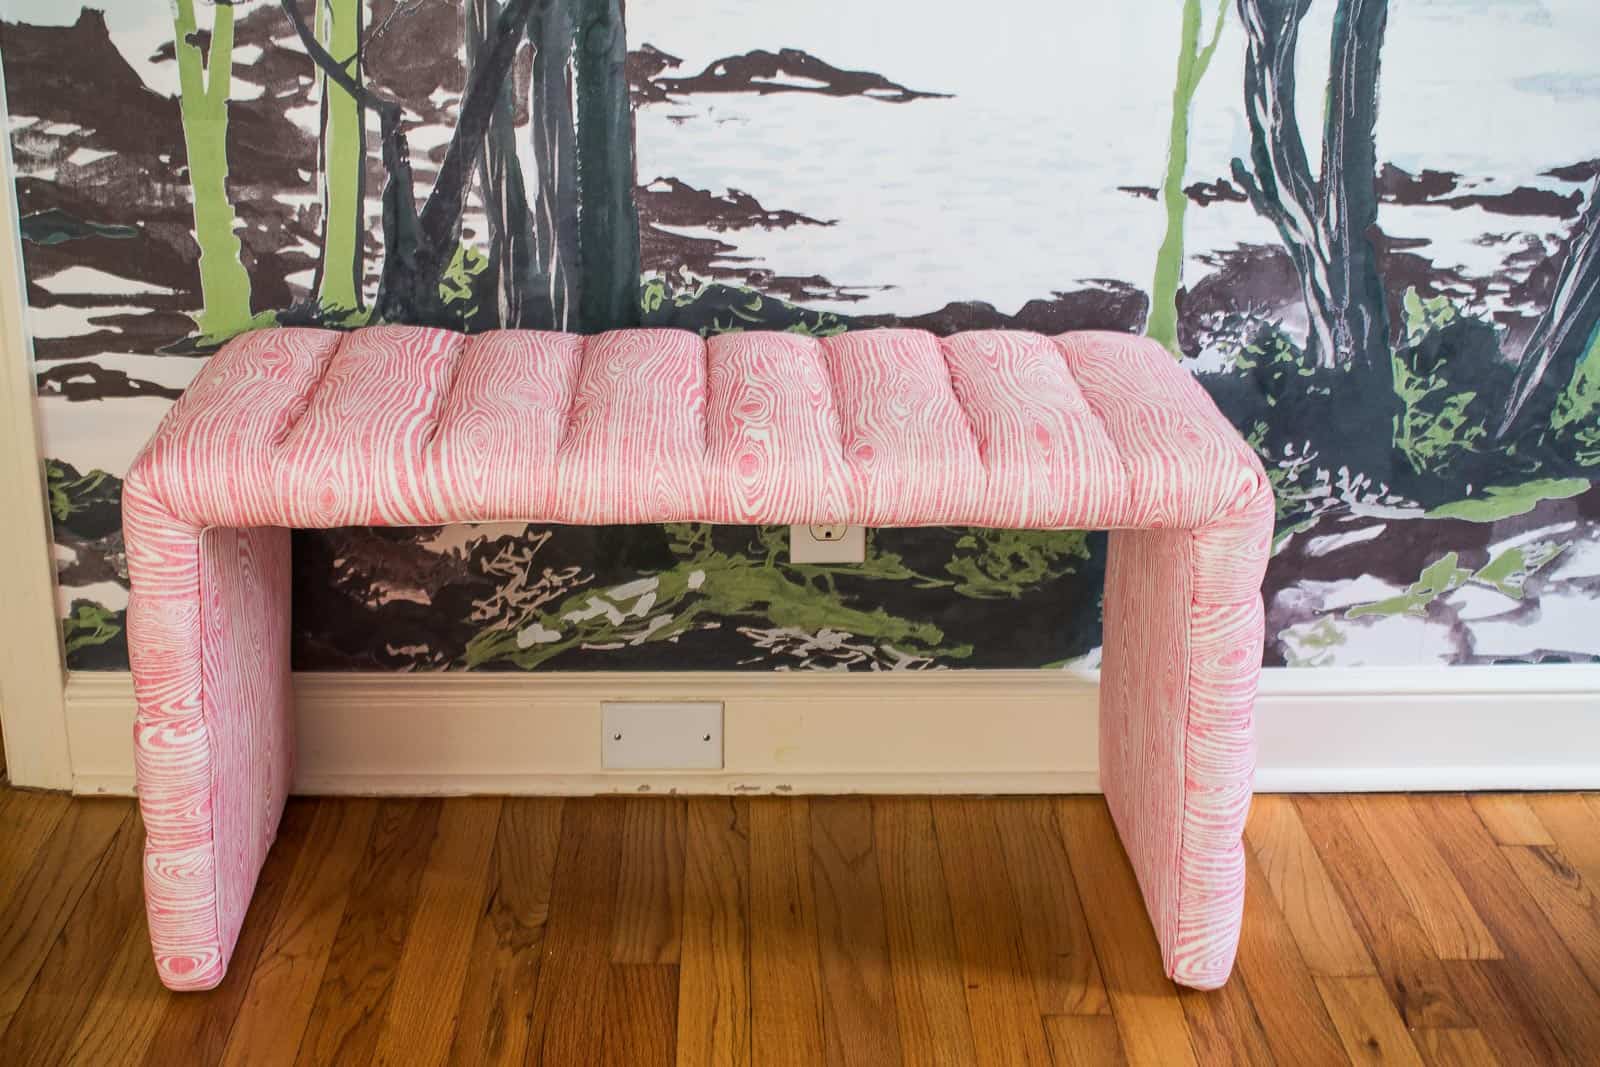
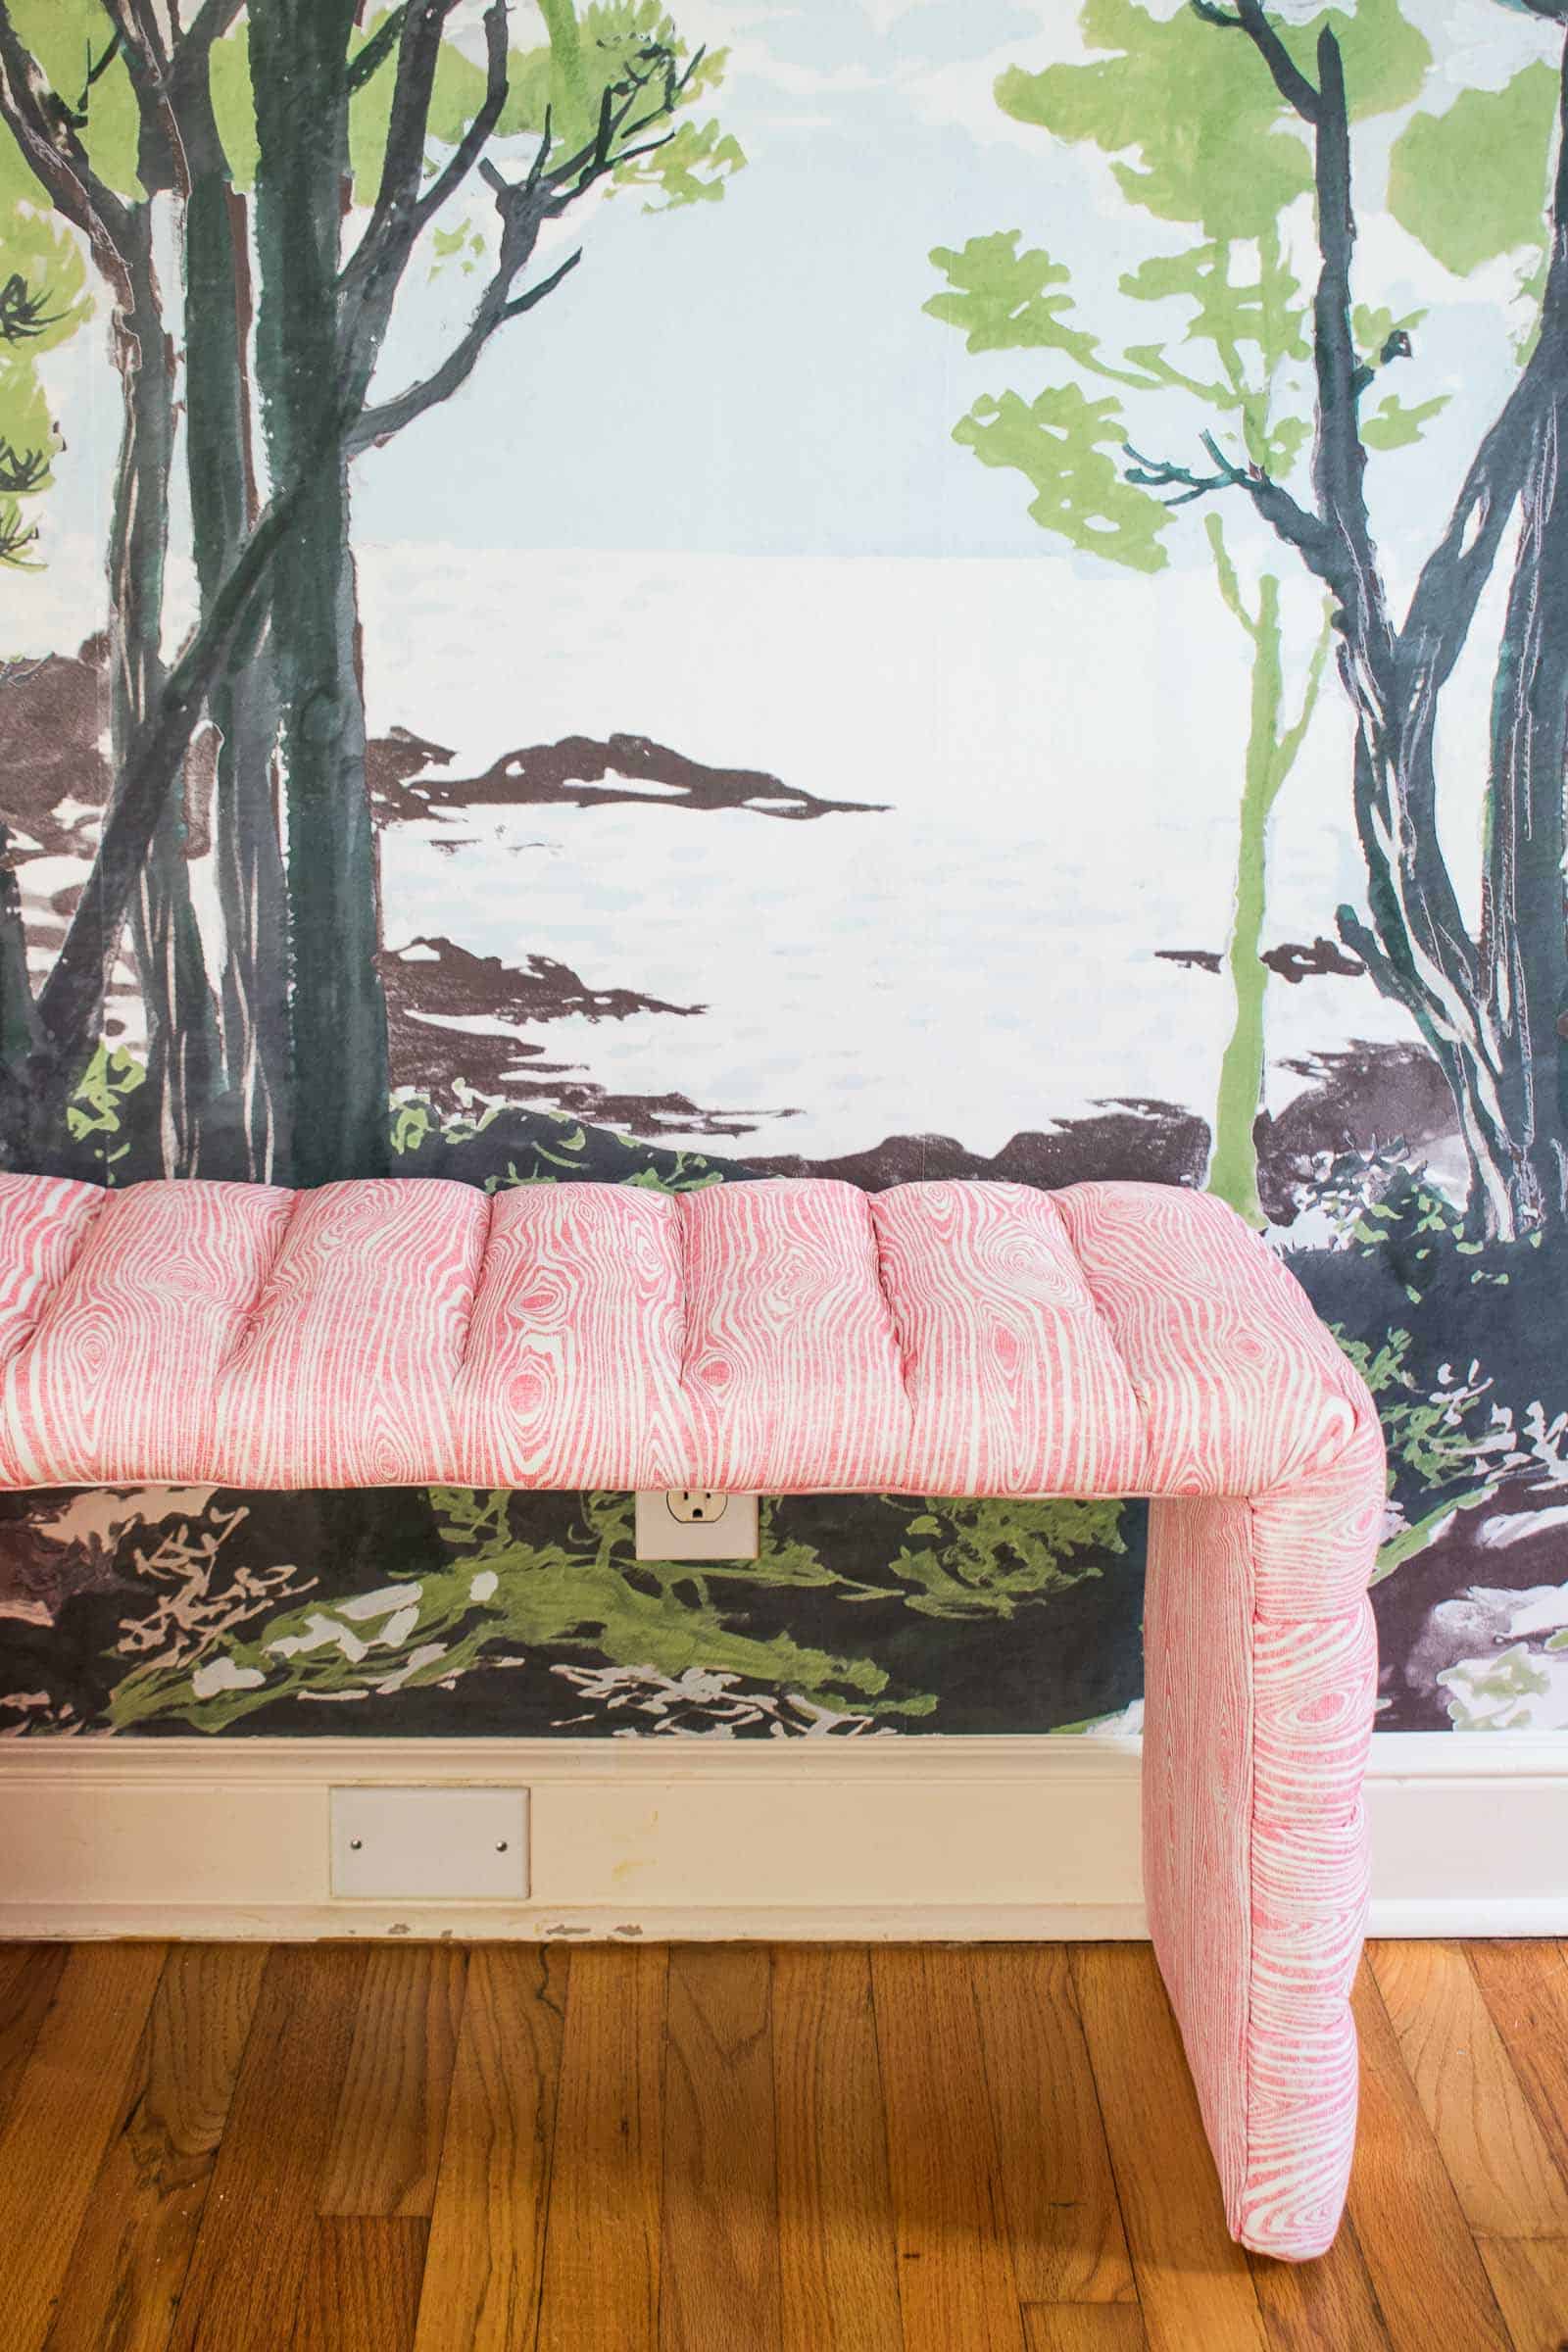
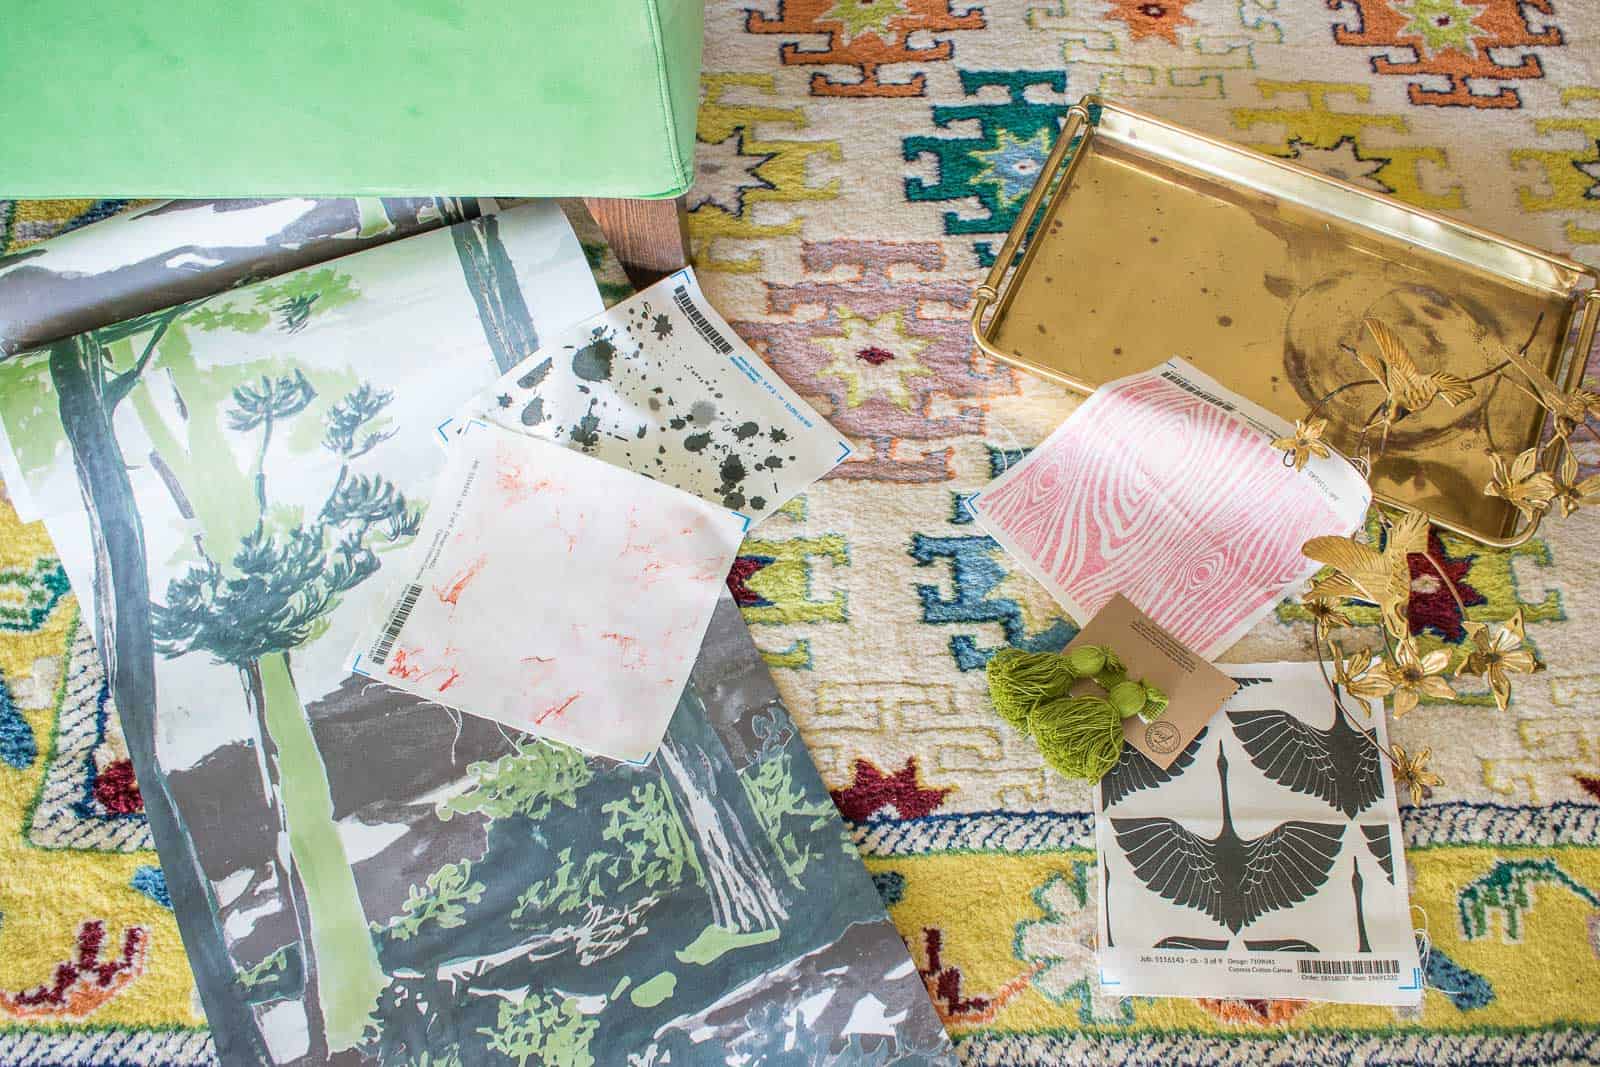
When I’m thinking of the layers of a room, it’s a little bit like a design decision tree. I look at the big bold colorful rug and I decide what colors I want to pull from this. I already have a big bold green couch, so I opted for the yellows and the pinks. Because that green couch is a big solid piece of furniture, I wanted the pink to have a slight pattern. Slight being the key word. I worked with my friends at Spoonflower to find a fabric with a small print in just the right shade of pink for this upholstered bench.
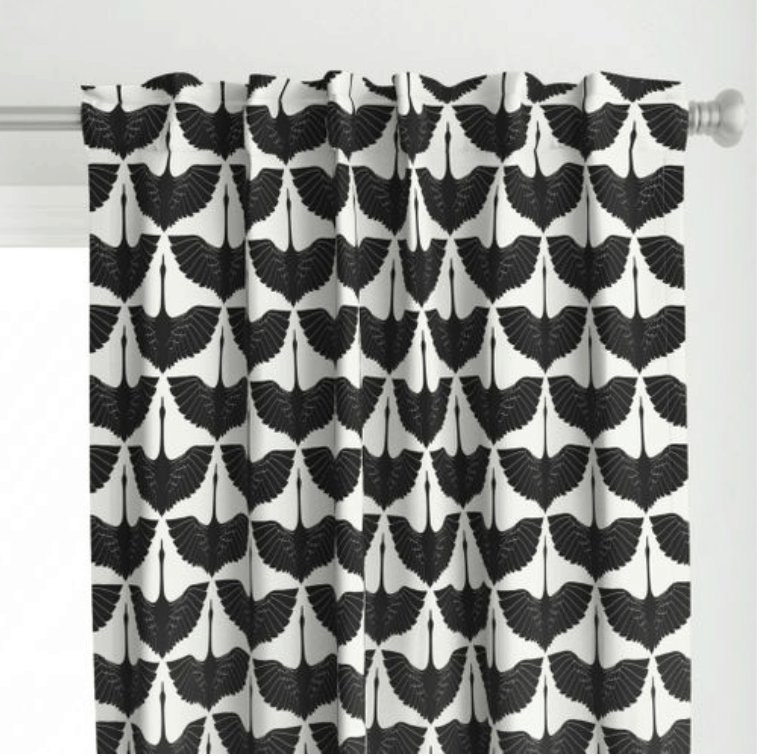
Step 3. Balance
I know what you’re thinking… balance seems like a fairly discretionary term. You’re not wrong. For me, I took a broad view of the room thus far and I had one big bold colorful rug, a bright green solid couch, a mostly green wall mural and a soft pink bench. I love color as much as the next girl but I wanted something a bit more serious for the curtains to offset the playful color elsewhere A bold solid could have looked great, but it’s nearly impossible to go solid when scrolling through the hundreds of options Spoonflower has to offer! Something about these black and white egrets caught my eye. I couldn’t pass up the chance to add a *bit* of color so I plan on sewing those big gorgeous green tassels on each inside hem. Fringe arrived last night so that’s next!
I posted my bench tutorial yesterday so make sure to head over there to see how I made that lovely pink channel tufted beauty.
Onto the smaller little projects I checked off the To Do list in here:
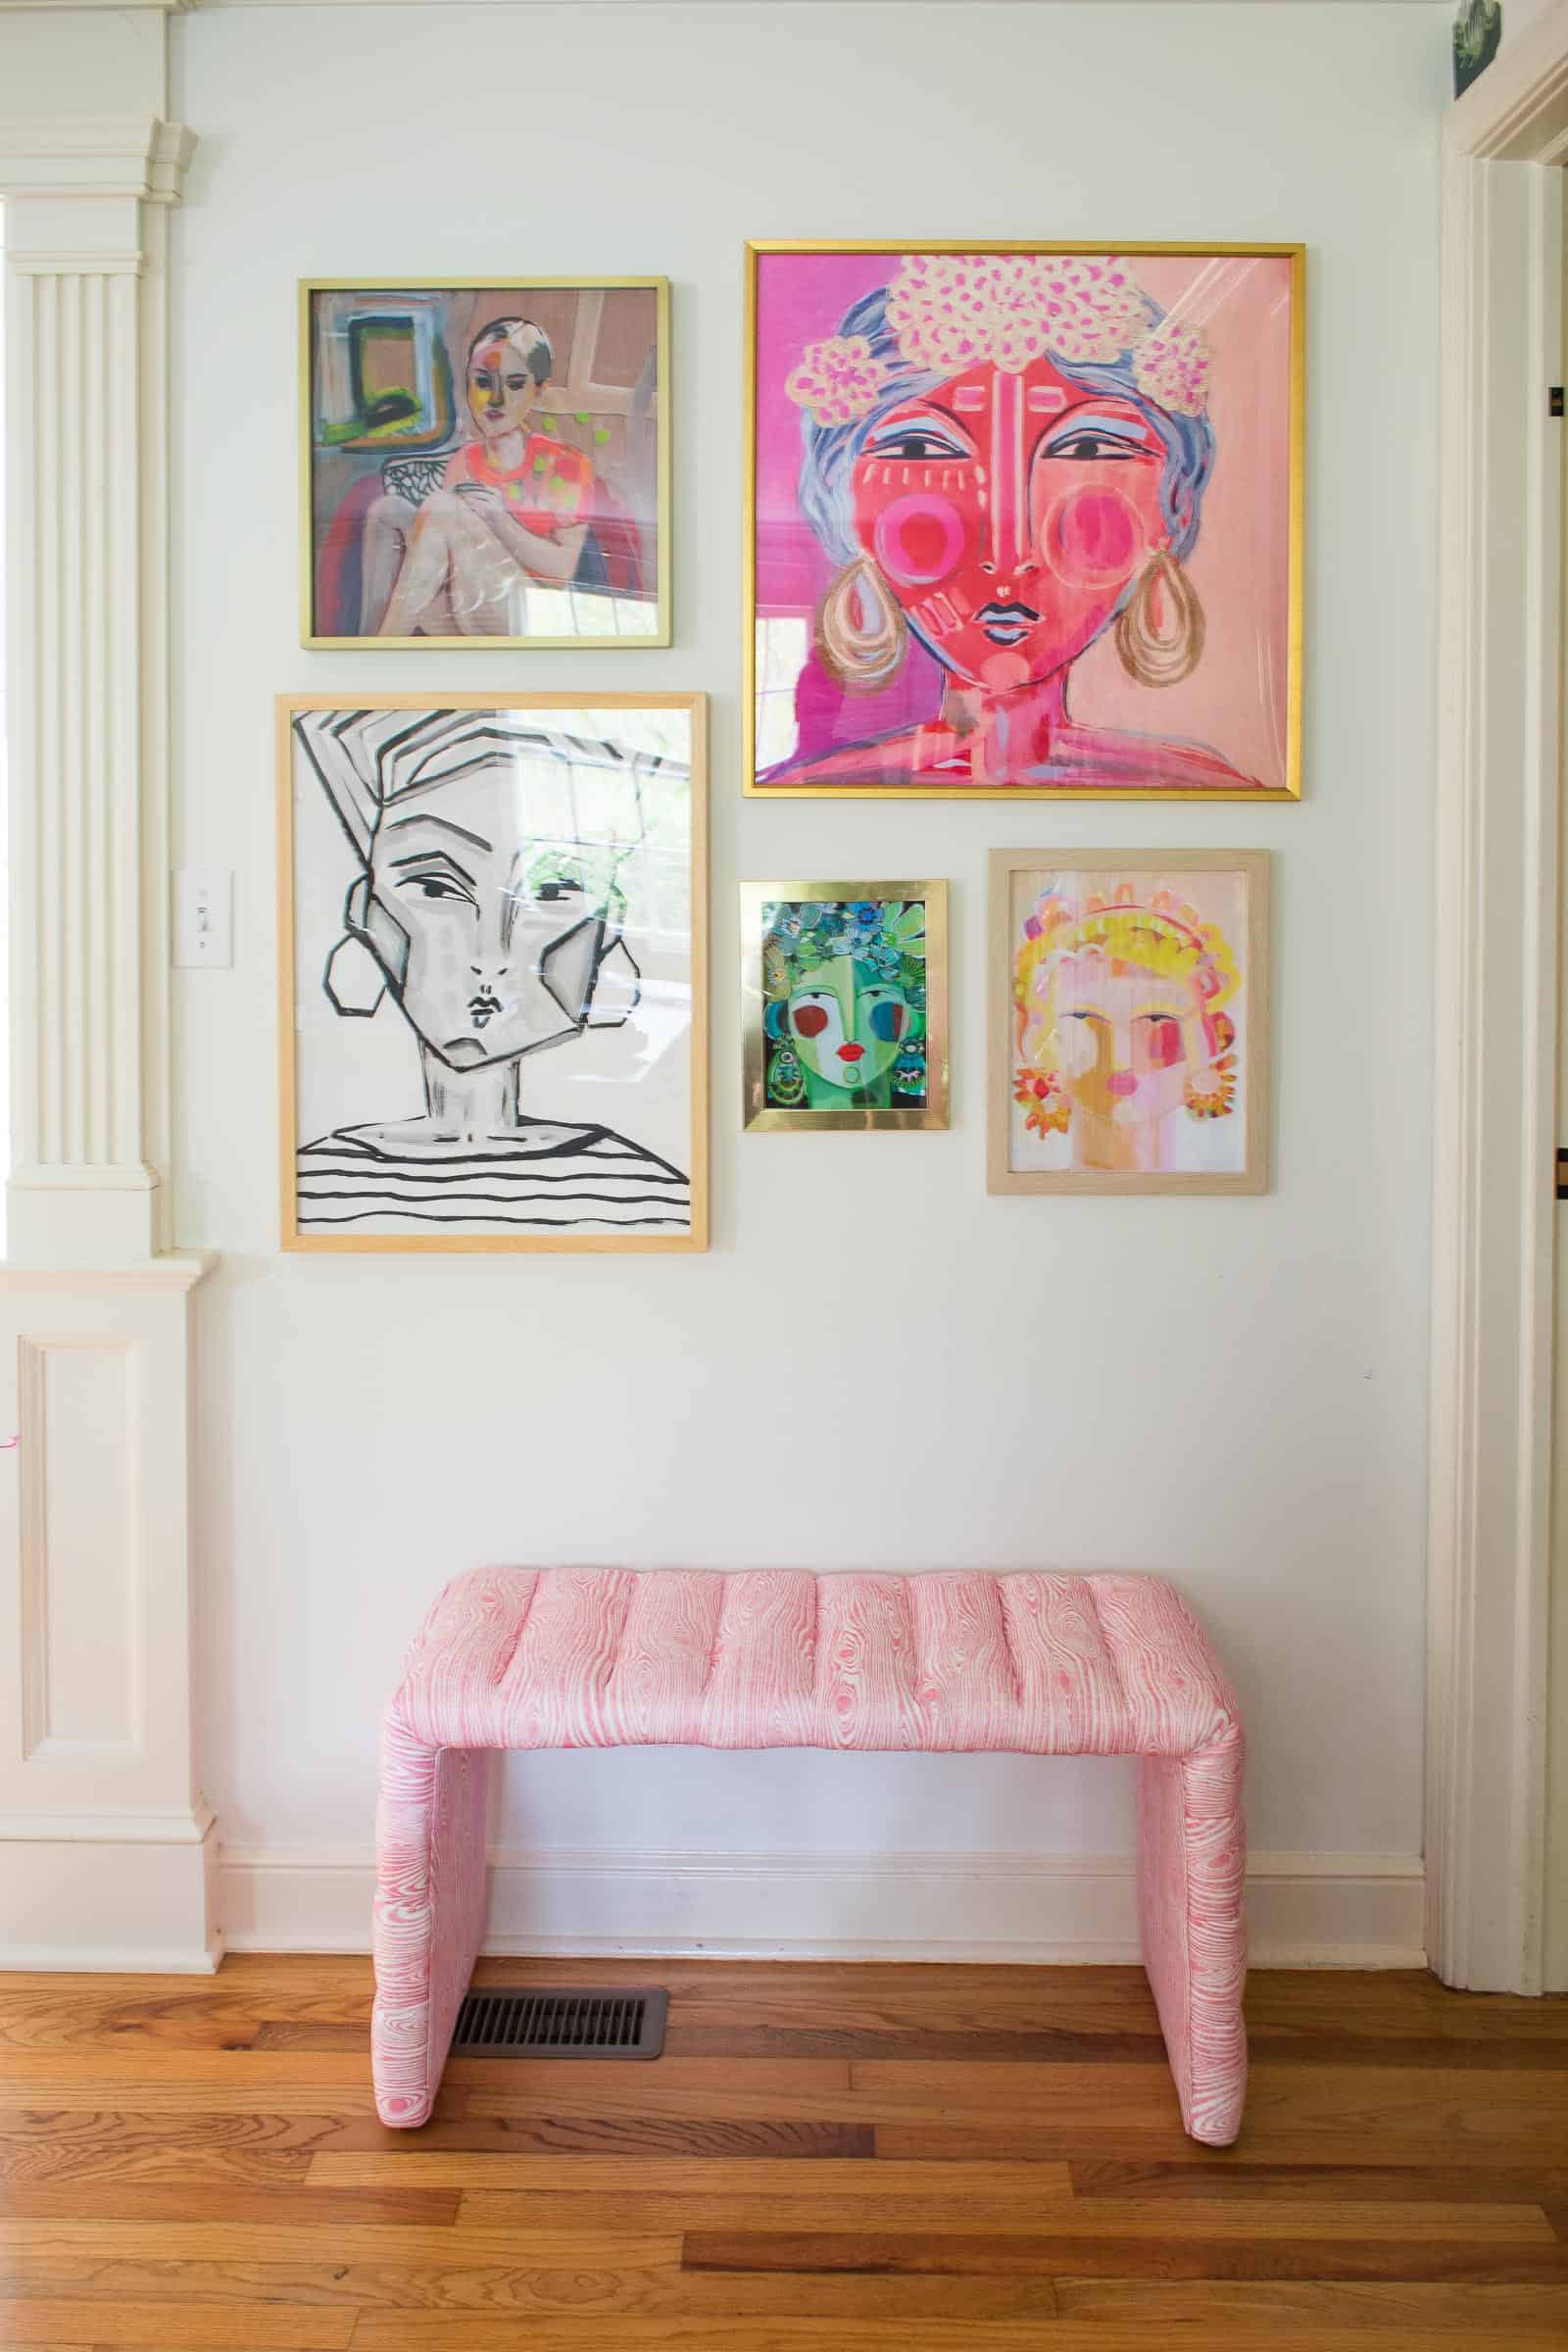
I took some time to lay out my gallery wall. I measured the wall space and then taped it off on the floor.
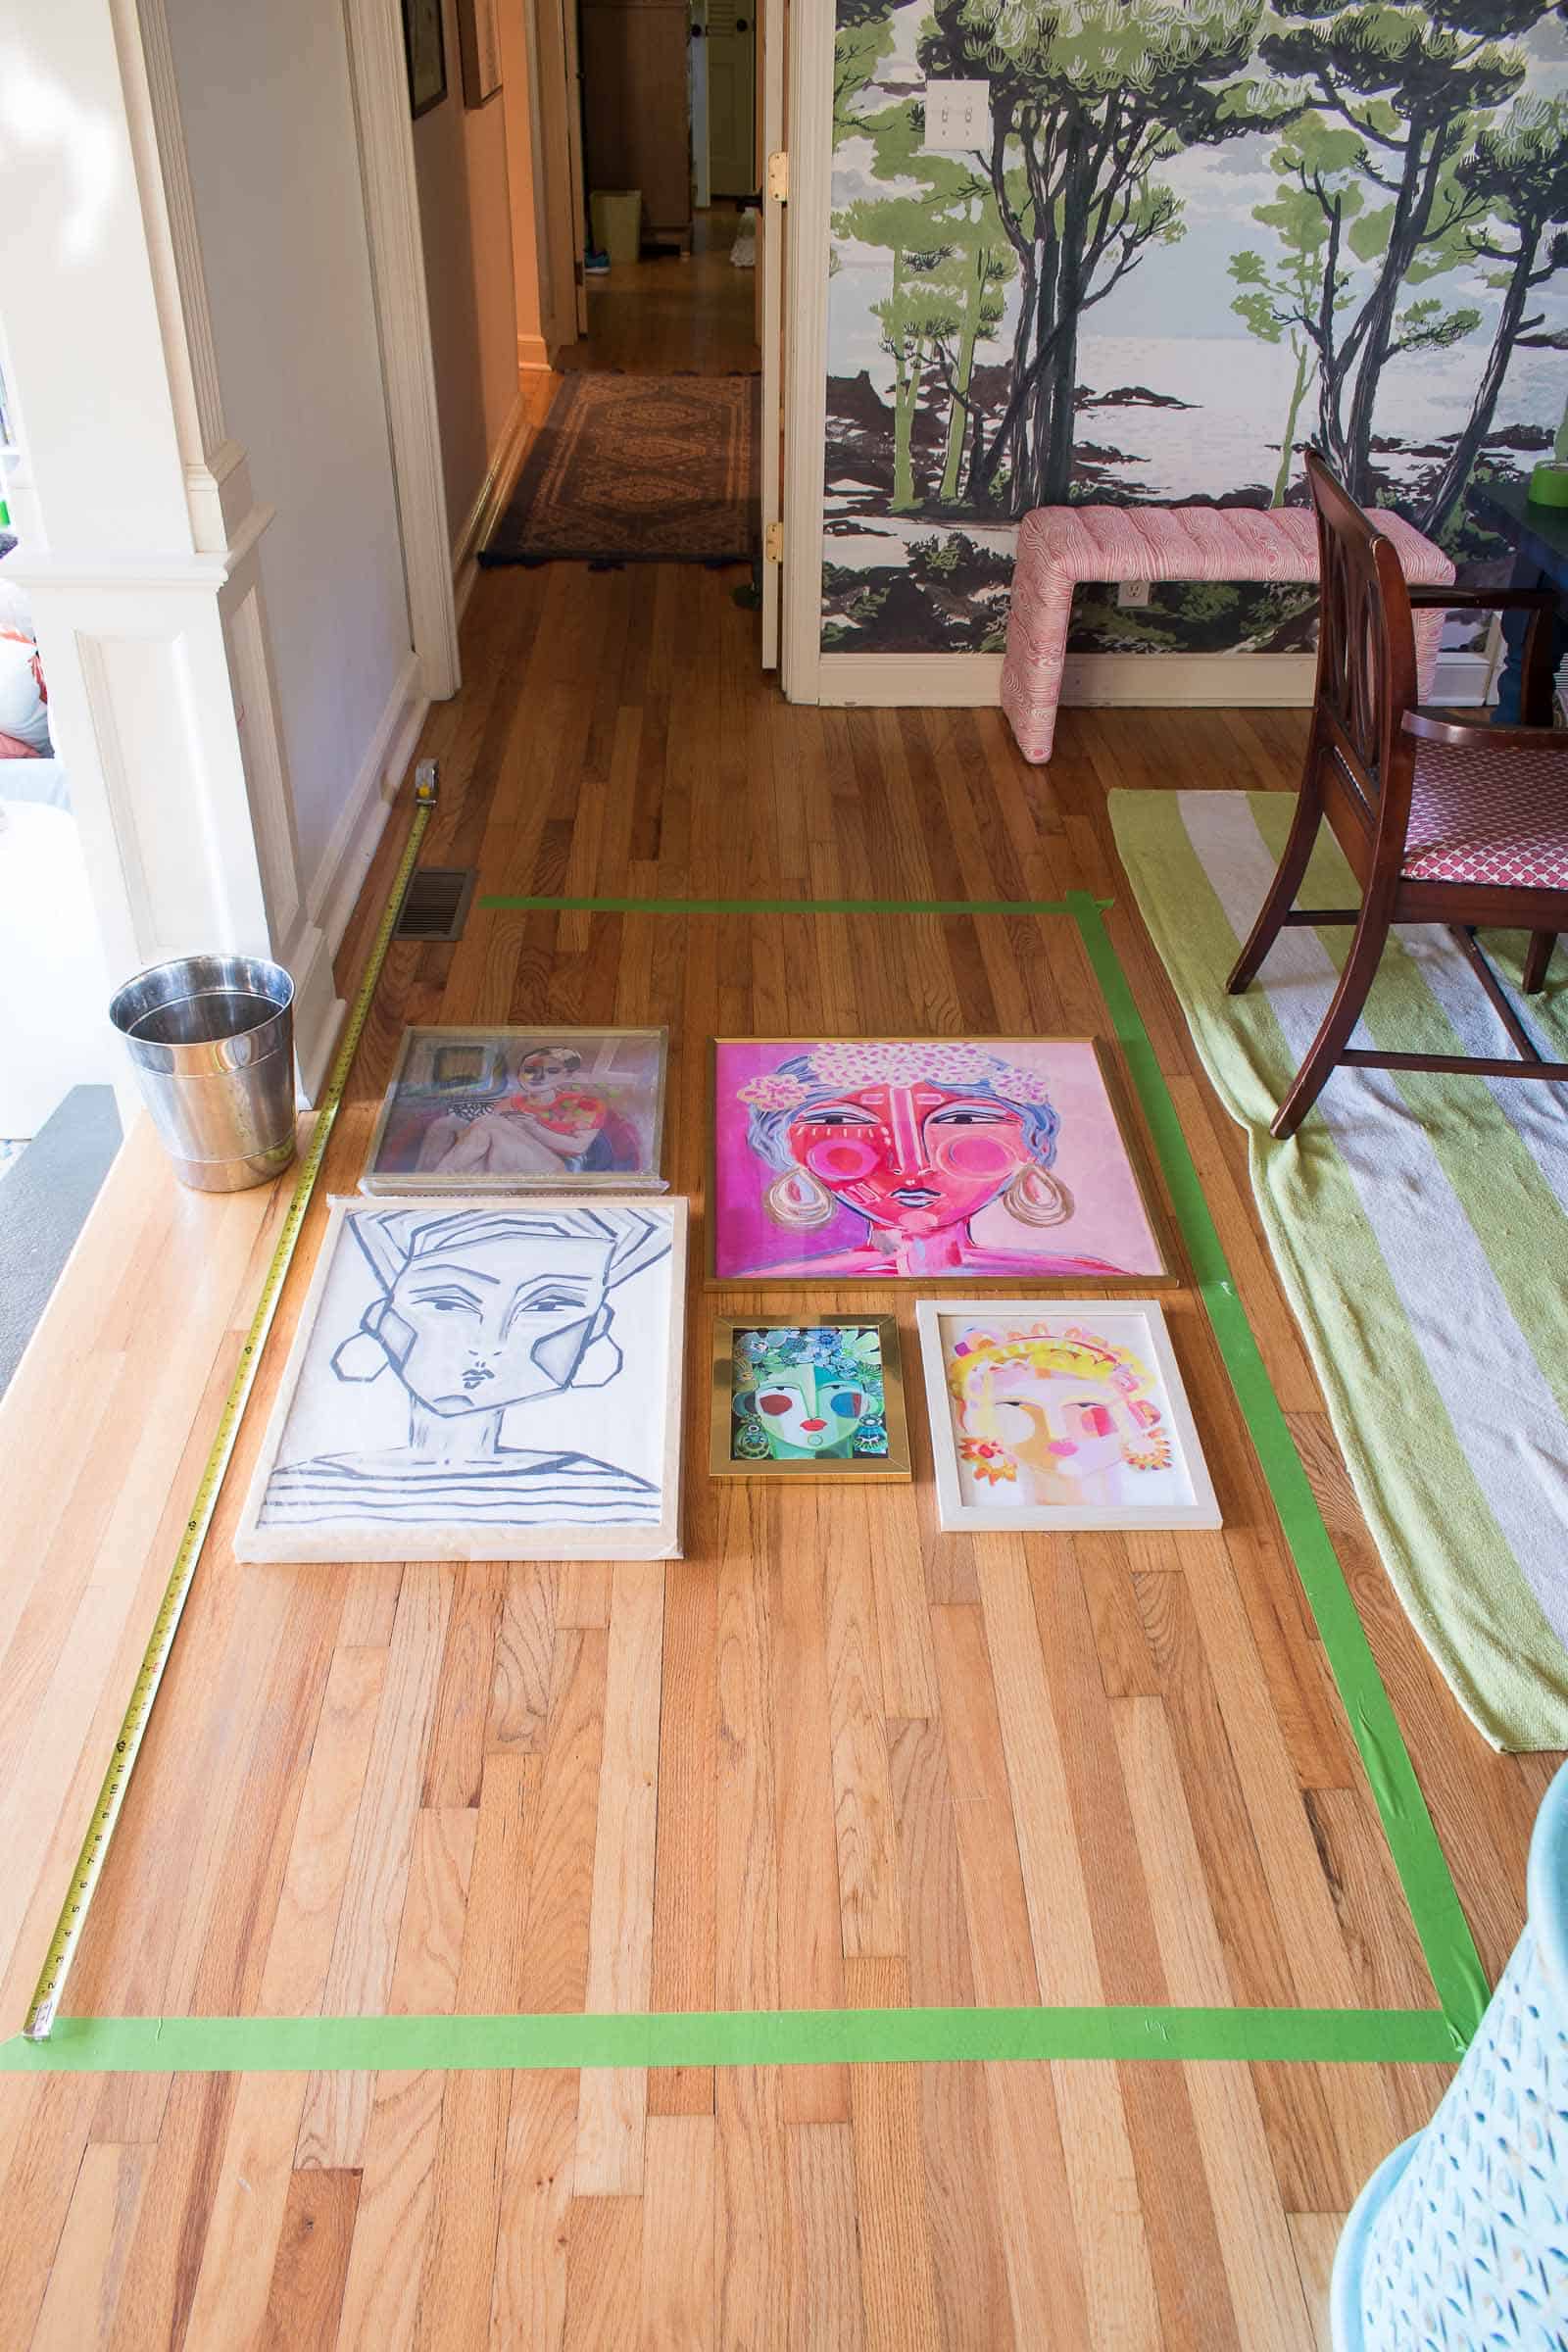
I love how all my pieces from Minted look on that wall!
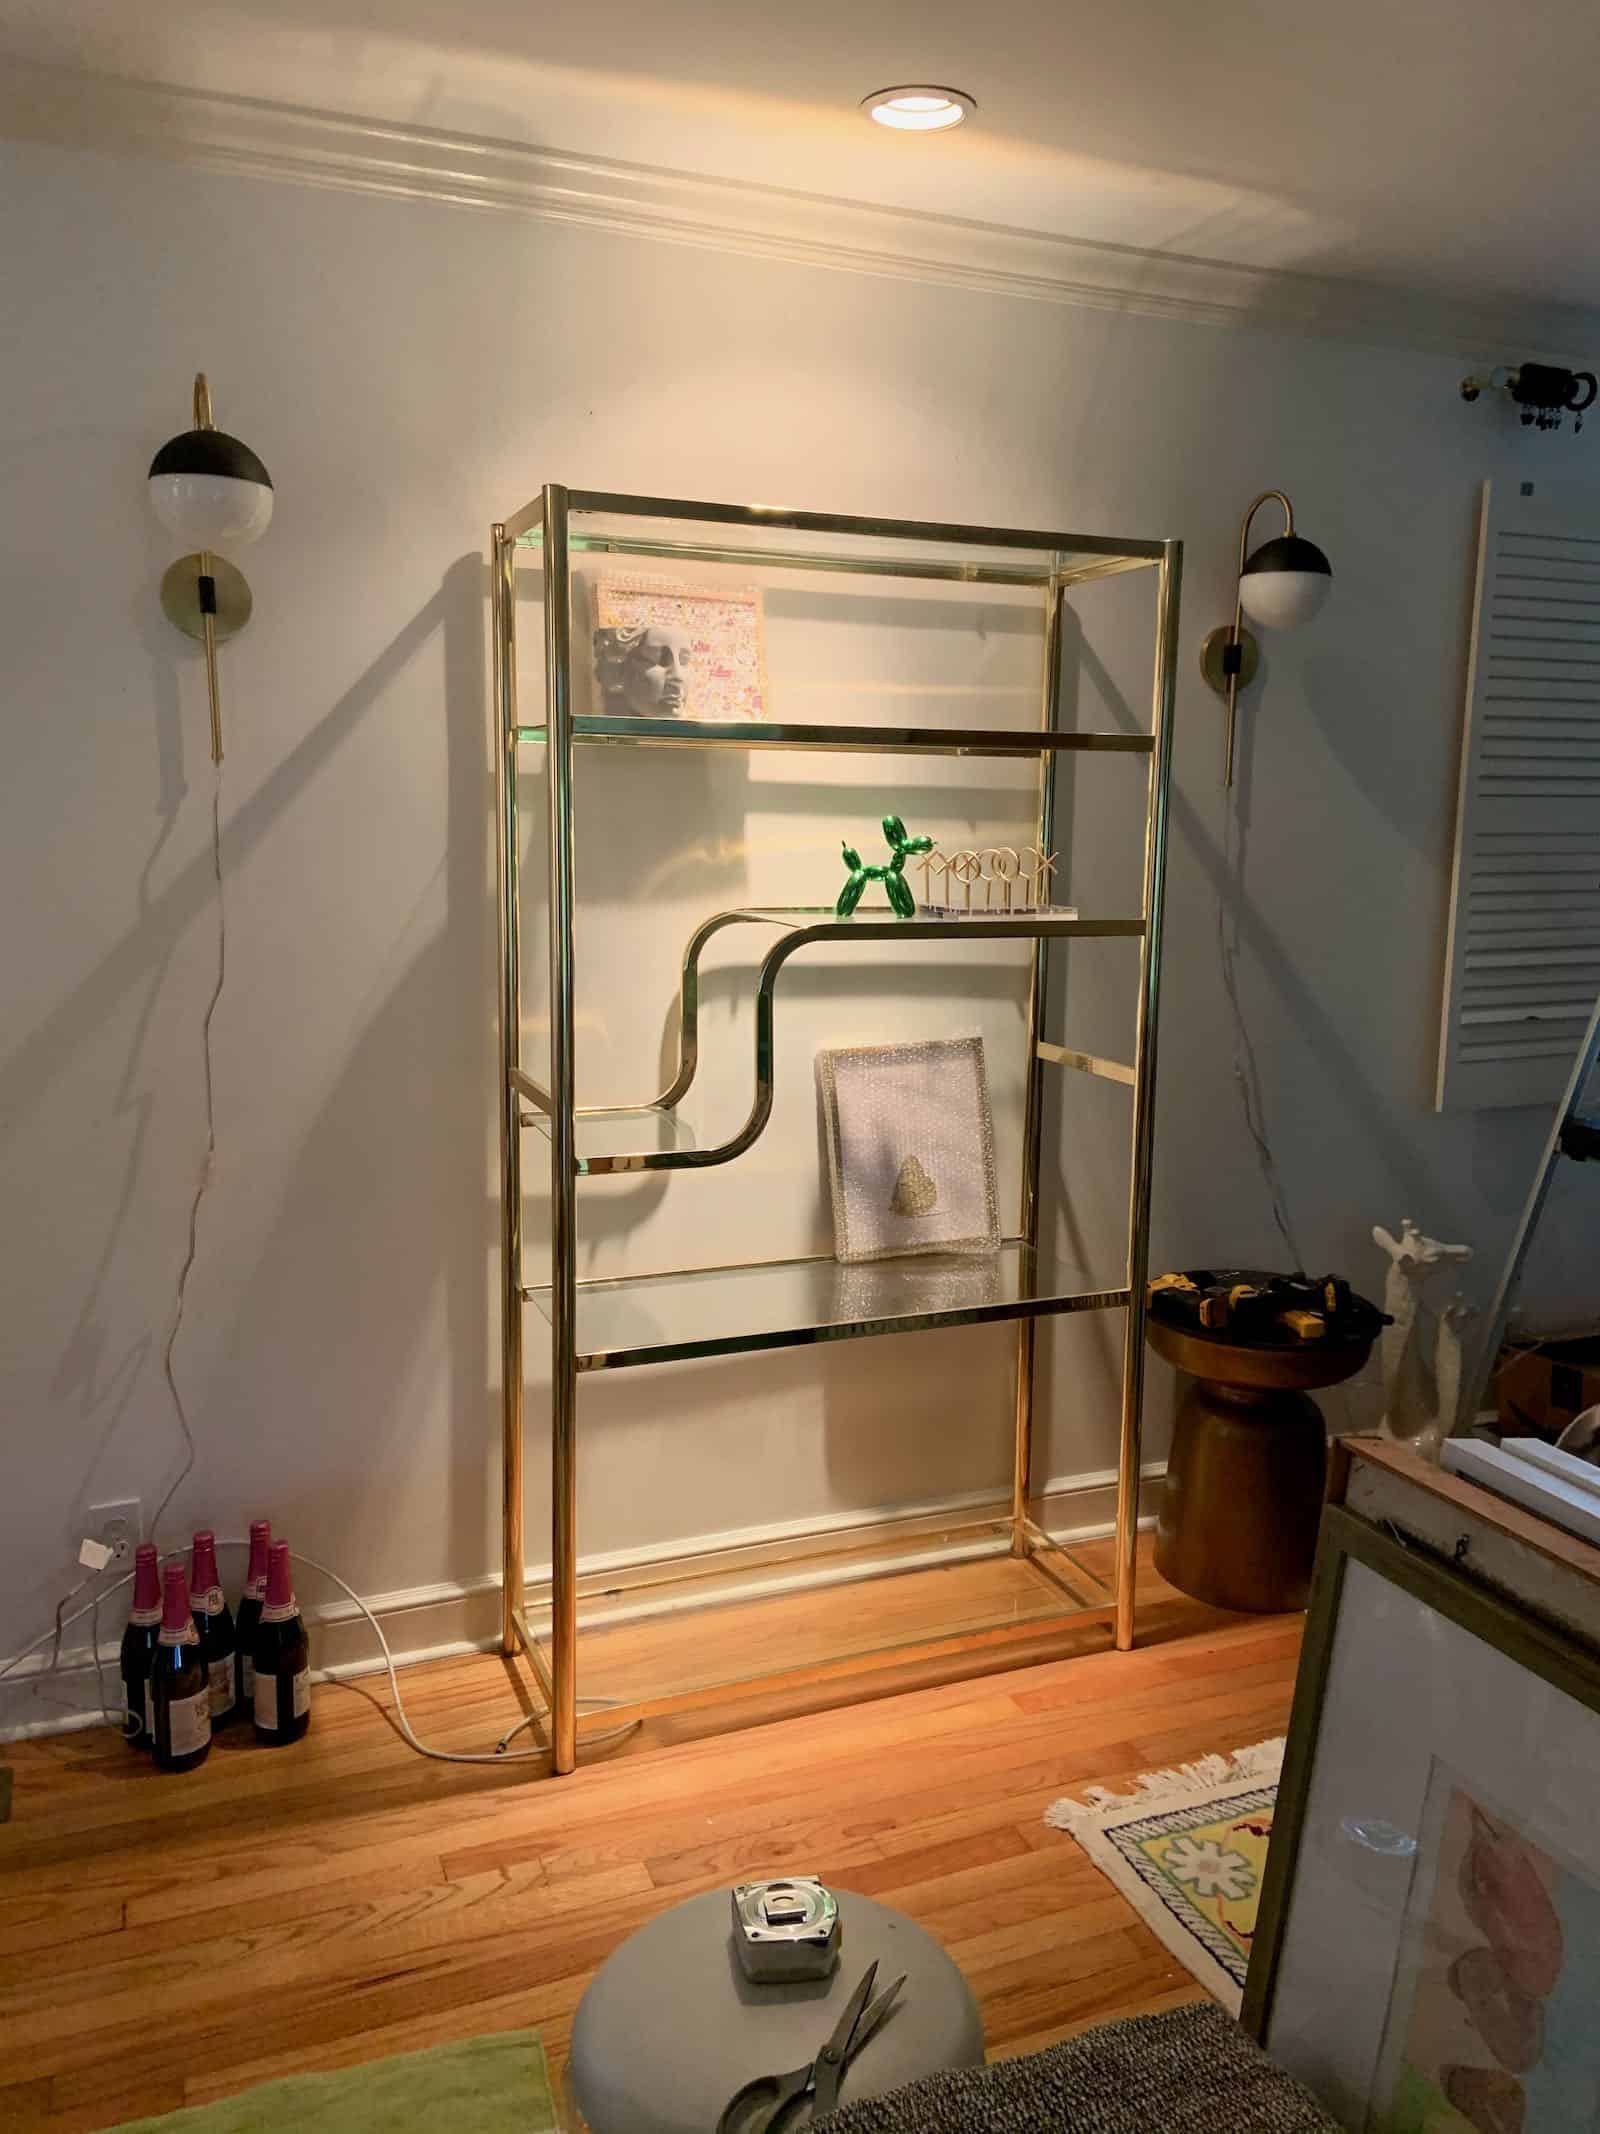
Other little updates… I brought in a set of vintage brass selves, hung those Mitzi sconces and have begun playing around with styling.
I hung a neon sign from Custom Neon which is quite possibly my favorite detail in the room so far. Although it’s impossible to choose really…

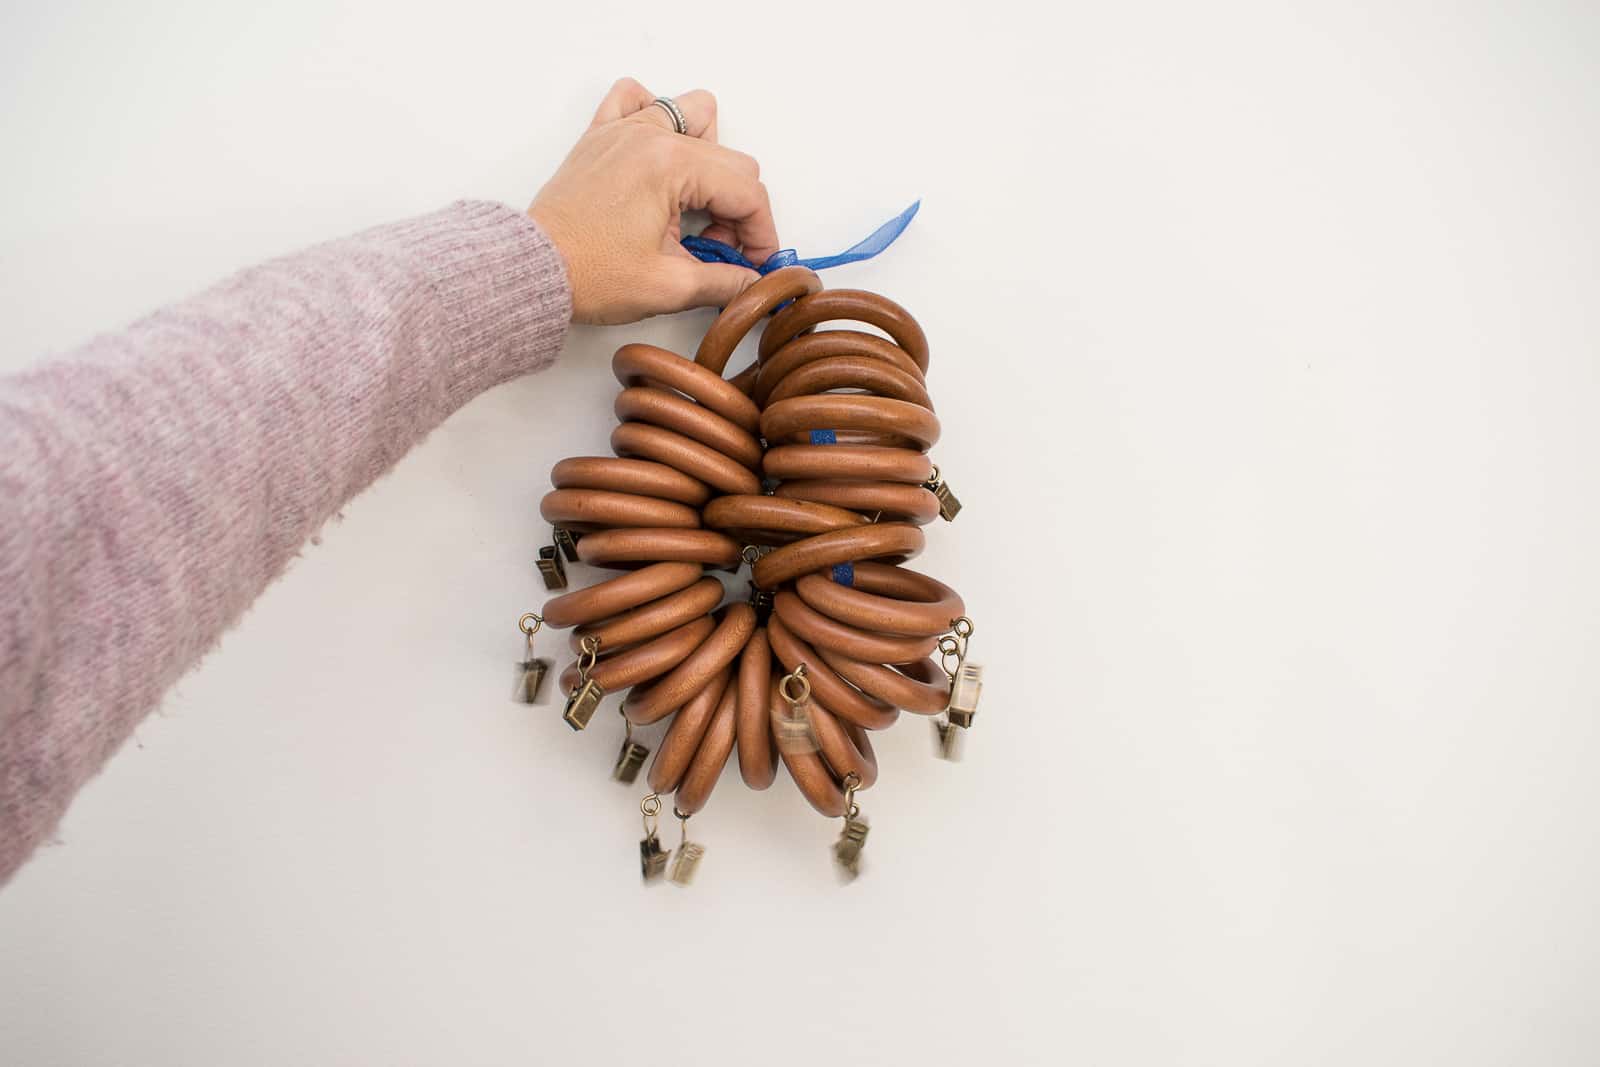
And I’ve hung the curtain rods and spray painted these flea market curtain rings so I’m just waiting on the curtains! Stay tuned to see how they look next week!
I’ve been watching in awe as my fellow Featured Designers have been tiling and framing and drywalling and more. It’s amazing to see how far everyone has come! Make sure you check out all of their posts!
Design Addict Mom | Erika Ward Interiors | Erin Kestenbaum | Girl & Grey
Gray Malin | Hommeboys | I Spy DIY | Jewel Marlowe | The Learner Observer | Making it Lovely
Nicole White Designs | Old Brand New | Oscar Bravo Home | Place of My Taste | The Rath Project
Room for Tuesday | SG Style | Undecorated Home | Veronica Solomon | Media BH&G | TM by ORC
To see what I’ve tackled so far, check out my progress from Weeks 1-3.


Charlotte I am not surprised you are tackling two rooms for this ORC and they are both going to be gorgeous!! Love love love the mural you chose and how you mix pattern, color and bold black and white into a space!
THank you my friend! There was only so much I could in the rental, but I”m trying to shake things up a bit! 🙂
You are the queen of color and pattern…everything looks so good togehter! That neon sign is rad!
I LOVE the neon!! So excited! THanks, Mary!!!
I love your mix of patterns and colors! You blend it together nicely with the matching color tones. This is looking so good!
Thank you my friend! Getting close! Meanwhile you’re just… painting your HOUSE! 🙂