
Kitchen Makeover at the Flip House
Psssst… this post *might* contain affiliate links: see my disclosure here.
The kitchen at the flip house needed the most attention… here’s how I transformed it!
Storytime: I’ve never made over a kitchen top to bottom… like demo, appliances, floor, tile, etc. In our first house I took down a dated middle island wall and replaced it with a flat island. Don’t judge the photos, but see the post here! In our second house, the kitchen cabinets got a coat of paint and we replaced the green vinyl floor about 4 months before we had to sell it. And in our current house, again… I had the cabinets painted and replaced the counters. HUGE impact, but not a total kitchen makeover. That said, when it came time to tackle the kitchen at the flip house, I was excited and nervous and had to think through and plan carefully to pull it off!
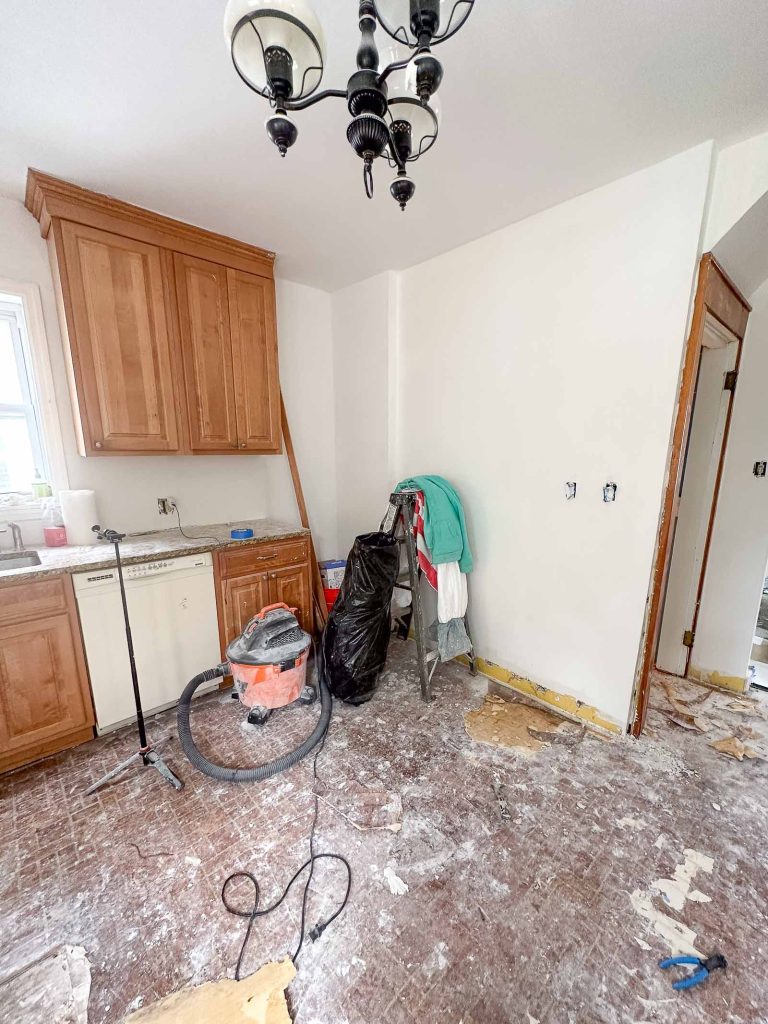
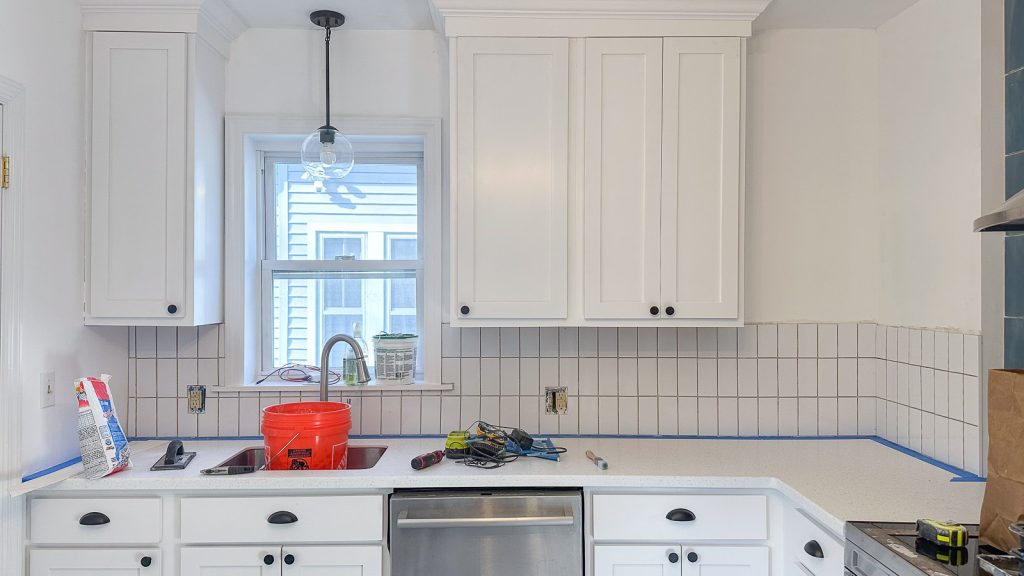
Kitchen BEFORE
This was the state of the kitchen when I bought the house. It felt *very* tight, not wildly functional and obviously super dated. The pain points, in my mind, were the lack of counter space, the dated appliances (particularly the fridge sticking out by half a foot) and the “island” situation smack in the middle of the room. Given the staircase going down to the basement and an interior flu for the furnace (and budget!), there wasn’t any possibility of changing the footprint of the room.
Shop my favorites!
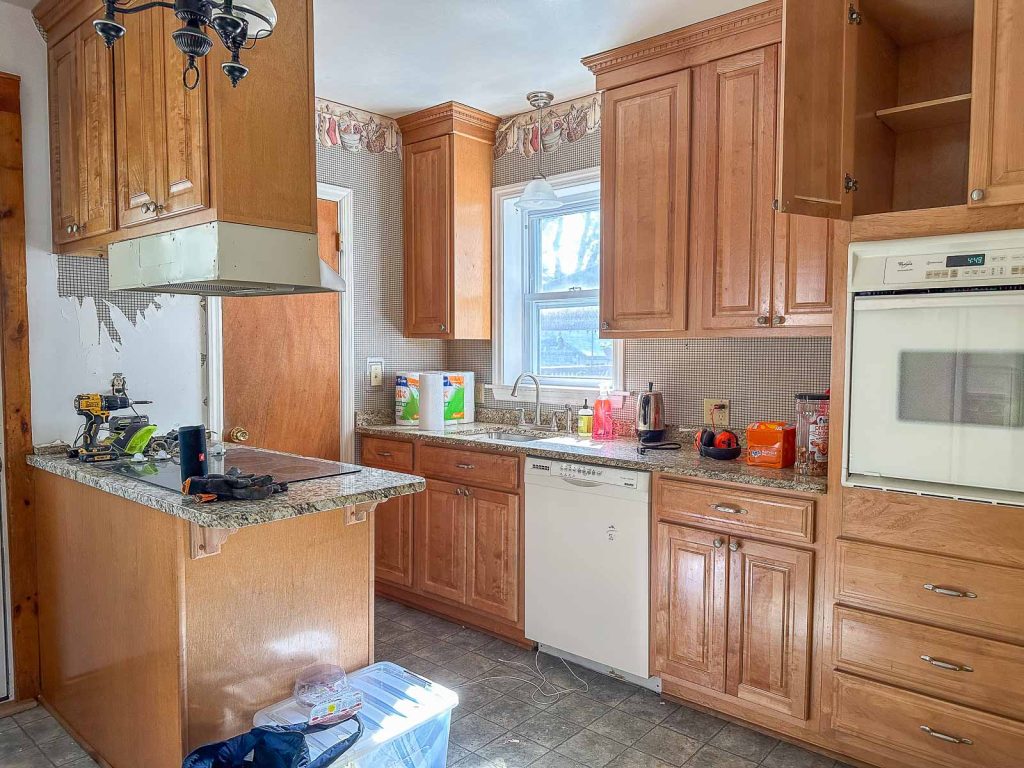
Anytime I have a large project to tackle, I try really REALLY hard to break it into smaller manageable pieces. For this one, I knew that weird island had to go so that was the first thing to come out. Turns out there was electric up in there (I mean obviously because of the fan/ cooktop) but that was something to navigate in the moment. Already the space feels more open.
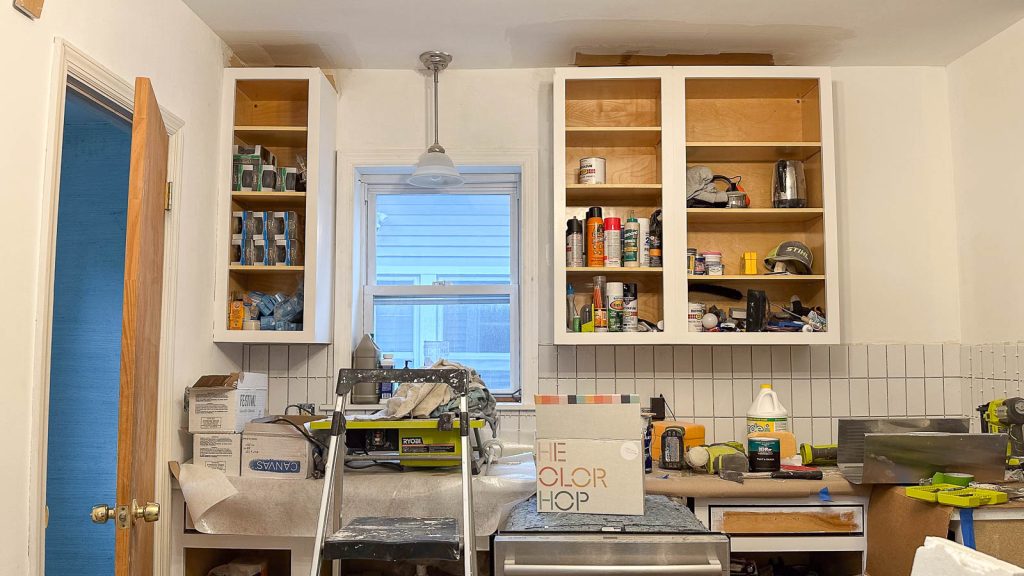
Cabinets
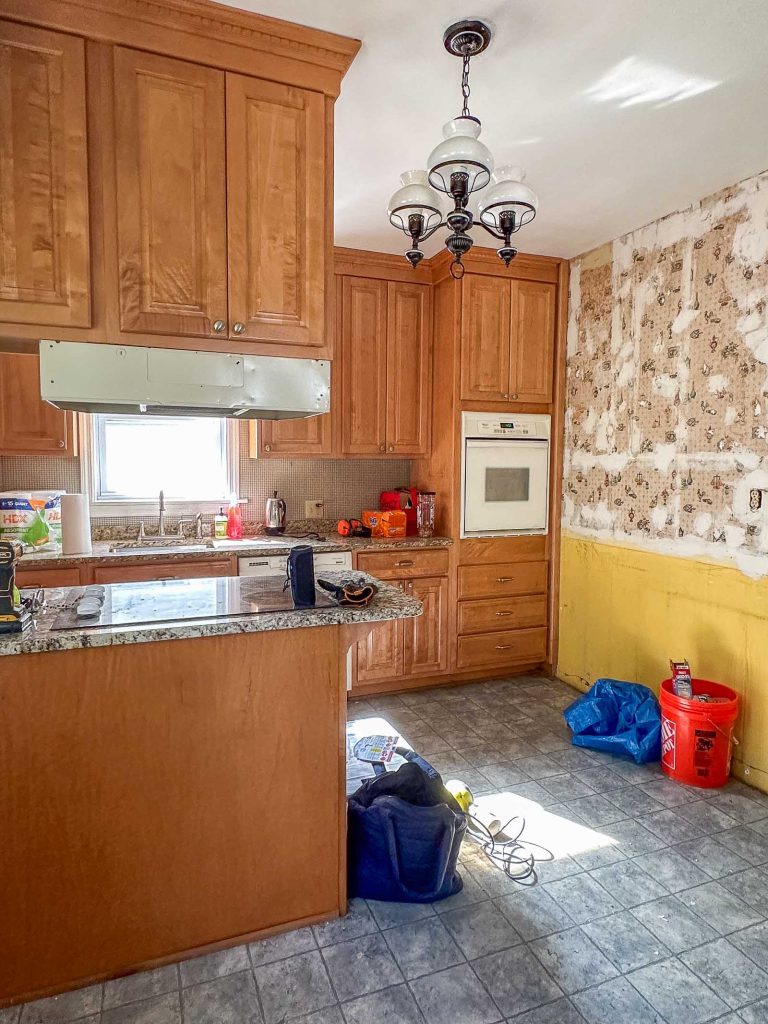
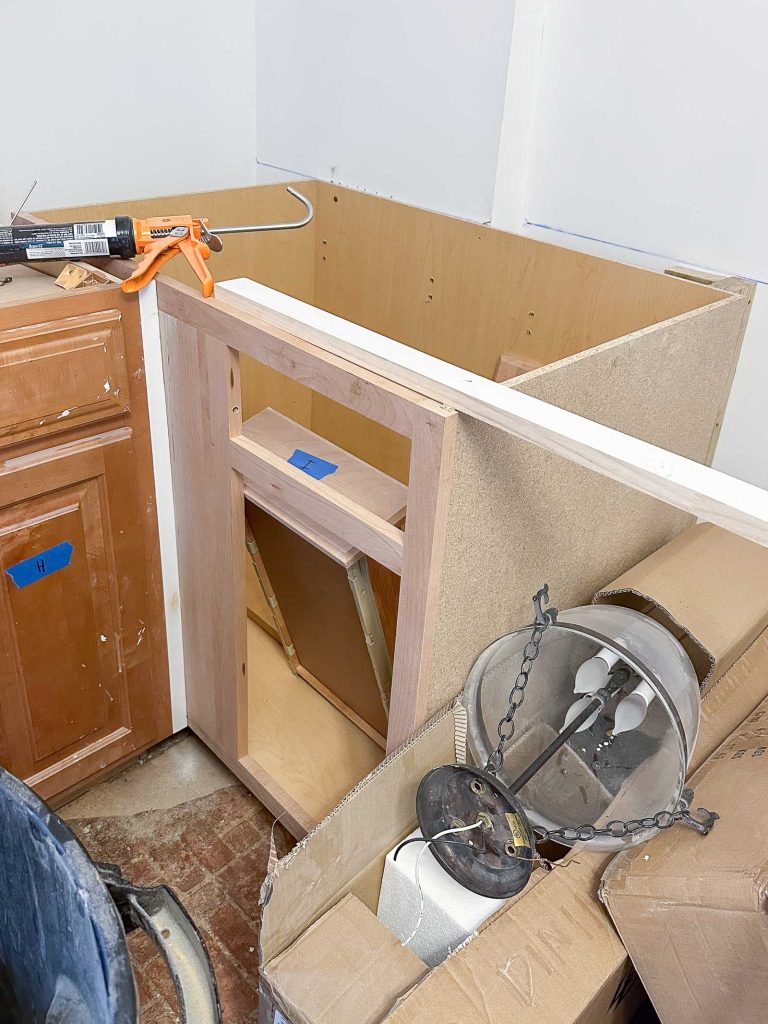
At some point there was a leak behind the tall corner cabinets that needed to come out anyways so my contractor was able to demo those to get to the leak. I ordered one base cabinet to fit into the corner where the wall mounted stove had been and then one more to sit on the other side of the new stove. I have installed cabinets before in my office but given the idiosyncrasies of this older home, I asked my contractor to step in and help set the new cabinets so they were ready for counter templating.
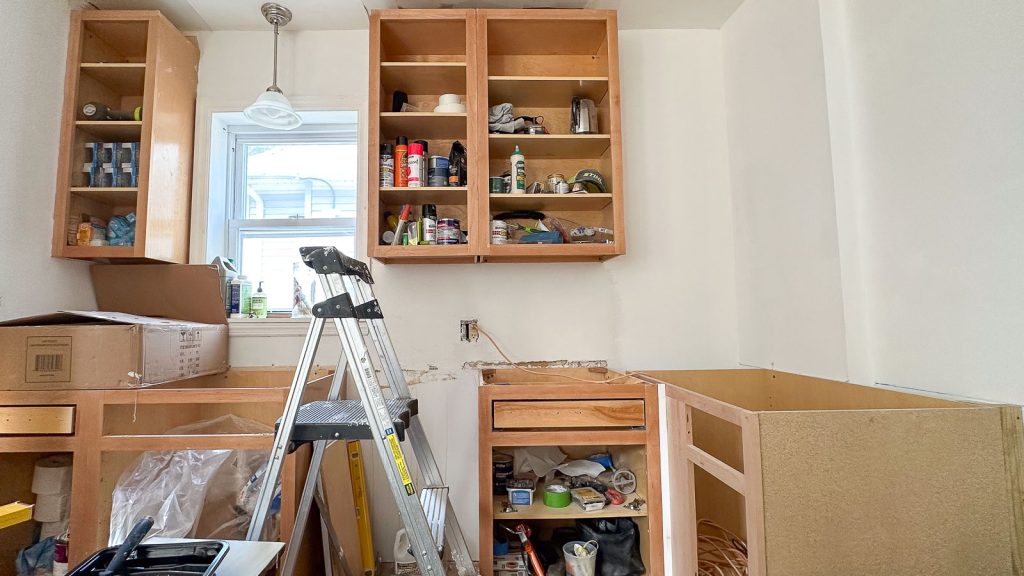
As you can probably tell, I didn’t replace any of the other cabinets in this kitchen. The existing cabinets were in great shape, were semi custom and the only thing I didn’t like about them was the doors and the trim- both of which had a solution. I removed all the cabinet doors and ordered more contemporary shaker front cabinet doors from Home Depot. I also removed the intricate trim work and my contractor replaced this with a more streamlined crown molding. If I’m being honest, I didn’t *hate* the trim work above the cabinets, but when we removed the corner cabs, that exposed the raw edges and I didn’t know how to match the existing trim so easier just to replace.
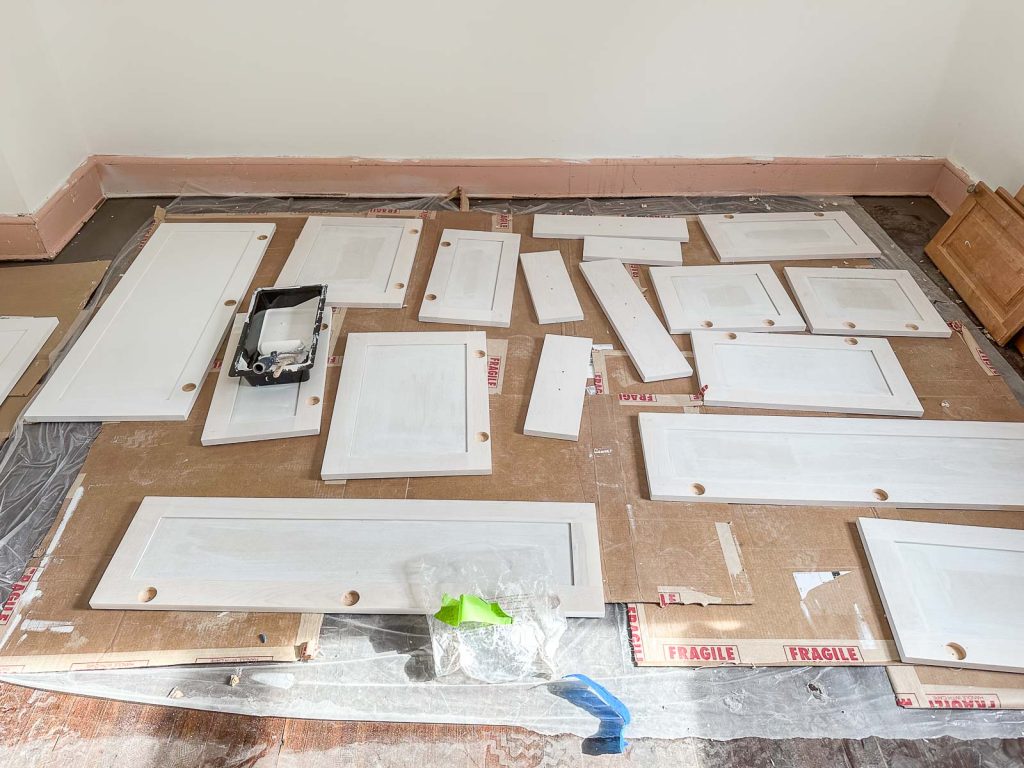
TIP: Take a picture and quickly mark it up to remember which cabinet door goes where. Mark each cabinet with painters tape to keep them organized.

Since the house was empty, I was able to lay out all the unpainted cabinet doors in the dining room and slowly but surely sand, prime, and paint each door front and back. I *would* have sprayed them but temps were getting cold and I didn’t have a great spot to set up a spray station so a roller and angle brush in the dining room worked just as well! They were a little fussy to install but ultimately not too hard. I replaced the old hardware with these more modern cabinet pulls to finish off the makeover.
Kitchen Floors
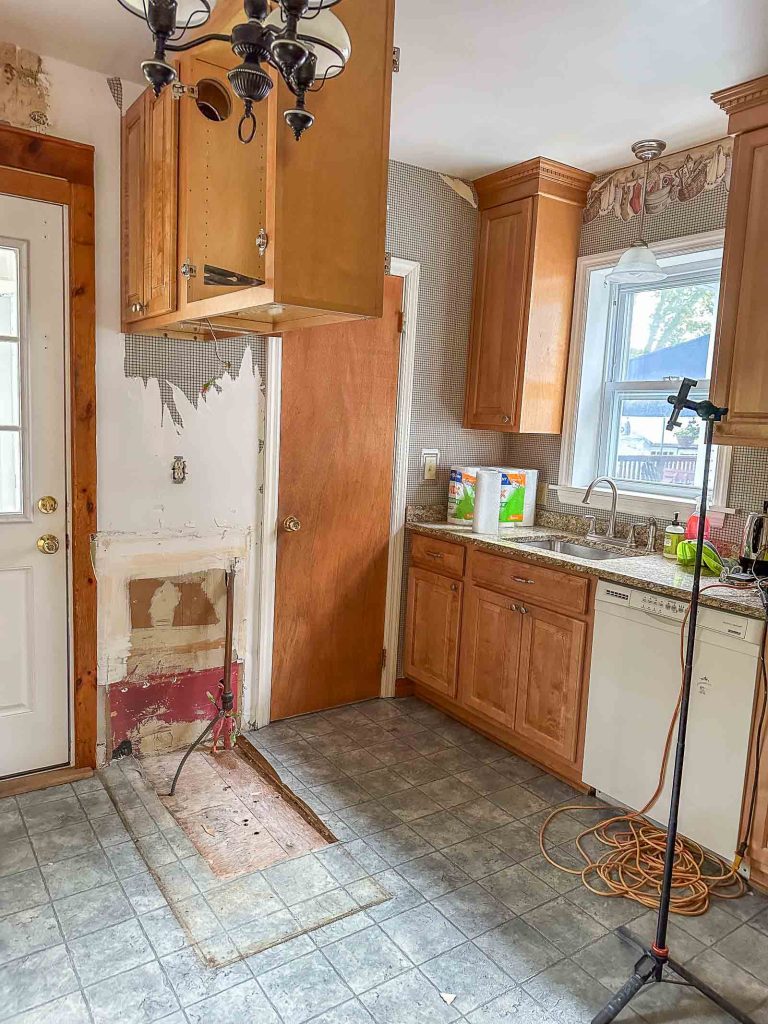
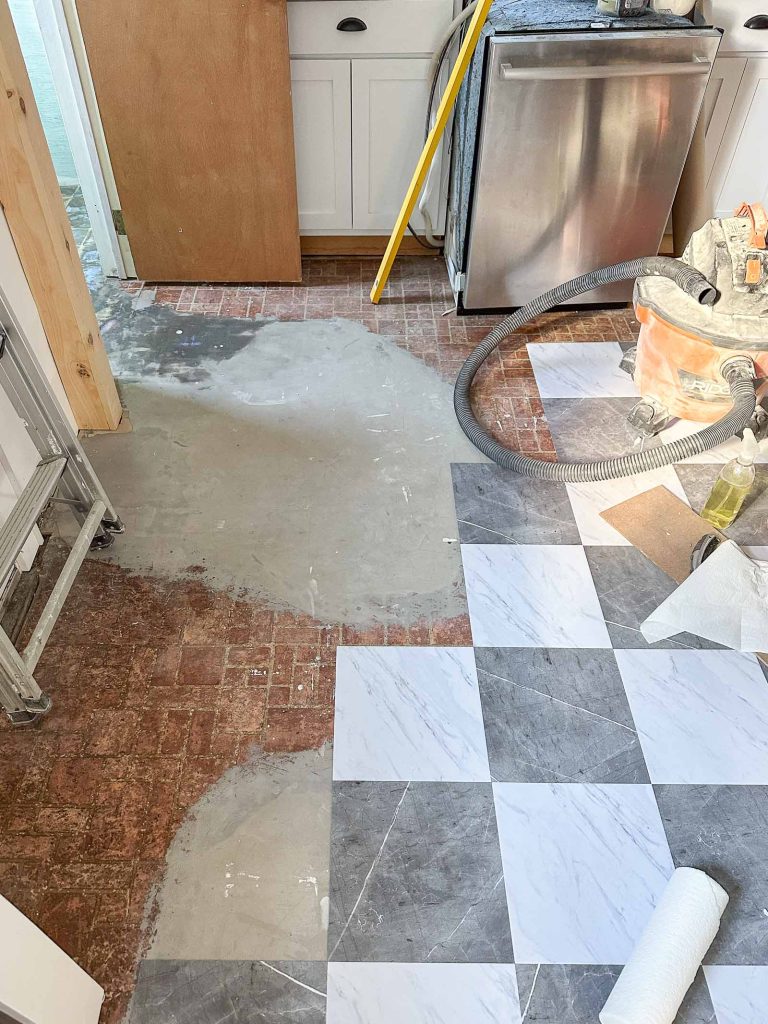
The floors in the kitchen needed to be addressed. At one point I was thinking of floating a floor over the existing sheet vinyl, but when I removed the island/ peninsula it was clear that there were already loooooots of layers to sort through not to mention the hole in the flooring where the peninsula/ island had been. So I used this asbestos kit to make sure the top gray layer wasn’t asbestos. It wasn’t so I peeled it all off. It came away pretty easily and, because I’m a glutton for punishment, I decided to remove the thin layer of subfloor underneath as well. In hindsight I probably didn’t need to remove this, but at the time I was worried that there was A LOT of residual adhesive from the gray sheet vinyl and I needed a clean surface for my floor tiles.
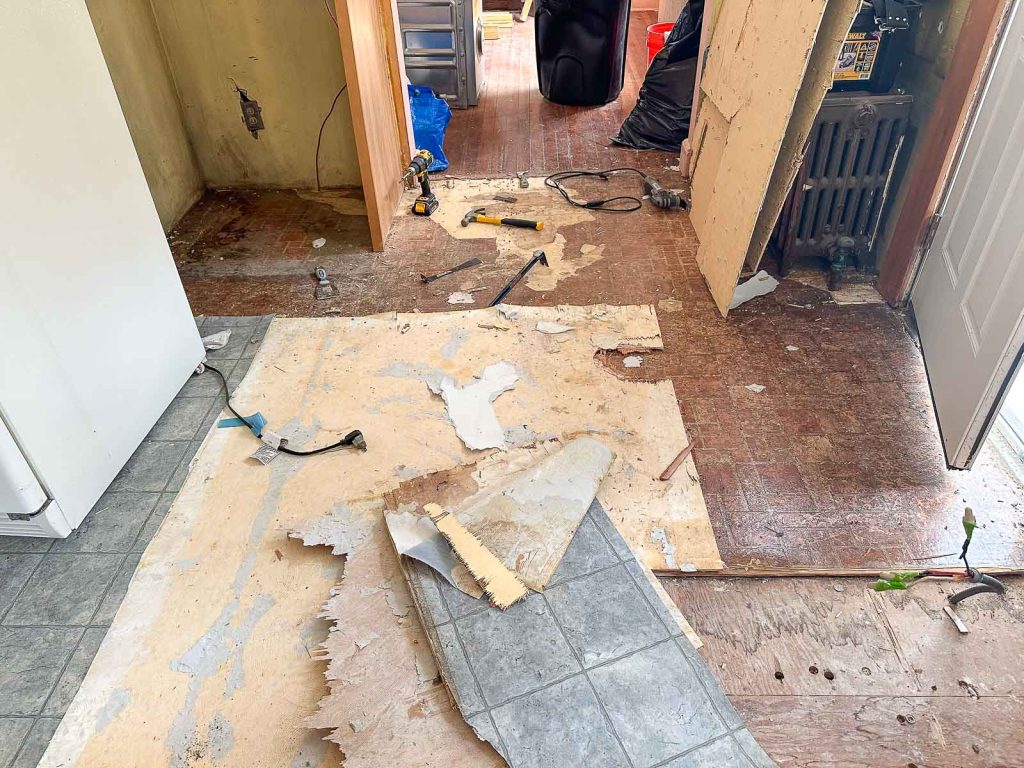
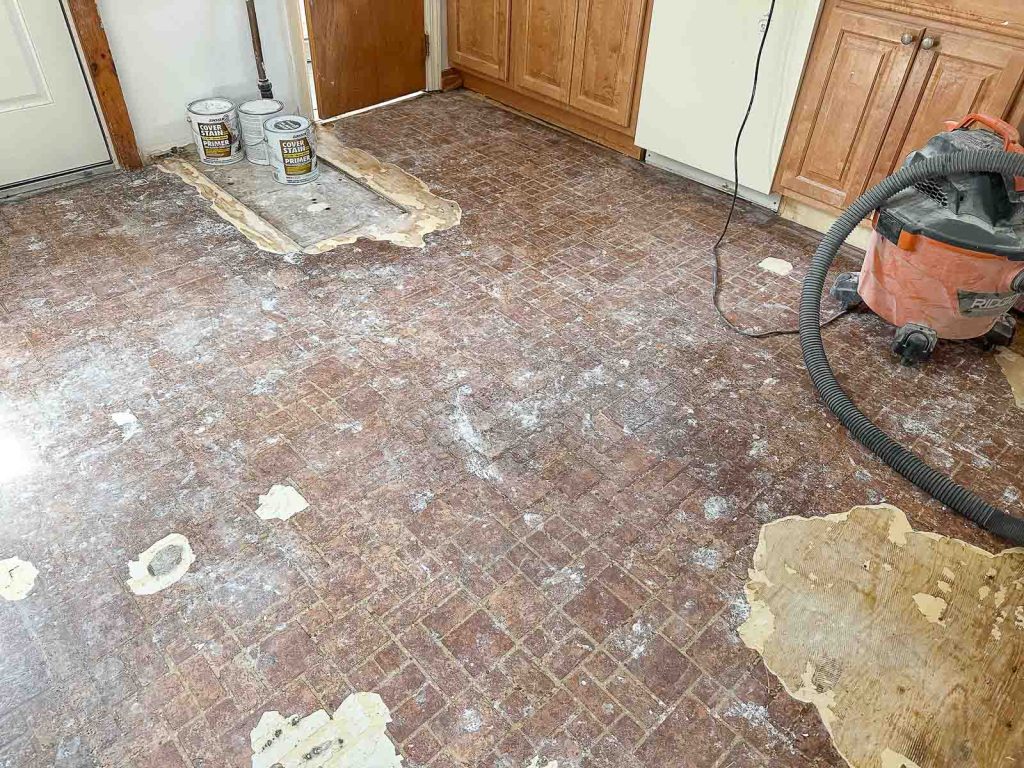
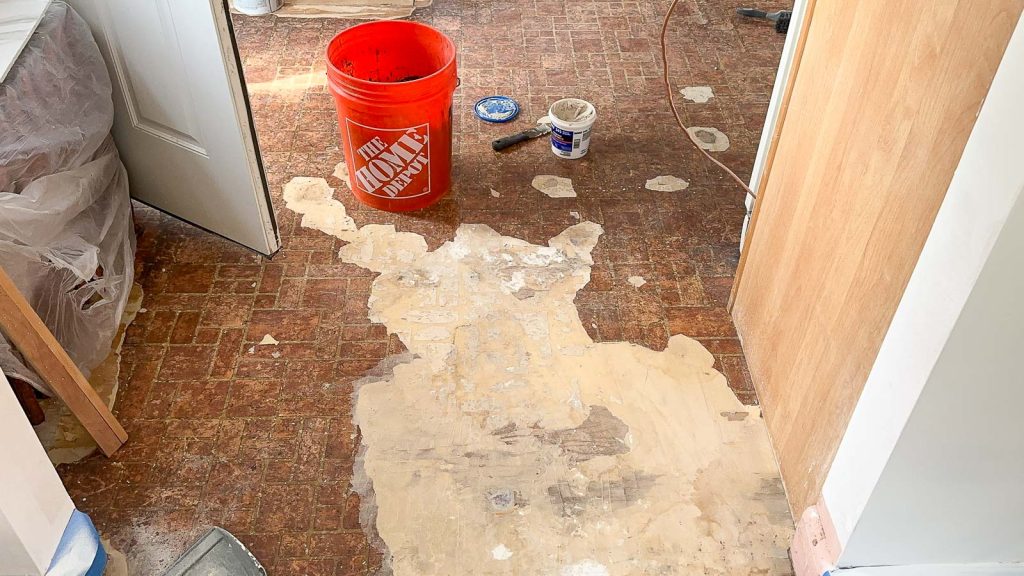
I had to remove a ton of staples and peeled away any loose floor from this faux brick layer of floor. This staple remover was my LIFESAVER. I patched the hole where the island peninsula had been with a piece of 1/4″ plywood. I also experimented with a patching compound to help level out the floor where I had scraped some of the vinyl away. For the larger patches, I poured a self leveling compound (and primed it for adhesive tiles) that I think was the right call, but it took a couple of tries to figure out the perfect consistency since it sets up FAST.
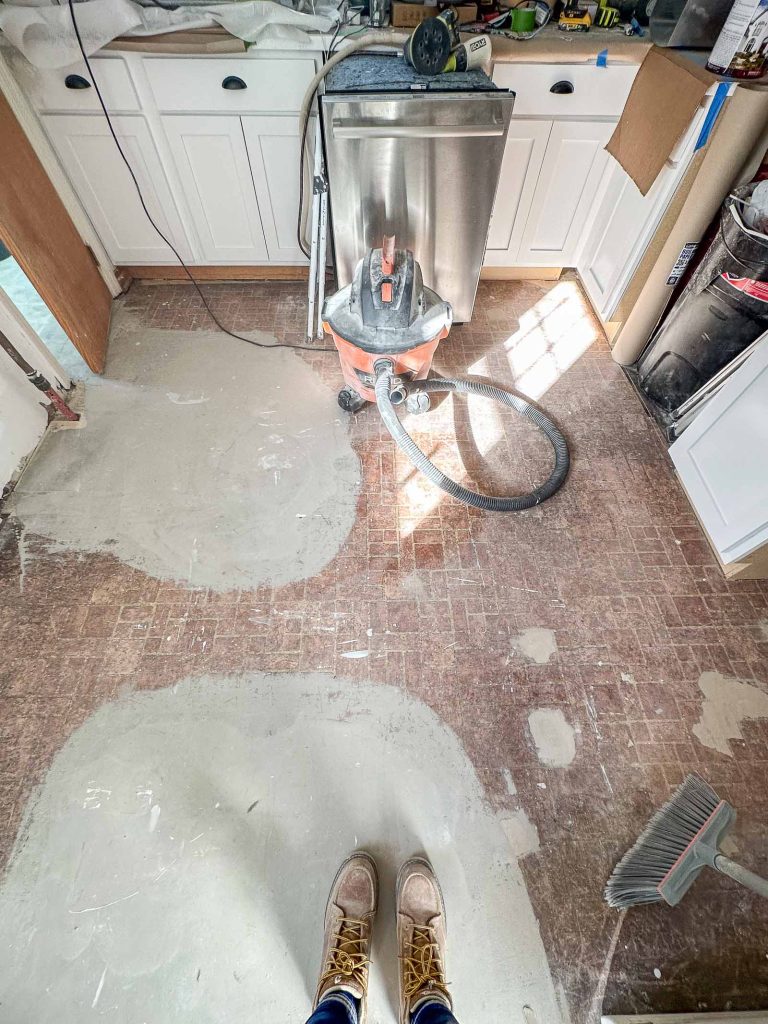
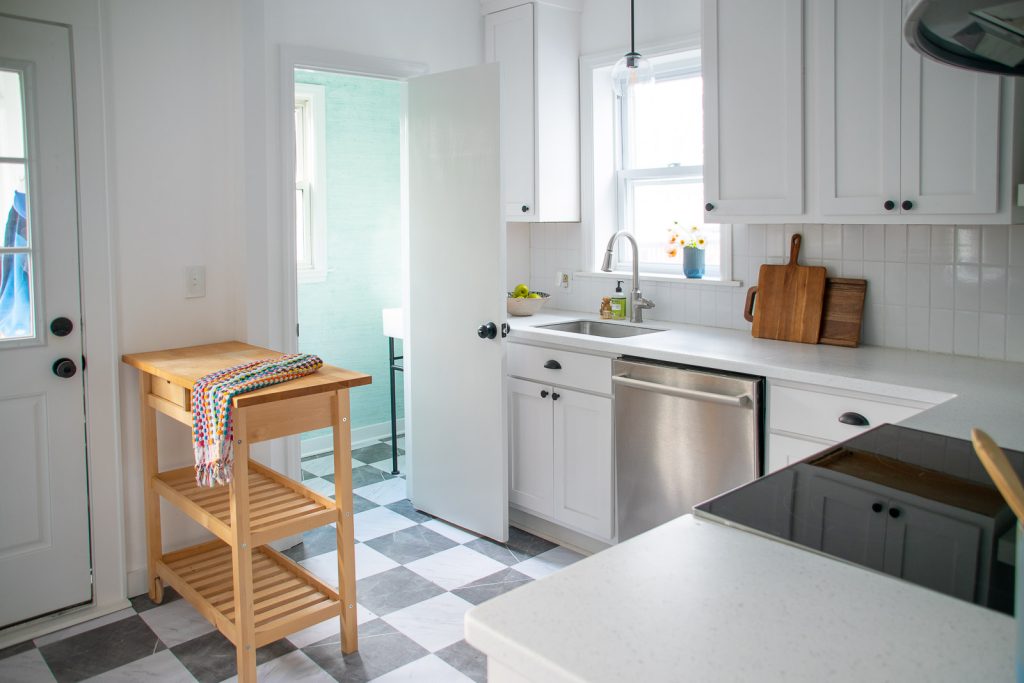
With the floor prepped and cleaned and cleaned some more, I was finally able to apply these adhesive vinyl floor tiles. I’d used adhesive floor tiles before in this bathroom makeover and was super impressed by how easy they were to use and how durable they were so I felt good about using them as a durable, aesthetic budget option in the flip house. An additional reason for this flooring was that the kitchen floor was already an inch or so above the hardwoods in the rest of the house so putting something like tile down would have increased the floor discrepancy even more.
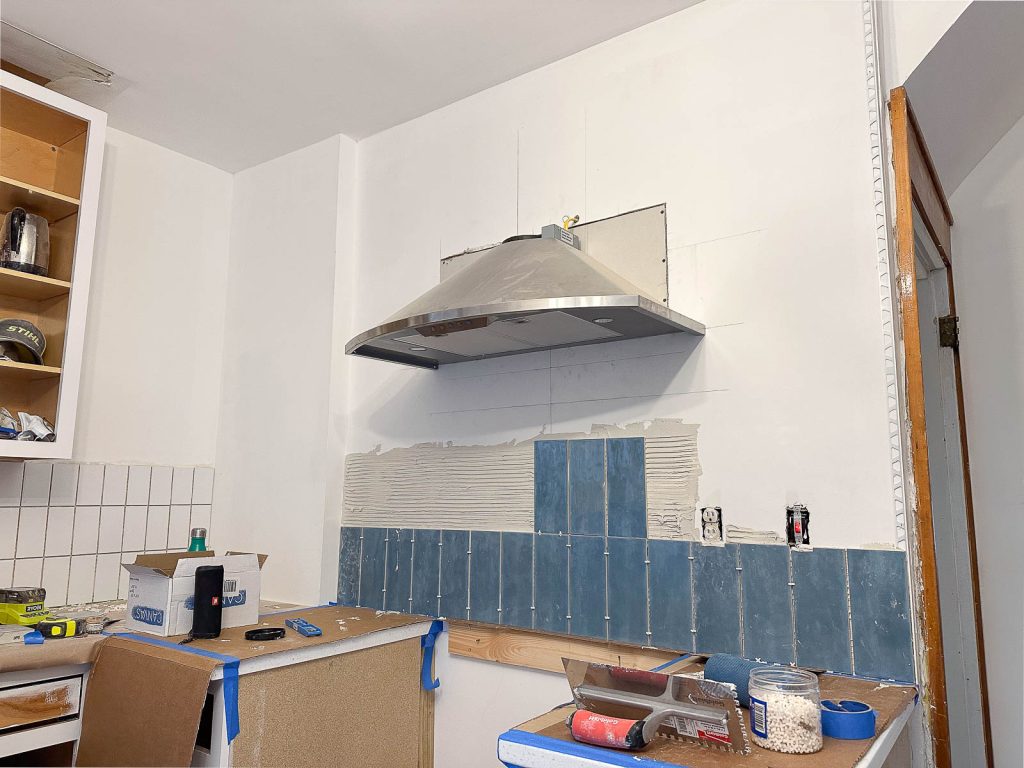
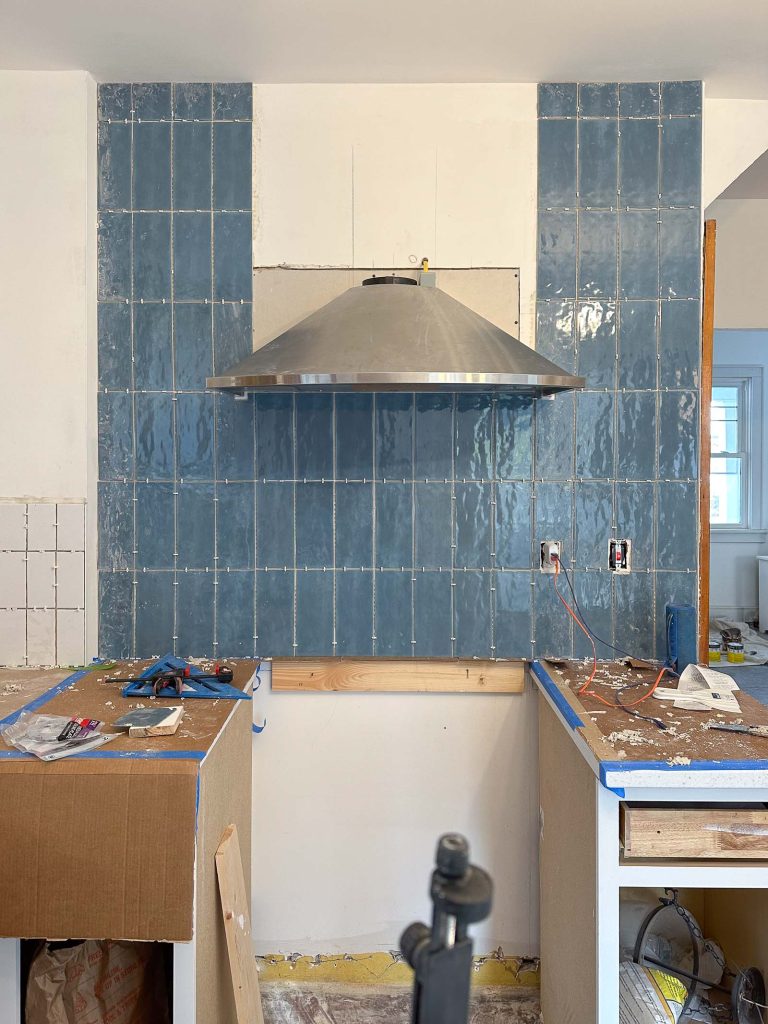
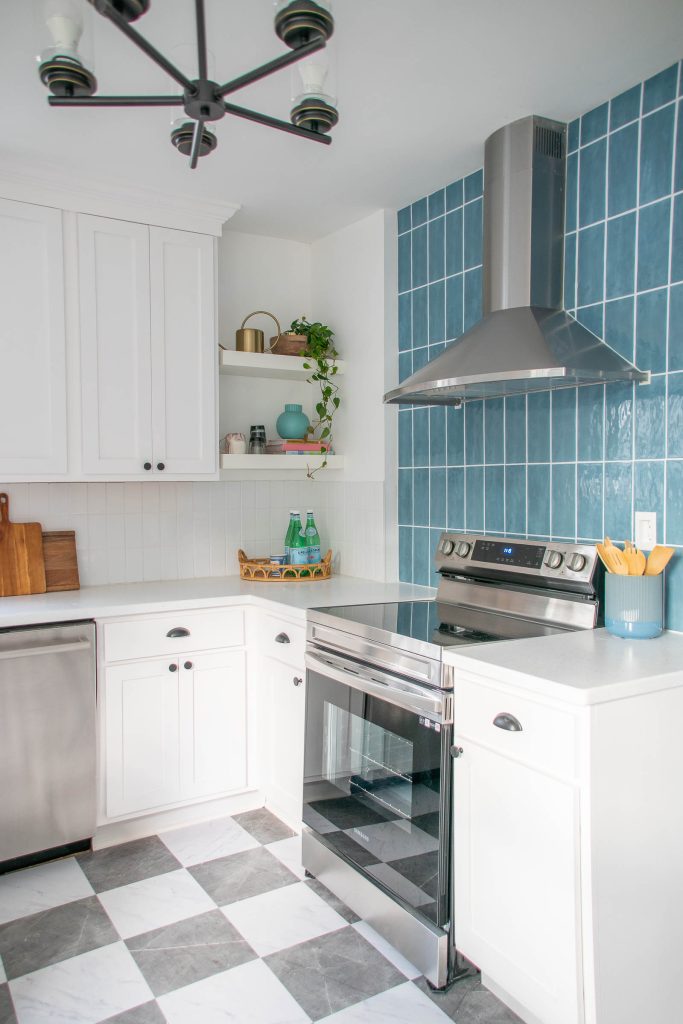
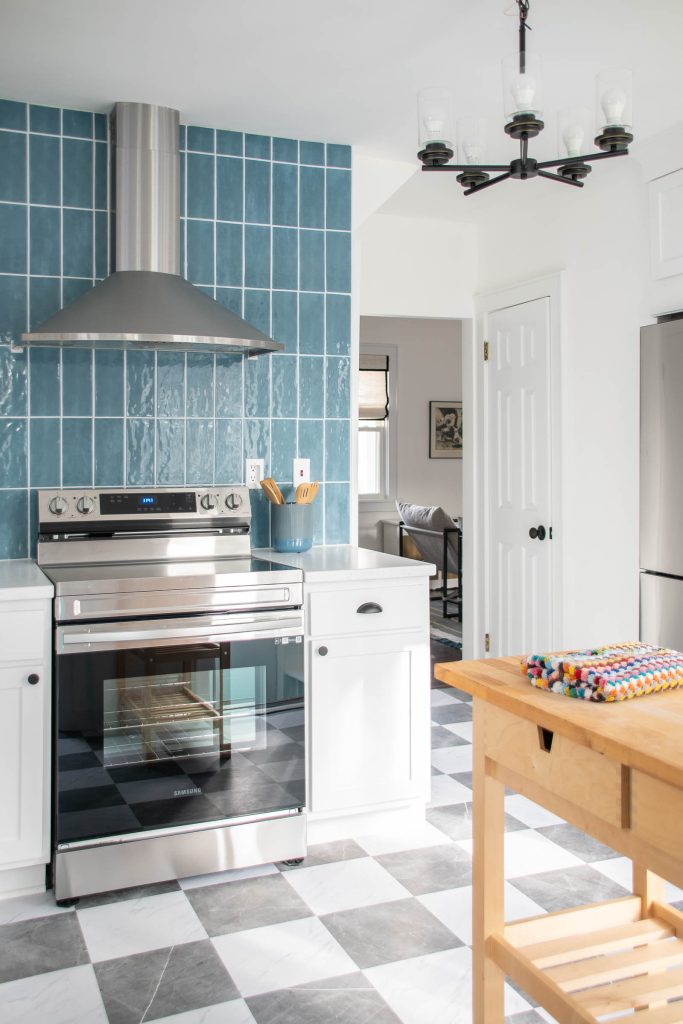
Tile
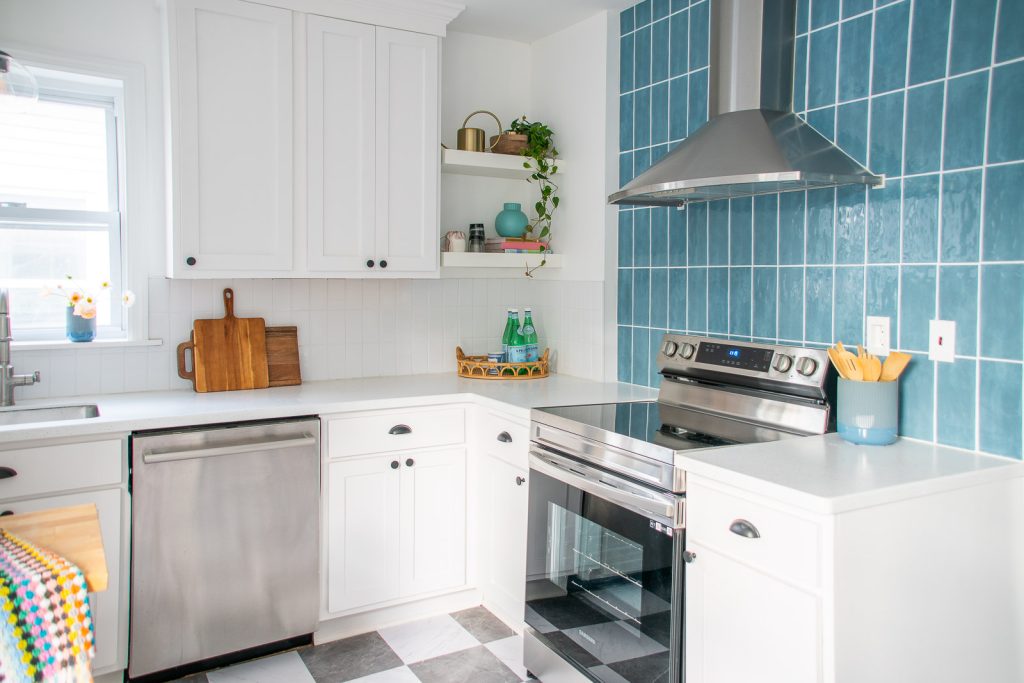
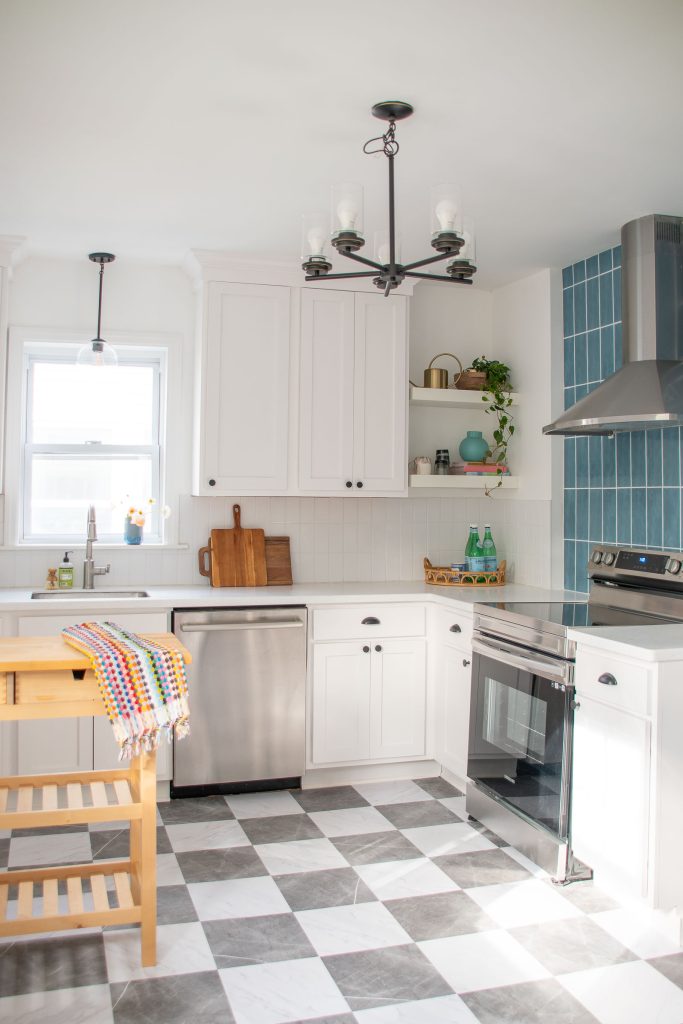
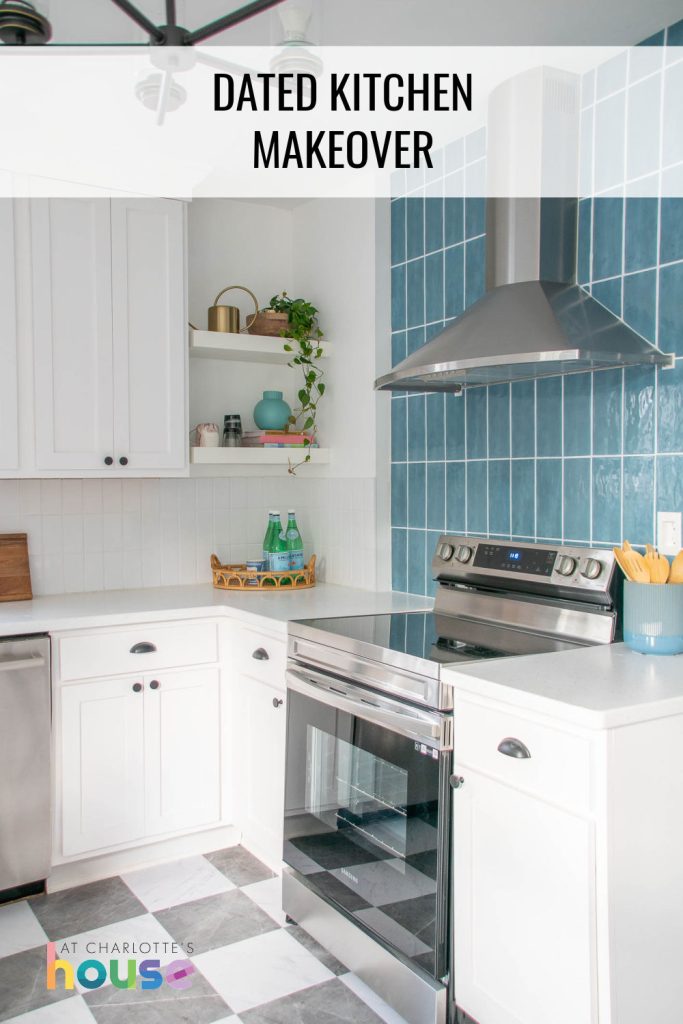
The final big improvement I made to this kitchen was adding a backsplash above the counters as well as tiling the main wall over the kitchen stove. I selected simple white subway tile from Floor and Decor and decided to stack it vertically for a more updated, contemporary feel. The tile over the stove is slightly bigger and obviously a beautiful blue but the stacked vertical installation ties the two together!
Other Kitchen Updates
Other updates/ changes I made in here. Obviously appliances. I grabbed a new stove and fridge from Home Depot. The Bosch dishwasher is new also but via Facebook marketplace so that saved me a little bit. The exhaust fan was also new and unused via Facebook marketplace and doesn’t require a duct to vent which meant I could install it right on this wall against the stairs without having to run a duct outside.
I replaced the lights and obviously got a new counter from Home Depot as well. It’s a solid surface counter so budget friendly but also durable and has a lovely speckled finish that gives it a bit of movement.
Finally, I asked my contractor to install open shelves in the corner to act as decorative storage since the space was too complicated/ precarious for an upper cabinet. I love how the open shelves breaks up the wall of cabinets and lends itself to a little decorative styling moment.
Kitchen REVEAL
This space came together in a couple of weeks but is probably the biggest makeover in the whole house. It’s bright and sunny and cheerful and SO much more useful than the original kitchen, in my opinion.
If you want to see the full makeover series, check it out here!


Don’t Miss Out
Become An Insider!
Signup for exclusive tips, and tricks from Charlotte’s House!
Let’s chat!
I love comments from you, so feel free to leave your thoughts and ideas below! And don’t forget to follow me on Instagram for even more!