
Colorful Home Office Reveal
Psssst… this post *might* contain affiliate links: see my disclosure here.
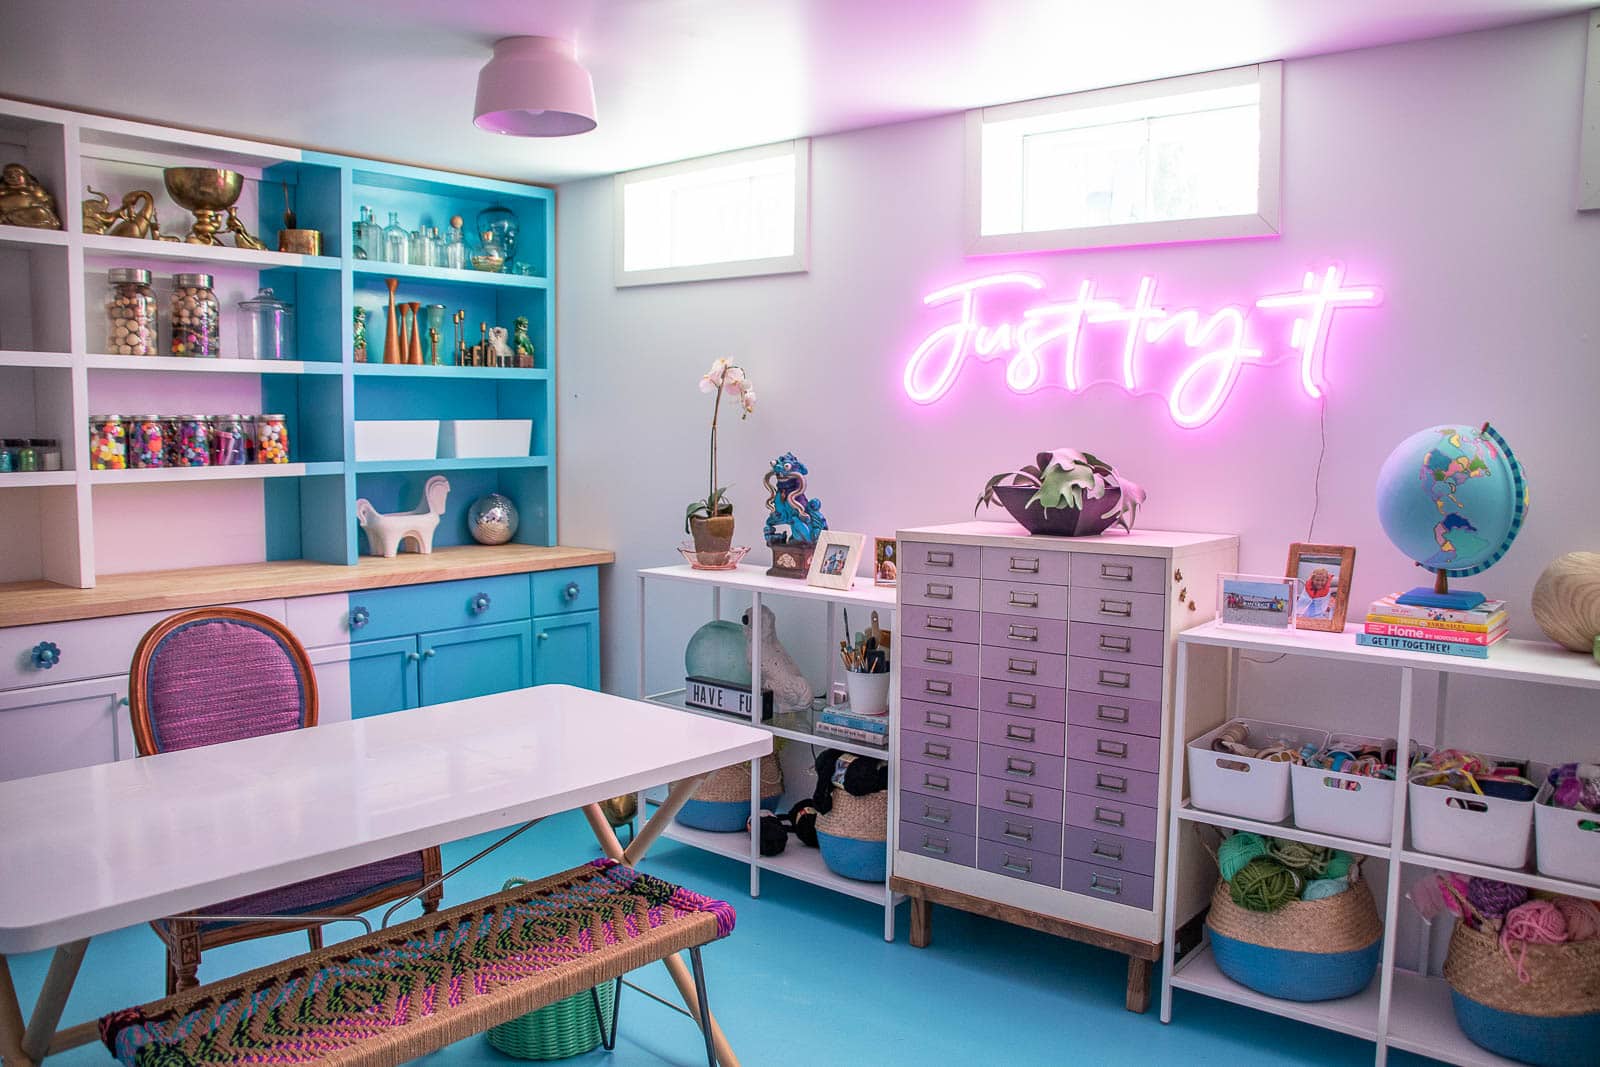
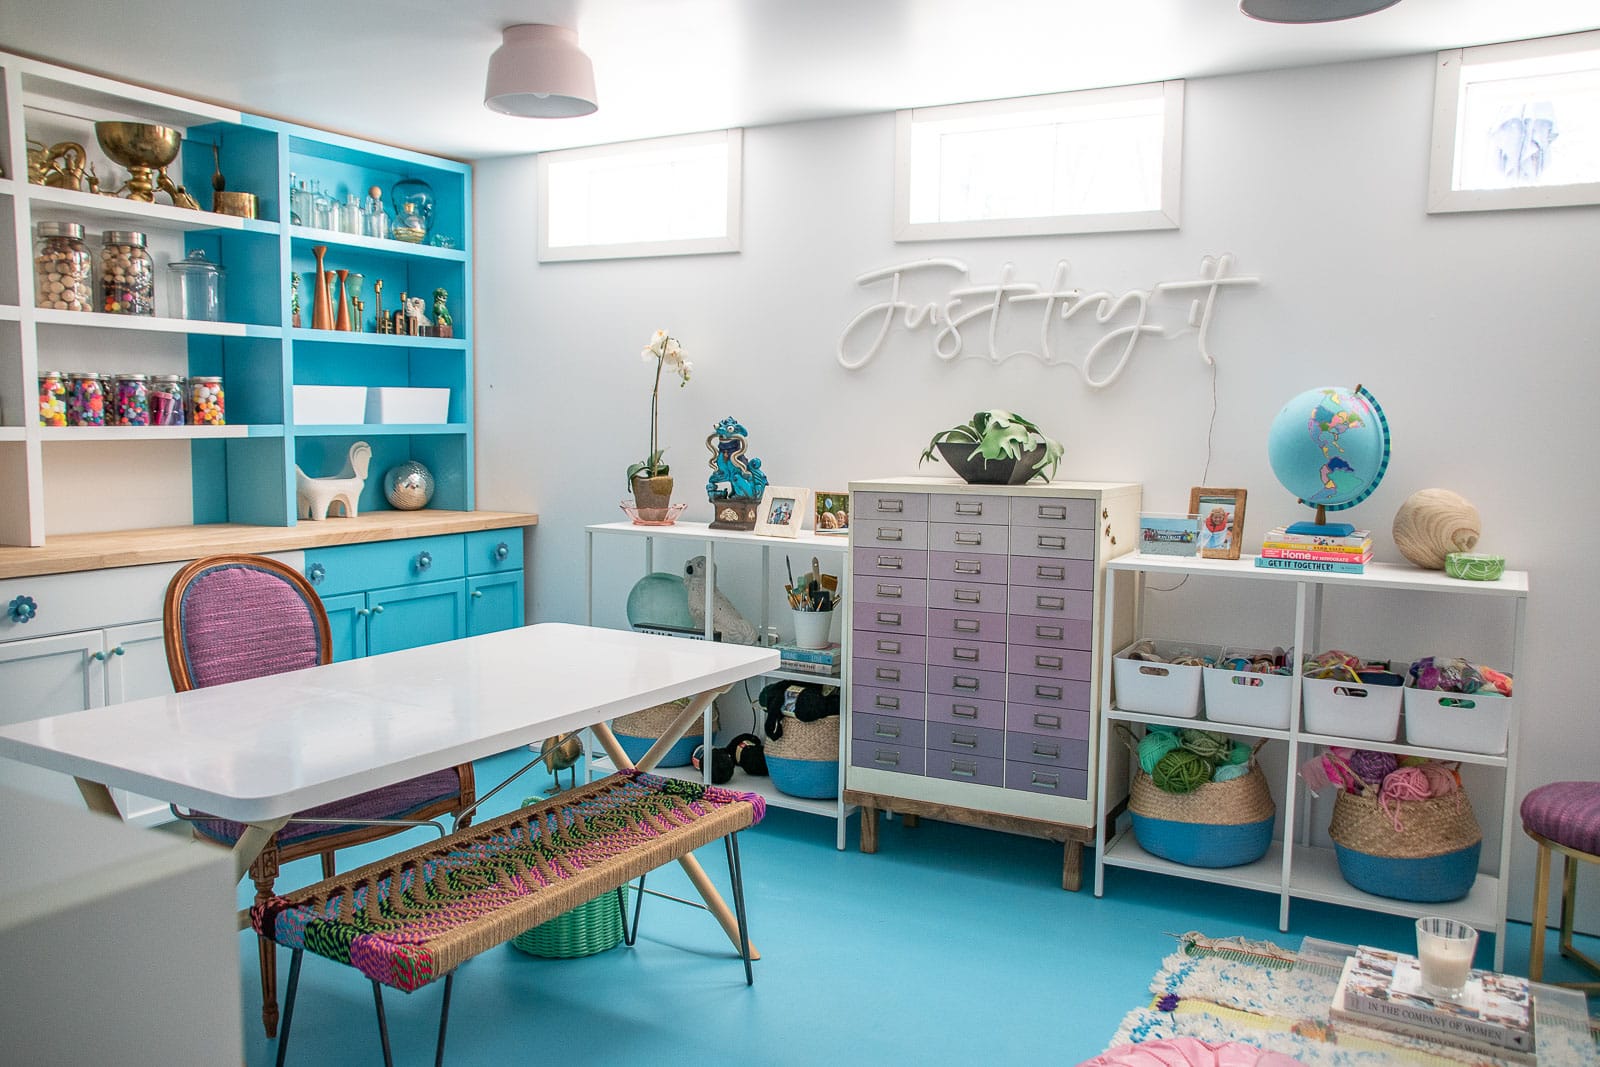
Basement Storeroom Turned Cheerful Office Space
We turned a concrete basement storage room into a colorful eclectic office.
Story Time:
The first time I created an “office” it was a closet in our first house. Because it was a space ostensibly for me… I could have fun and do whatever I wanted! Then we moved and our new house had a shed. A dilapidated old shed that needed lots of help, but that too became a workspace for me. I loved that shed. Looking back, it had way too much stuff going on, but it was also an homage to my flea market trips and my collections and all my new DIY skills. There were shelves for my tchotchkes, room for my woodworking, a curtain for video work and even a little never used area to sit and relax. When my husband’s firm shut down and we had to sell this house, selling and making sense of this shed was the most challenging part of the move for me. We landed in a rental where I assumed there would be no hope of an office space. But I was wrong! Thanks to my friends at Frogtape, I participated in the Paintover Challenge and made one of my favorite spaces 2.0. Which brings us to our current house. In 2020, we bought this house and moved in and this room’s story begins. (Full source list at the end of this post!)
Shop my favorites!
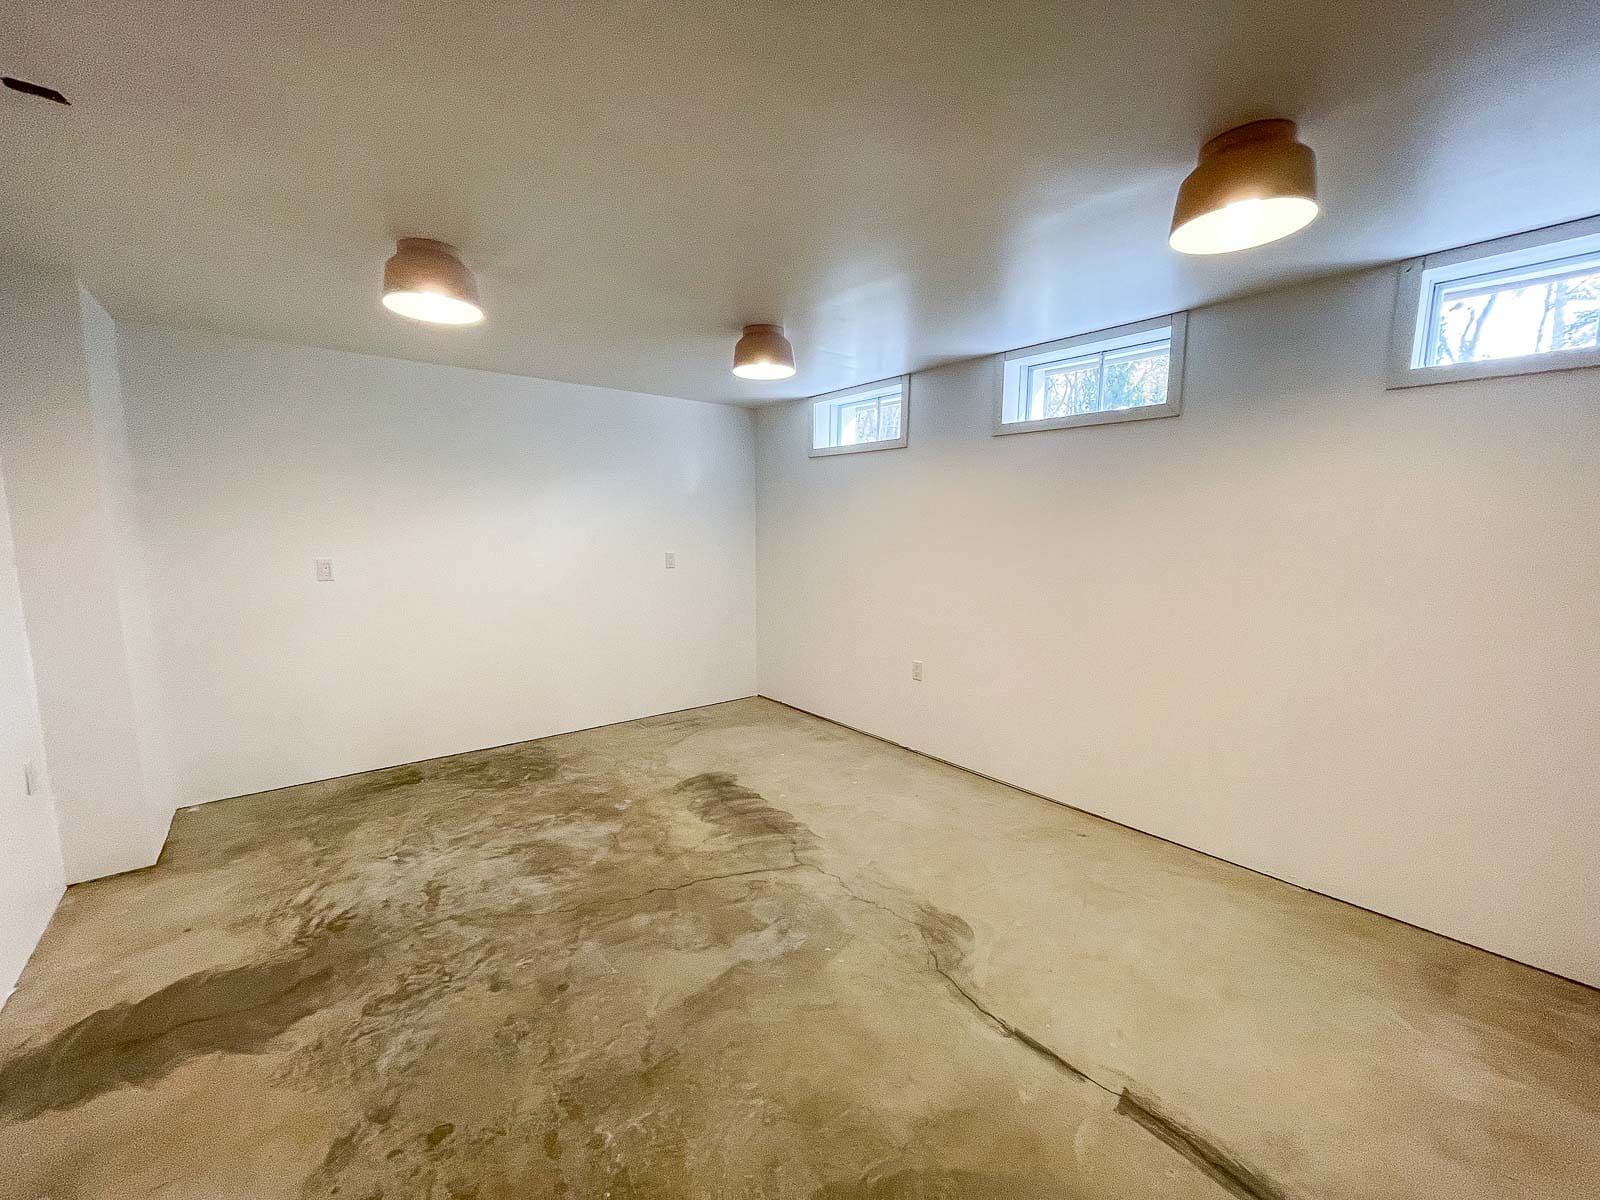
Introducing the Basement Bunker
Obviously I recognized the potential for this space when we first toured the house. I appeared to be dry, had a wall of shelves, was surprisingly bright for being below ground and… was relatively BIG! My first instinct was to be lazy and just to paint it all: white concrete walls, white shelves, white floor. Done. But then my wise friend Emily (who happens to be an amazing organizer here in CT… look her up HERE) came to see the house and strongly encouraged me to take a bigger swing and ‘to things the right way’ meaning drywall, better shelves, etc.
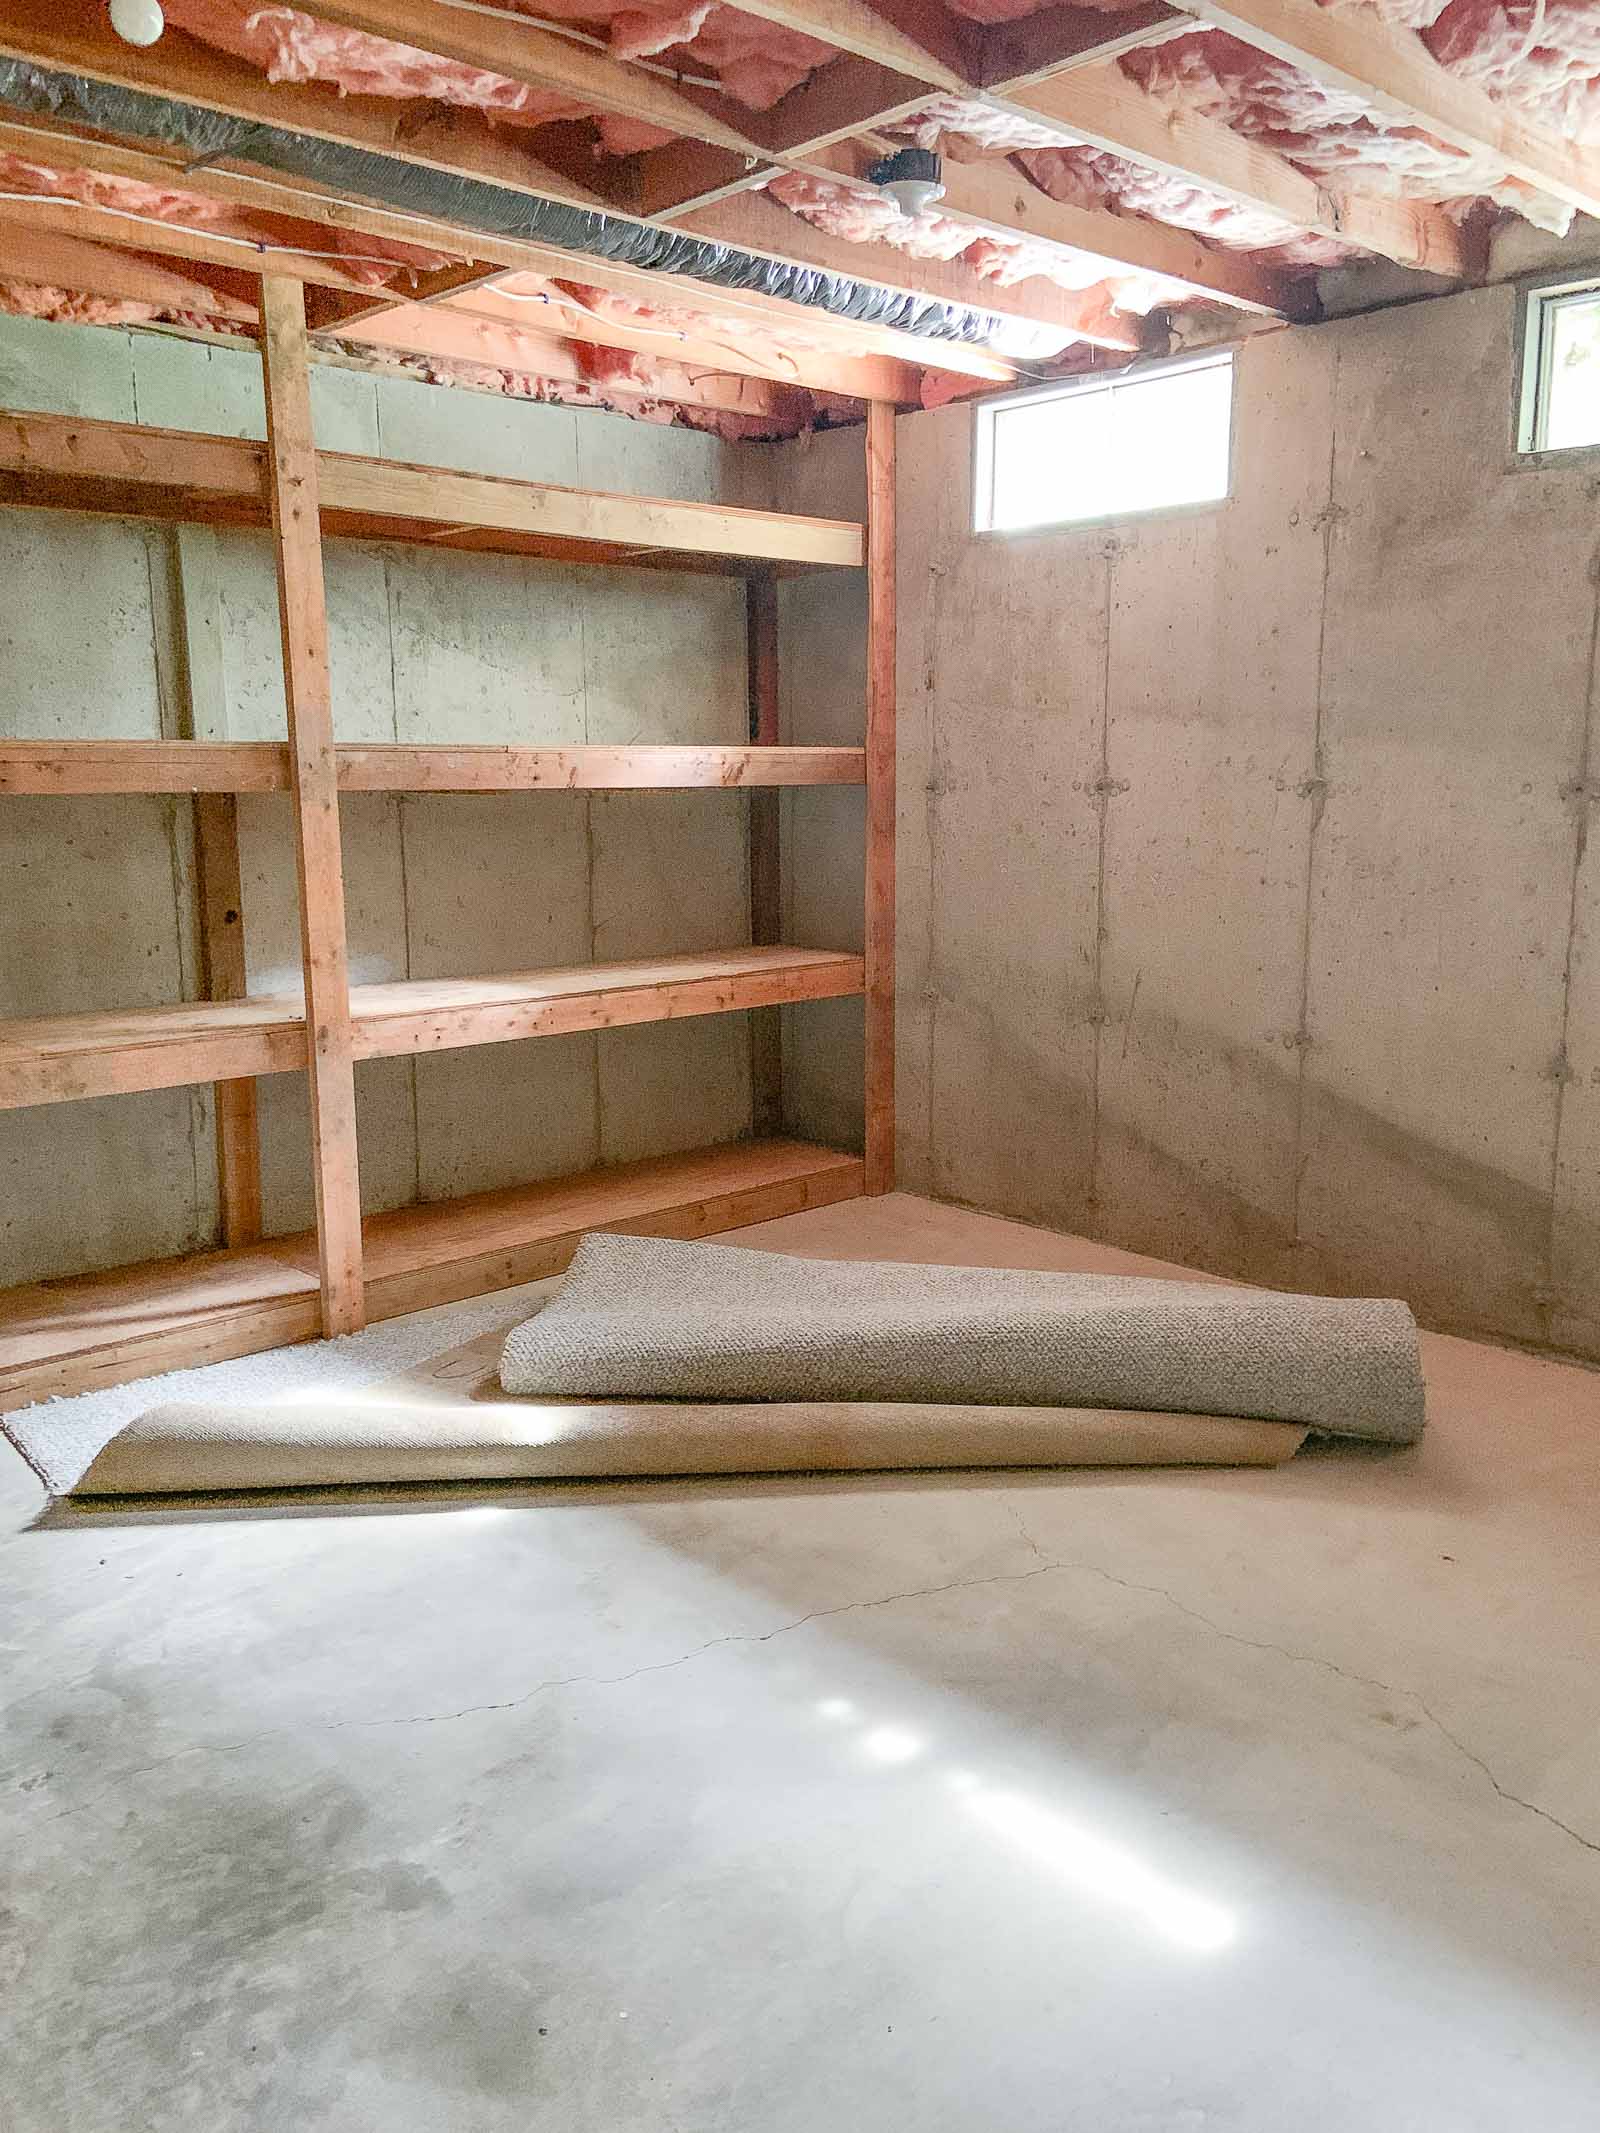
Step 1: Framing and Drywall
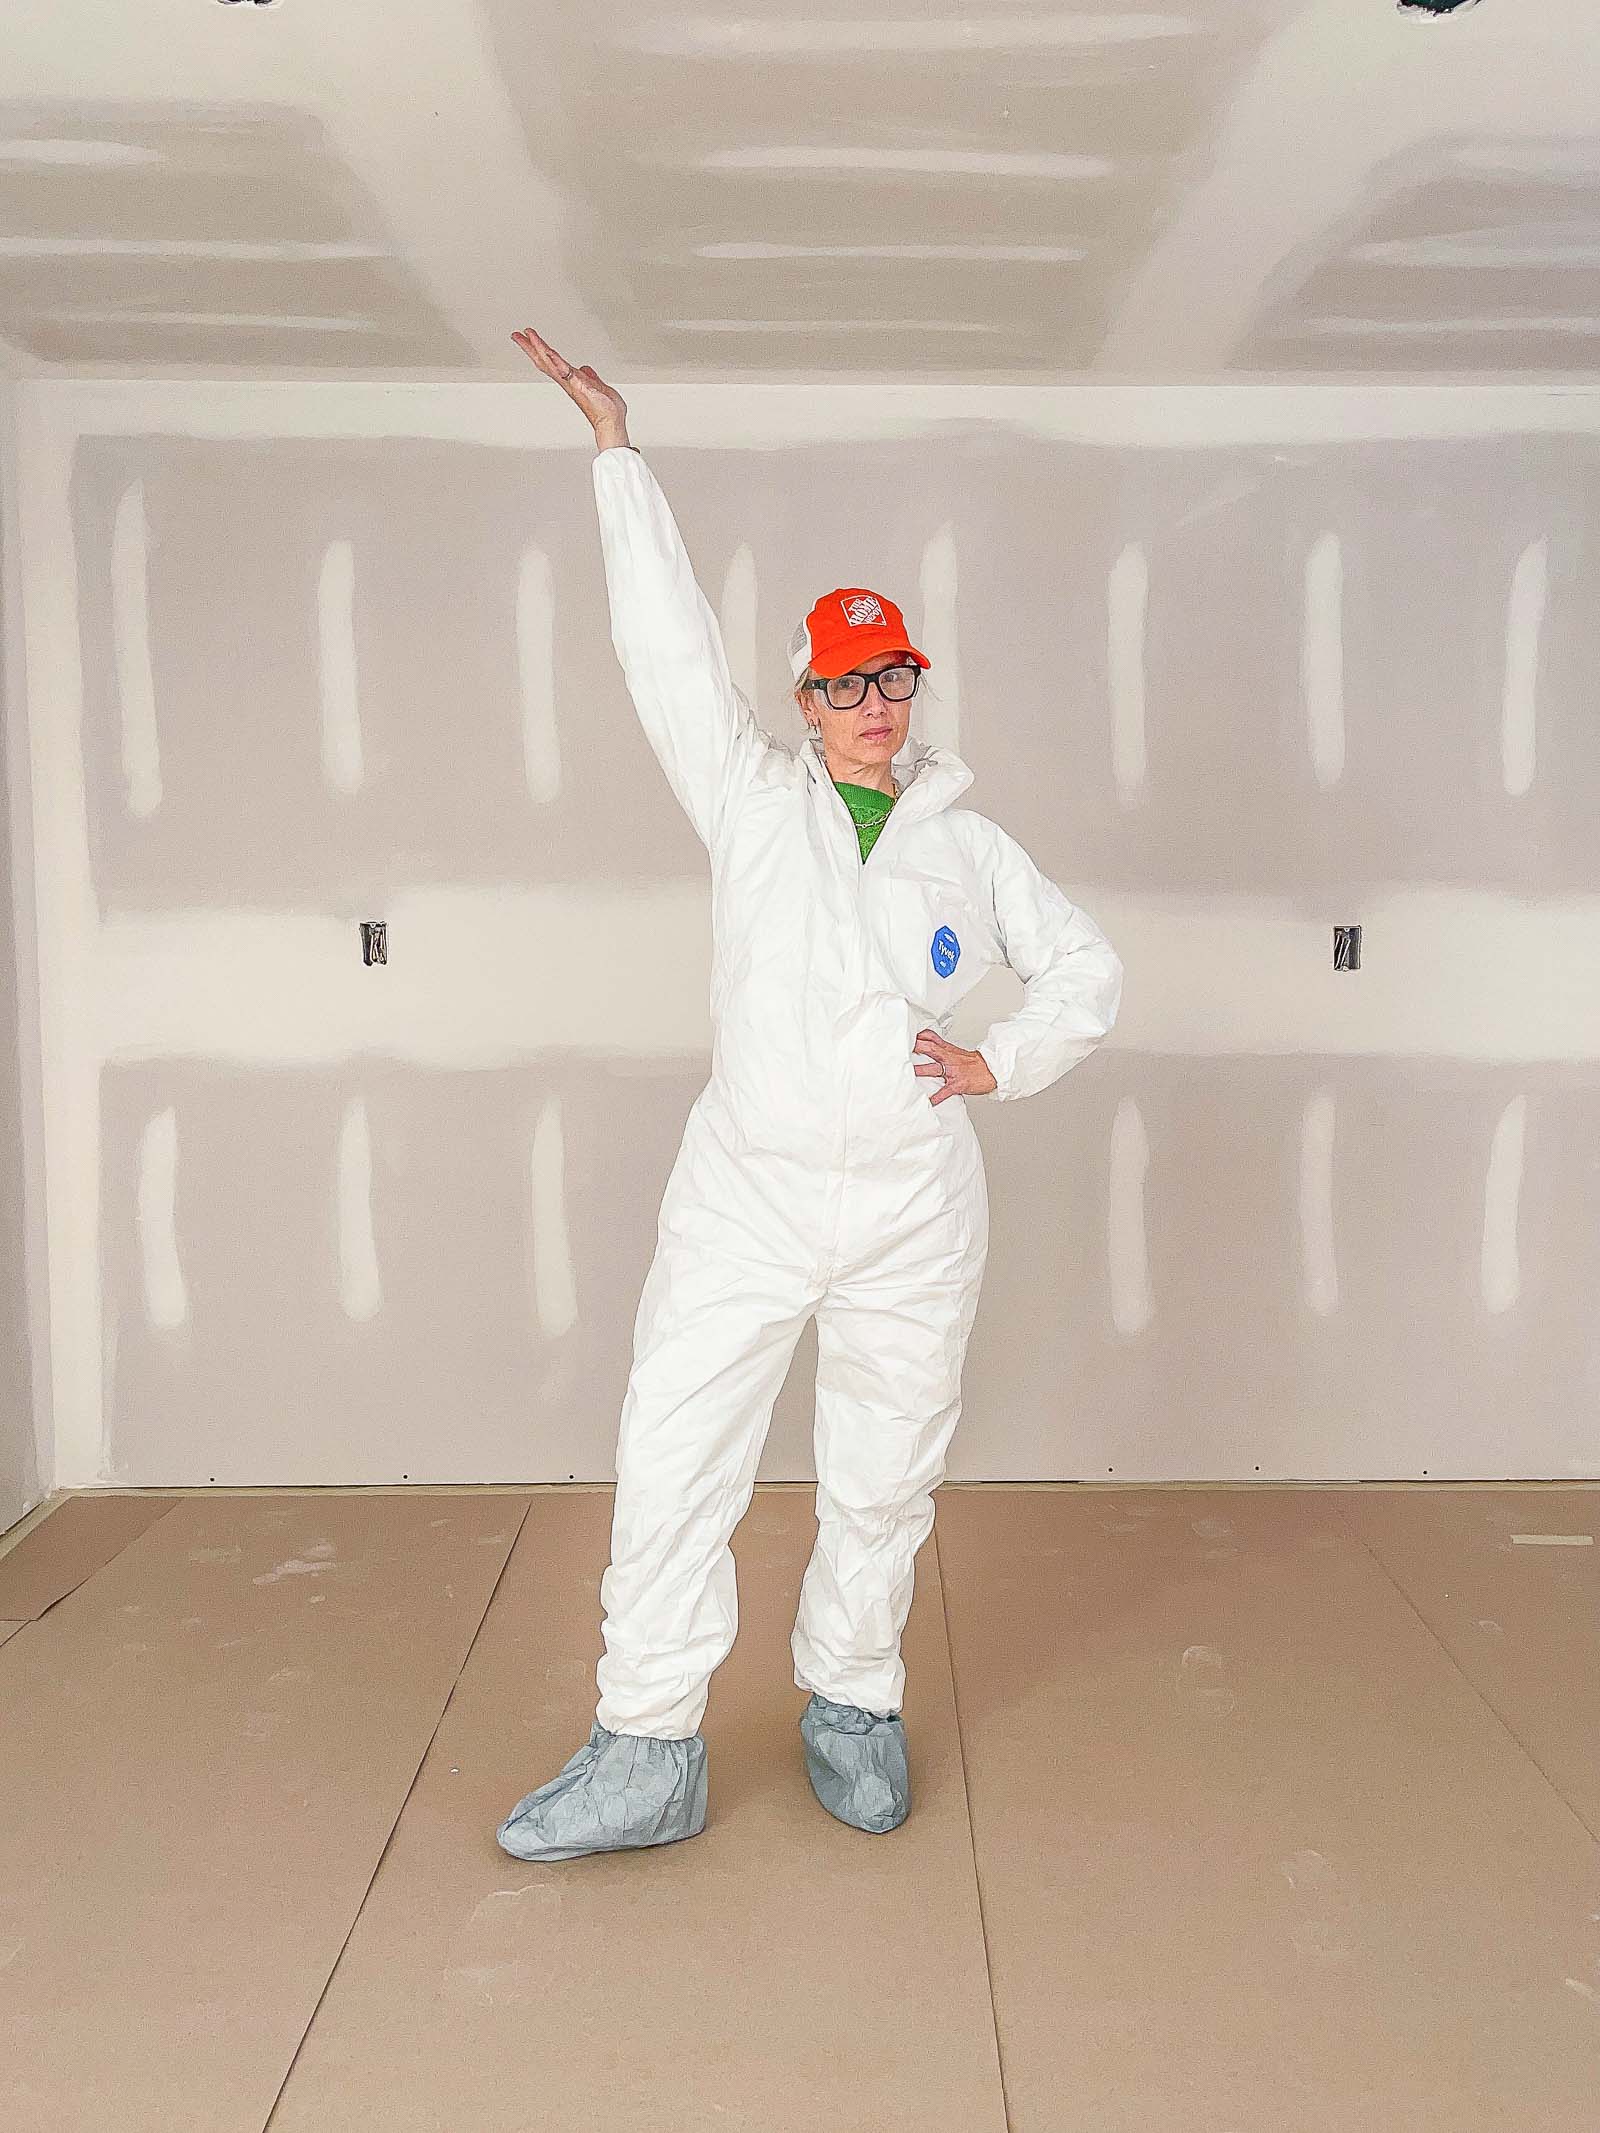
Believe it or not… I was tempted to attempt this whole space myself. “What a better way to learn?!” But then I considered what that would entail and brought in our old contractor to advise me and my mind was changed. I had already taped a piece of plastic to the concrete wall to test for any condensation that would indicate moisture. Thankfully none which meant the plan was to frame in front of the cement walls, insulate and add drywall. The more I looked at the space, the more corners and angles and tricky places I started to notice. I also started to mentally add of the time it would take and it was… long. All to say, I hired this first stage out and don’t regret it even a little bit!
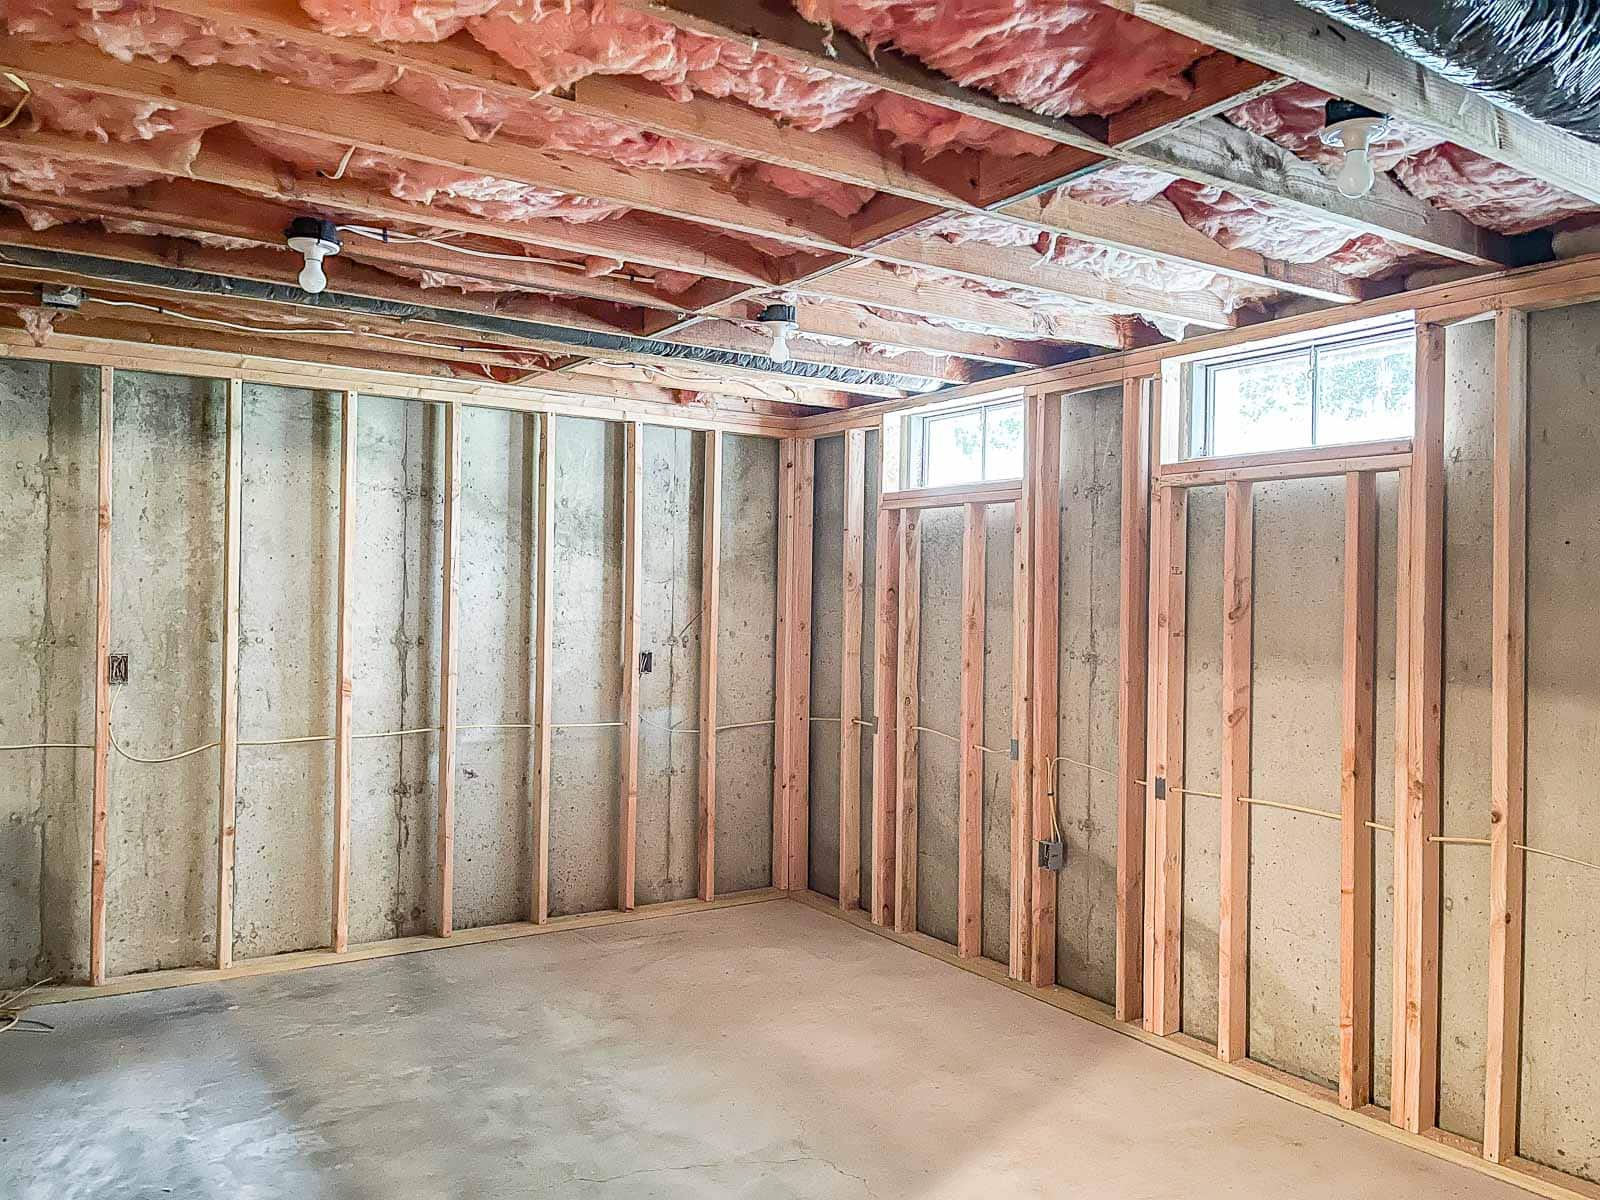
My contractor sent a few guys to demo the shelving and frame the space. Then another group came to install the drywall/ sheetrock, tape and mud. At this point, the space was feeling about a million percent brighter and cleaner and I was thrilled to keep the momentum going. Emily suggested a better closet along the back wall, but to do so would have meant losing even more space to framing out the closet doors so I opted for the next best thing: cabinets and a DIY bookshelf. But first… paint.
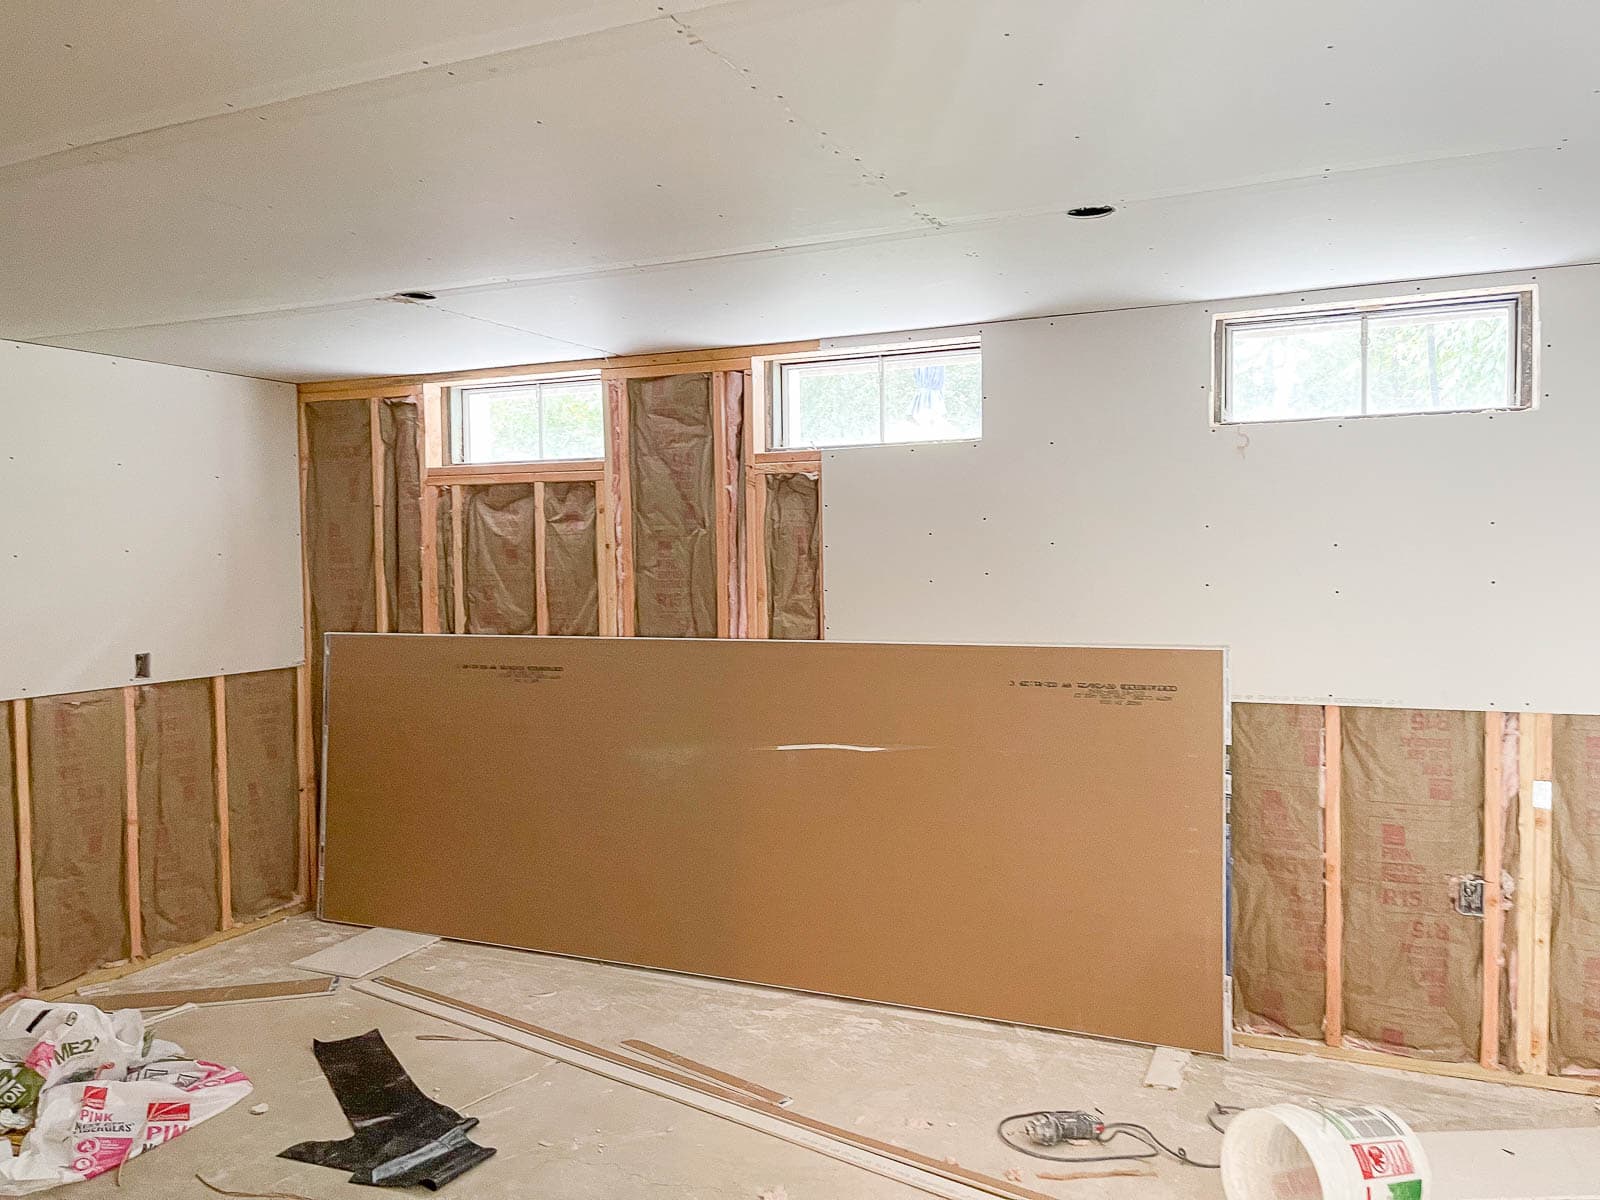
Step 2: Painting the Walls (and Window Trim)
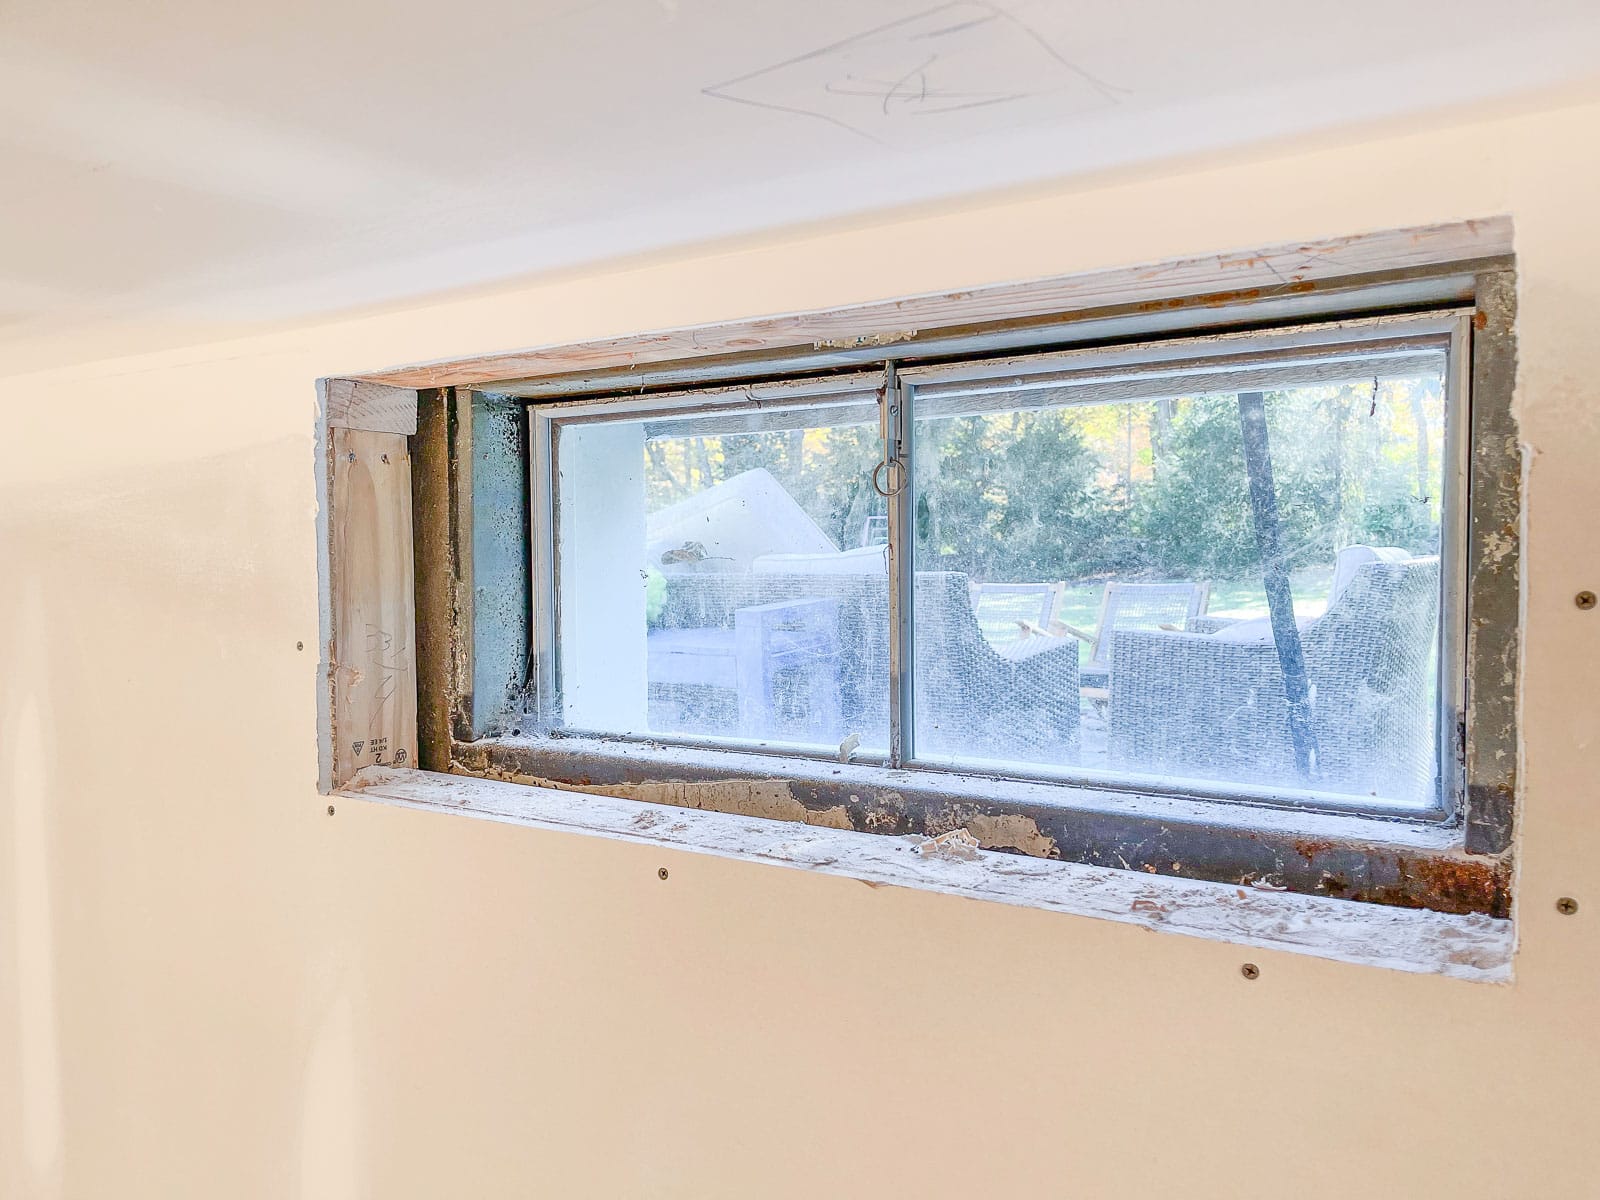
Before painting, I added trim to the inside of the window wells. Confession… I still need to go back and caulk/ fill in the nail holes. I used primed trim and nailed it in place around the three windows.
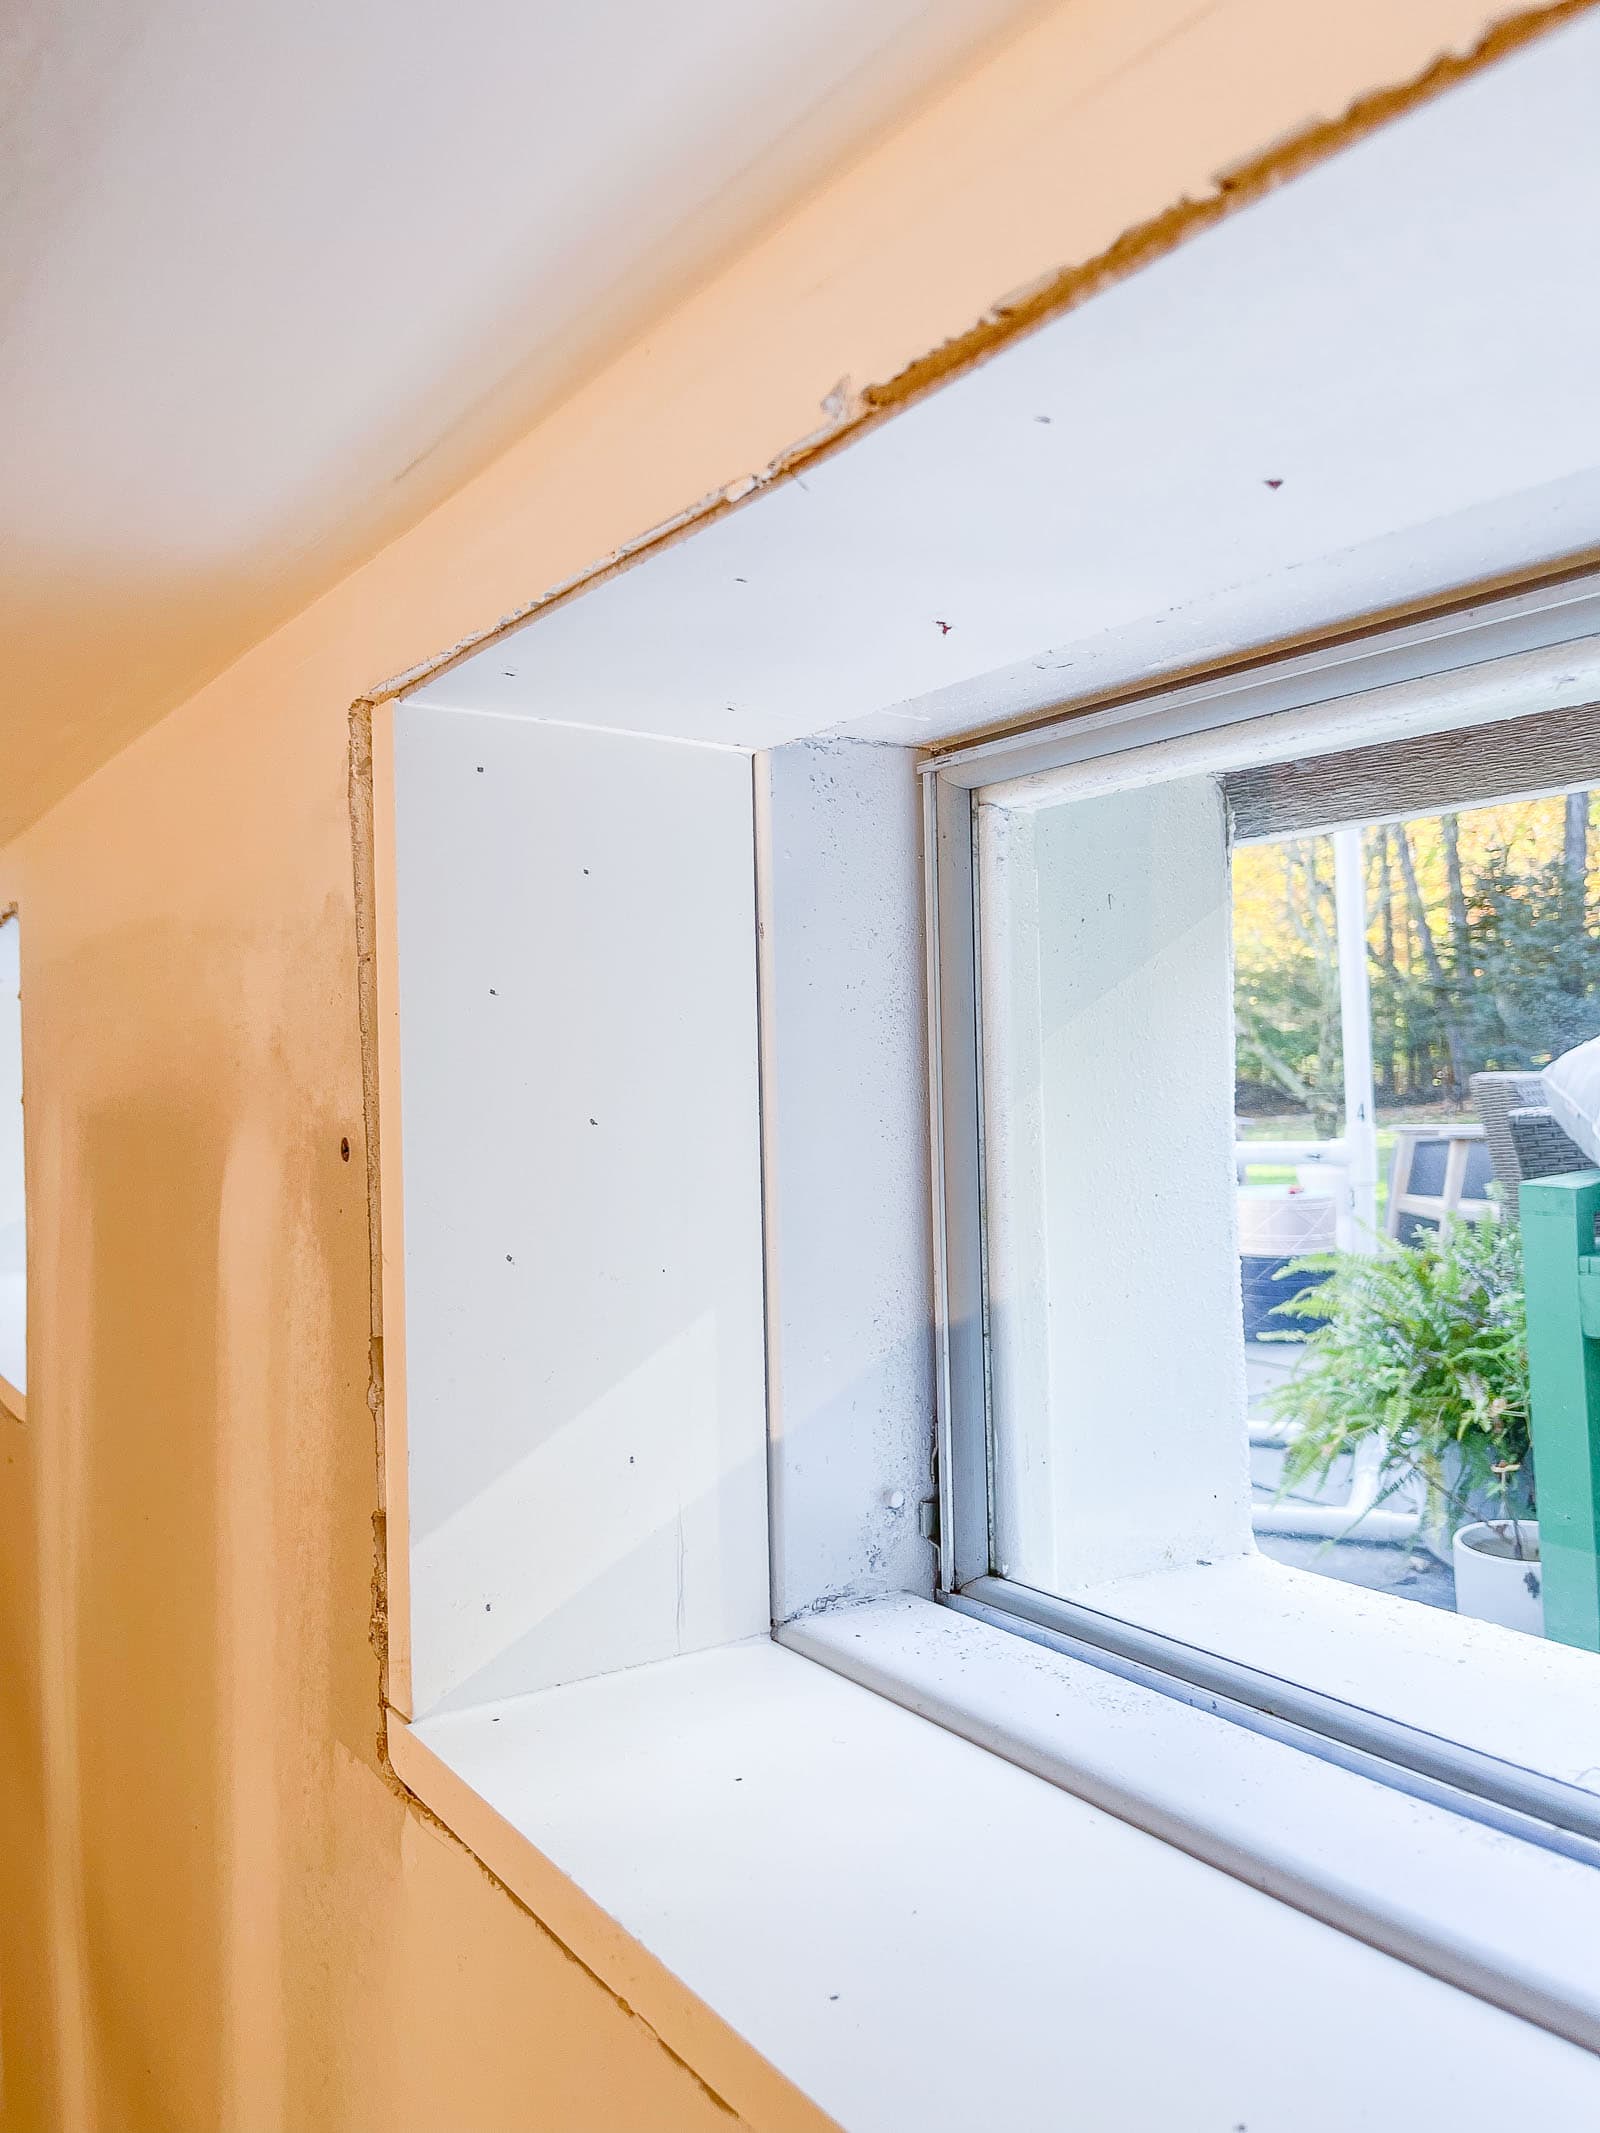
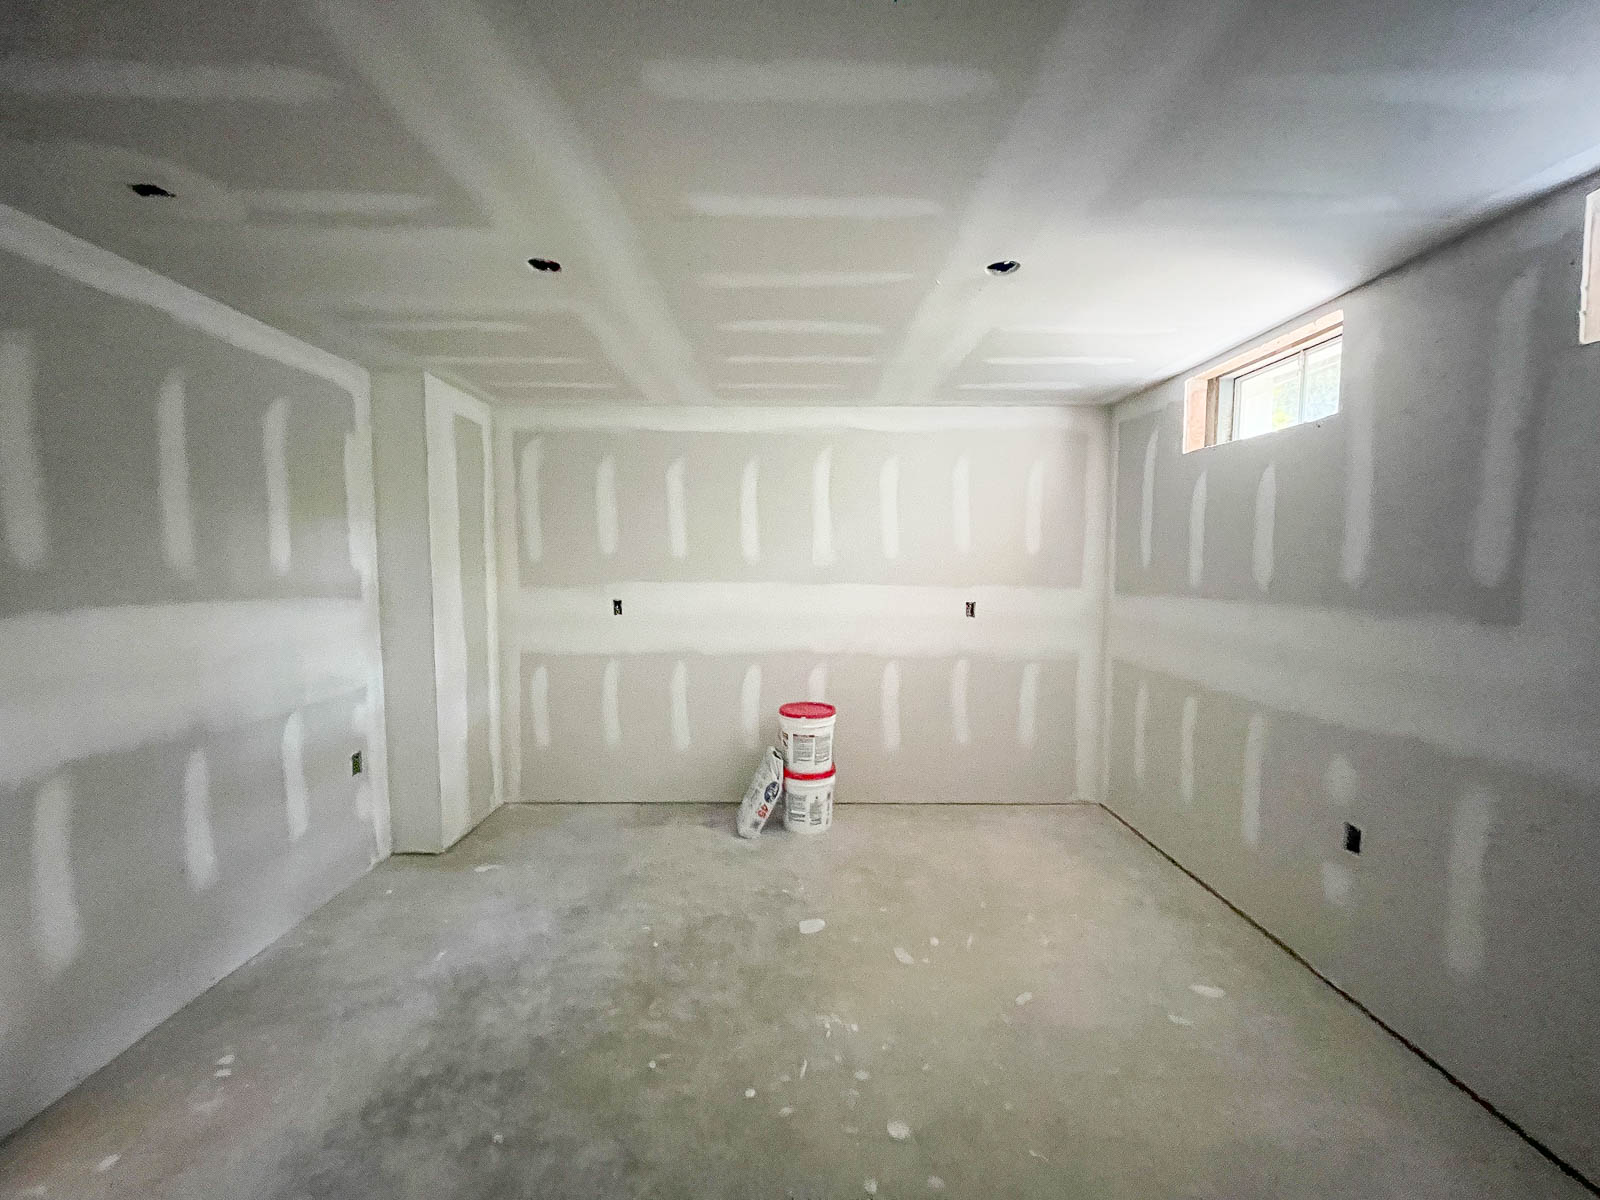
Prepping drywall for painting is a little different than a regular wall. The tape seams were in pretty good shape but I sanded them once more and wiped them clean to remove any drywall dust. Drywall is more porous than a painted wall so it’s essential that you prime drywall before painting. My Home Depot paint expert recommended this stuff which was much cheaper than a regular paint primer. As with any paint project, the prep is the most tedious part. I taped off the windows and trim as well as the floor. Even though I was planning to paint the floor, I didn’t know how this drywall primer would do underneath my masonry paint so I didn’t want to risk it.
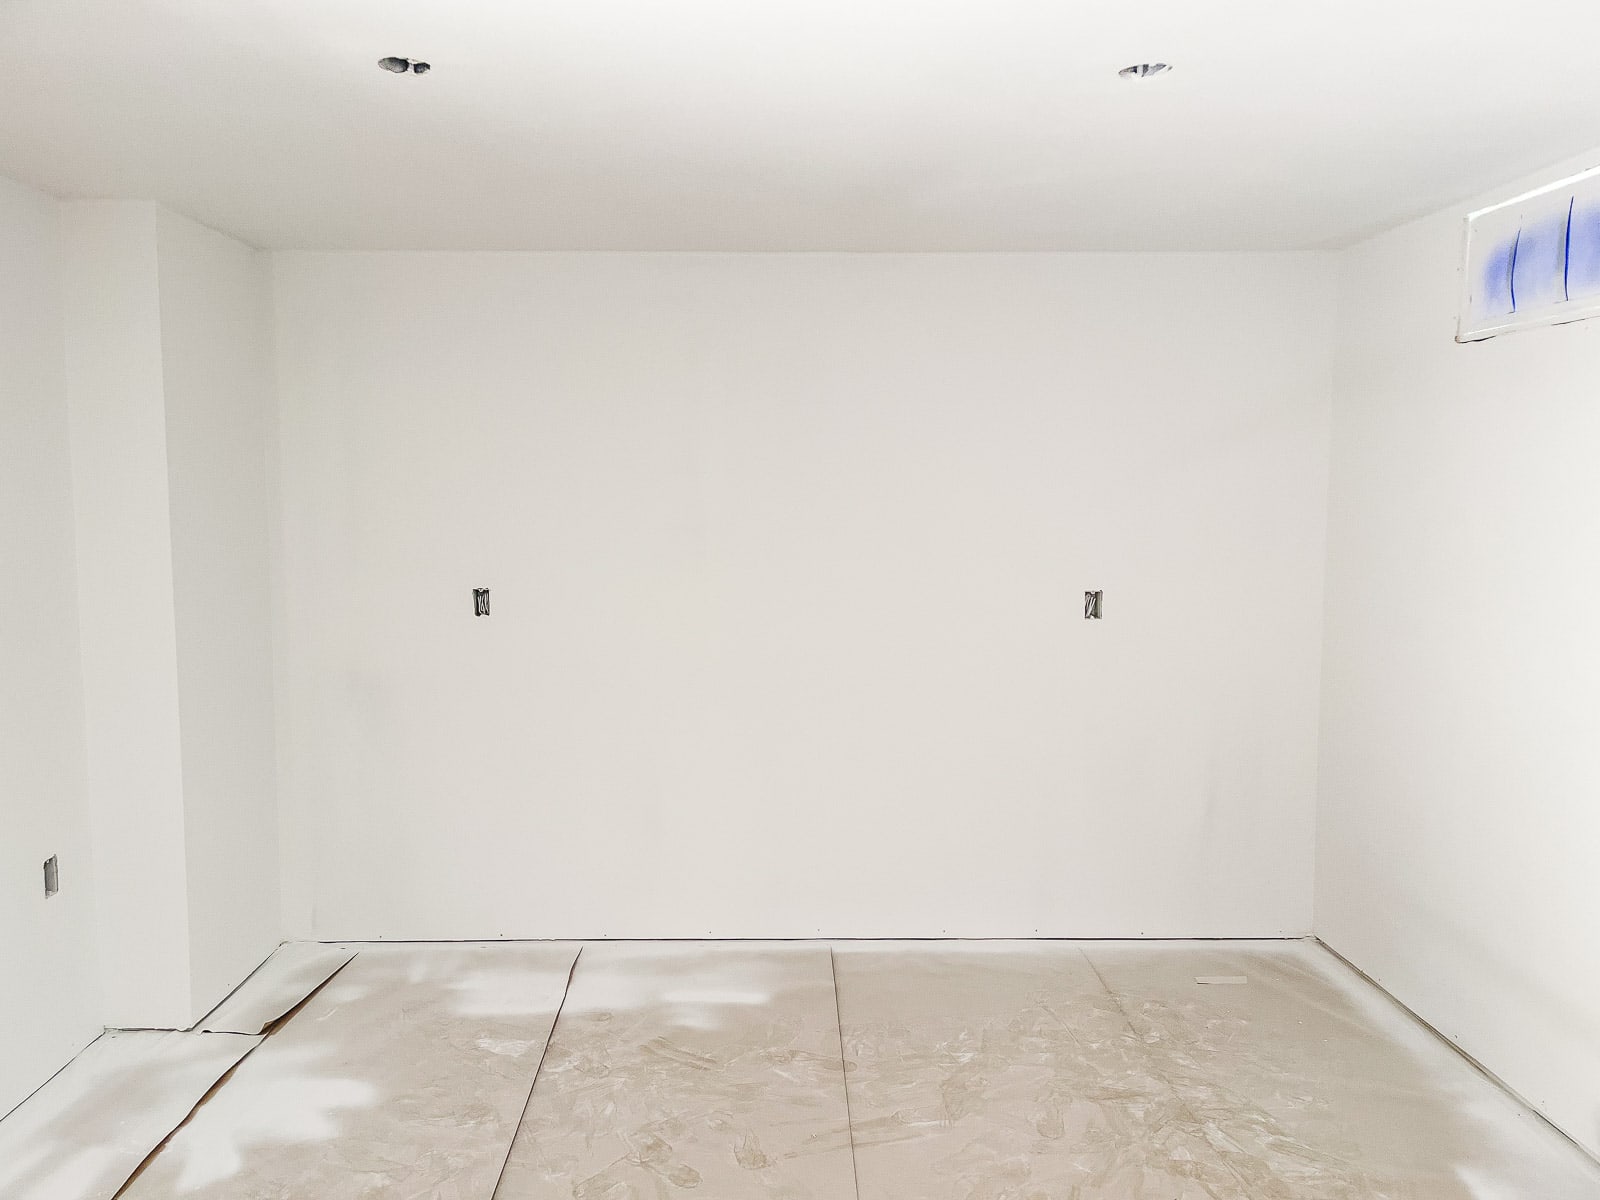
I used my favorite sprayer and to give the ceiling and the walls a coat of drywall primer and then went back the next day with two coats of white paint. (I’m literally using white paint straight out of the can here… no tint.) I was excited to pull down the paper covering the windows/ trim to reveal the new clean bright walls!
Step 3: Pendant lights
I get asked about the lights in here ALL the time. I got them from Home Depot and I love them. Click here for a link. I quickly installed these lights which added a whole legit dimension to this newly created space. I also added a frame to the windows… so much better.
Step 4: Painting the Floor
Originally I was planning on doing a sheet vinyl floor since there were some fun patterns available on Etsy. When I got the samples… they didn’t play nice with the bench that I was planning to bring down to the space so I got nervous and decided just to paint the floor a bold bright color. (I toyed with stenciling the floor for a hot second, but ultimately decided that was a ton of work that might not pay off so… work harder not smarter.) I tried to color match the blue on the bench but it felt a little bright so I added some darker blue I had left over from this patio project. For both floors, I went with the recommended porch and patio paint and it’s held up great!
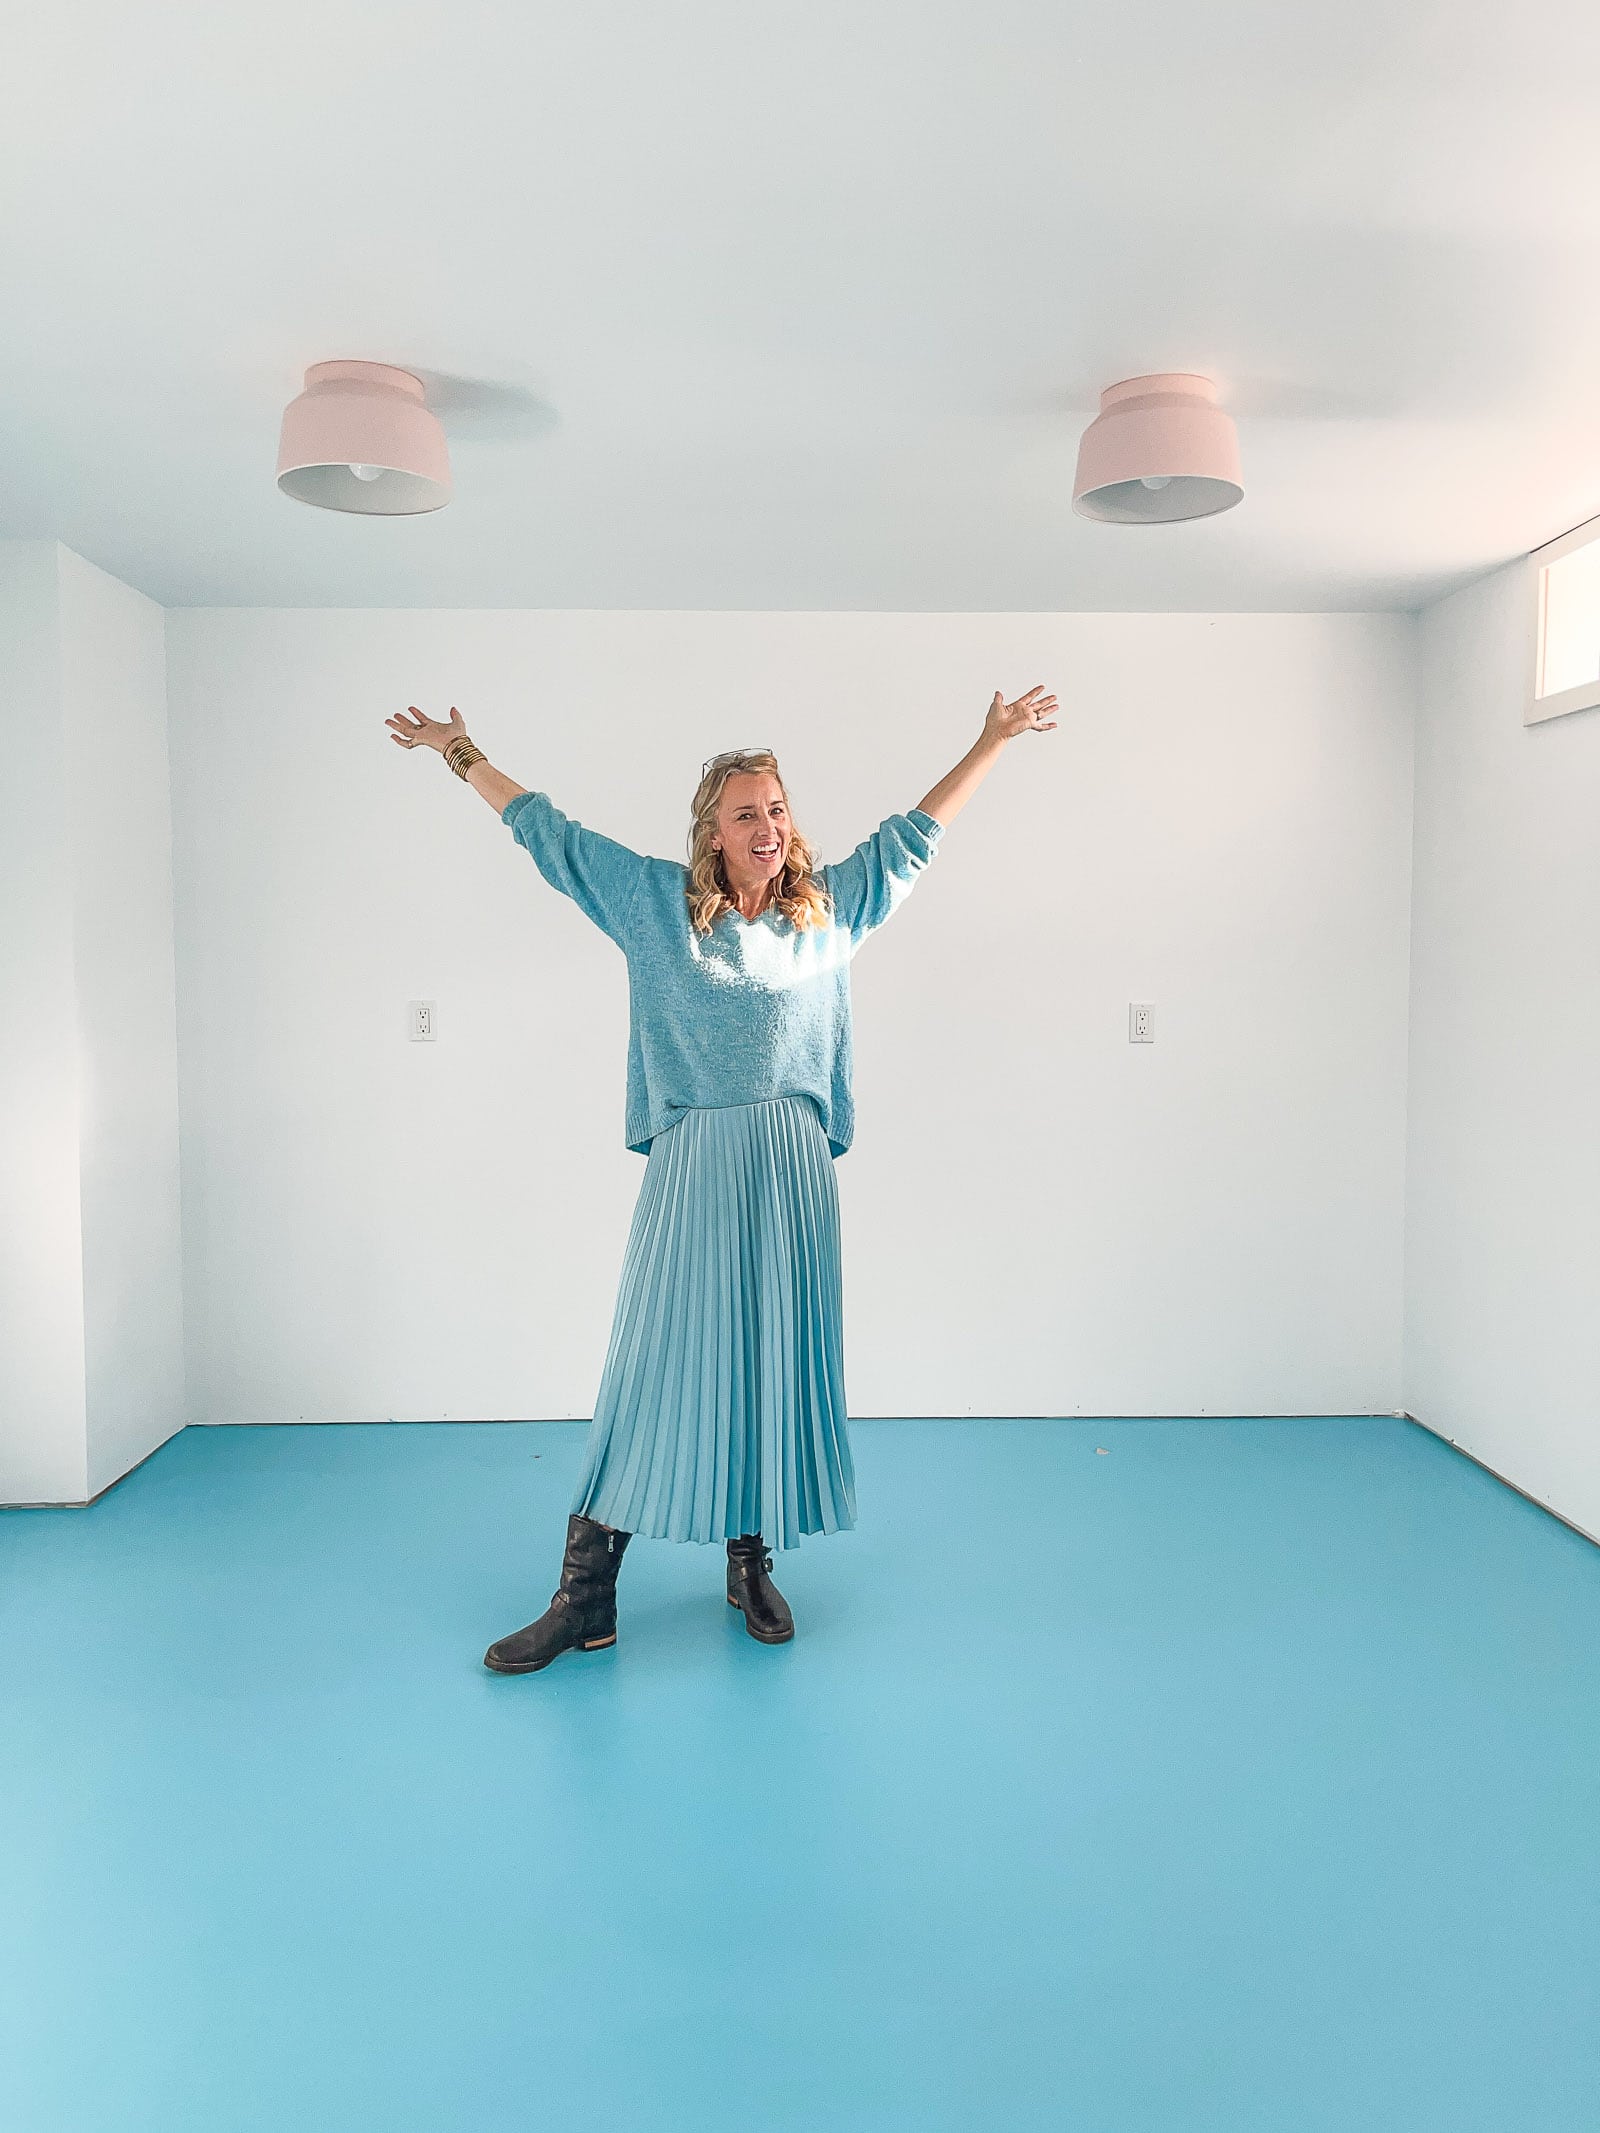
I did take the time to mop the floor in order to remove any drywall dust and paint overspray. I also used a concrete patch mixture to fill in a crack down the middle of the floor. It’s not perfect, but it smoothed out pretty well so you don’t notice it much now that it’s painted.
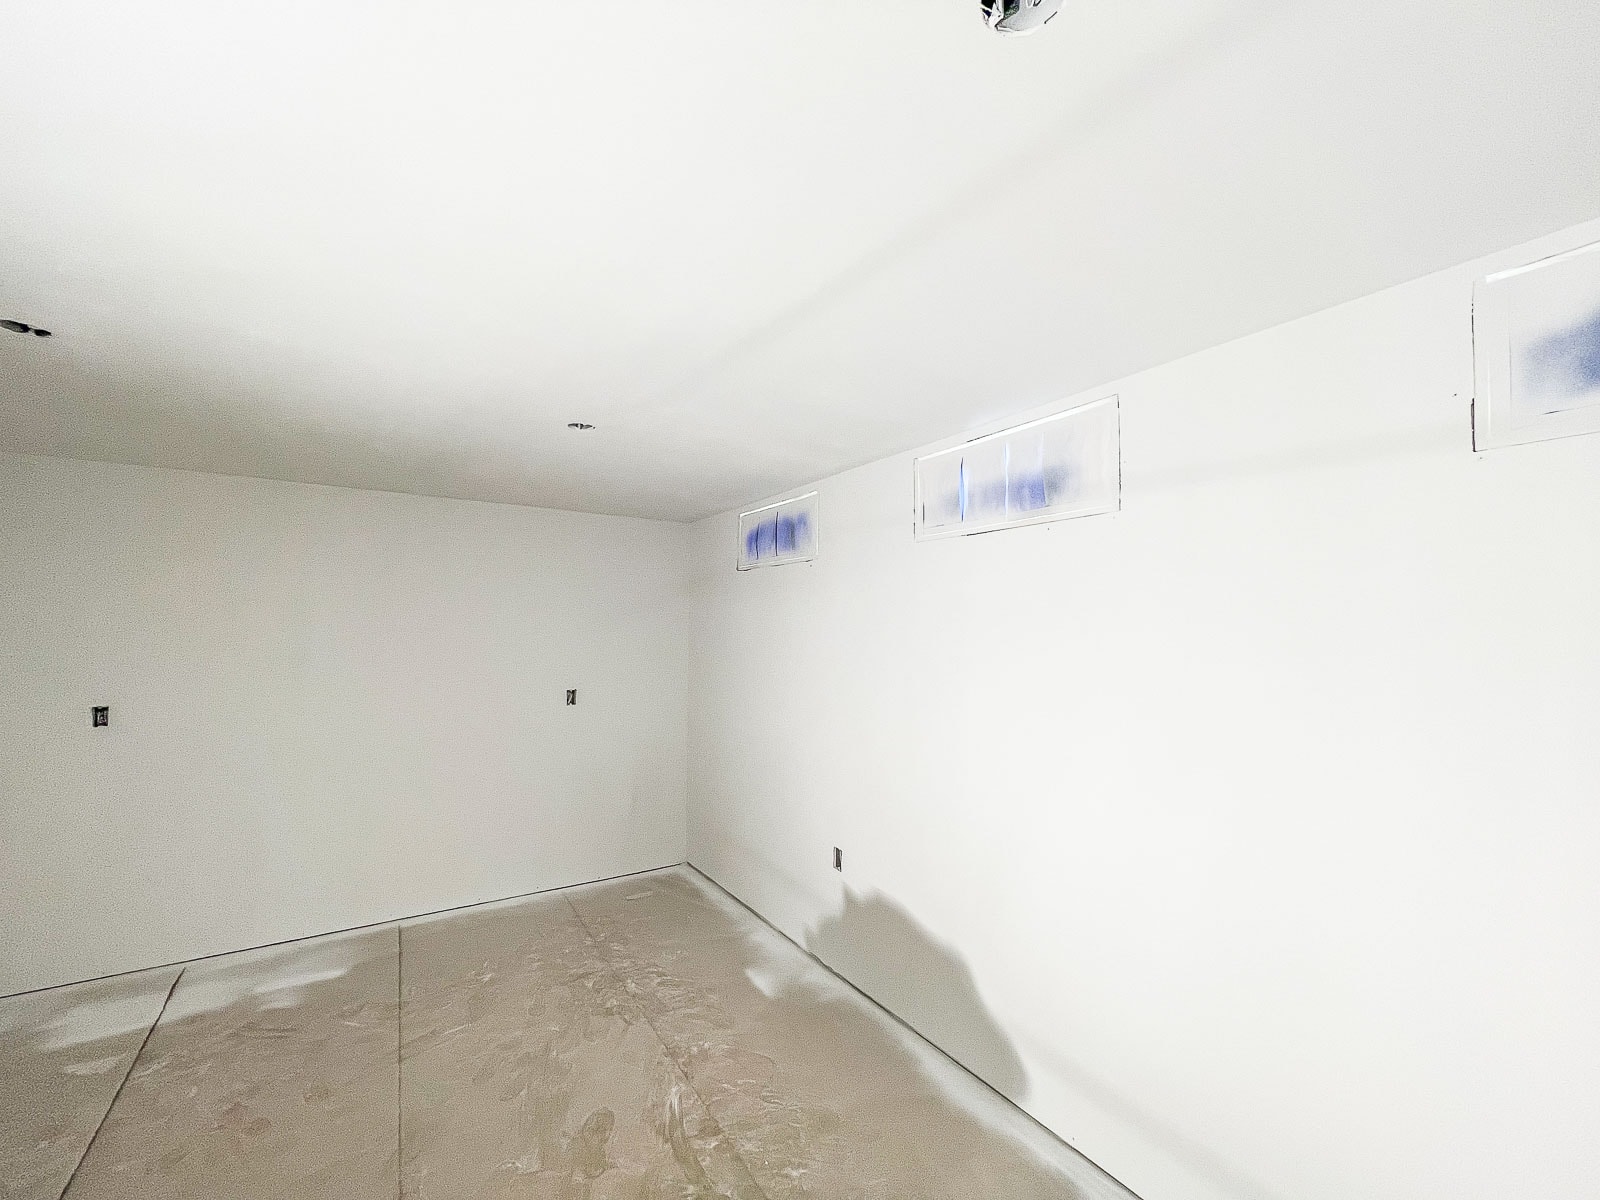
Step 5: Electric Outlets
Back when the walls were just studs and before drywall had been installed, I had our electrician come and wire a bunch of outlets. With the walls exposed, this took him about an hour and a half. The drywall guys cut around the outlet boxes so all I had to do was go in and wire the actual outlets… if you’re comfortable with basic electrical work, this is such a good cost saving measure.
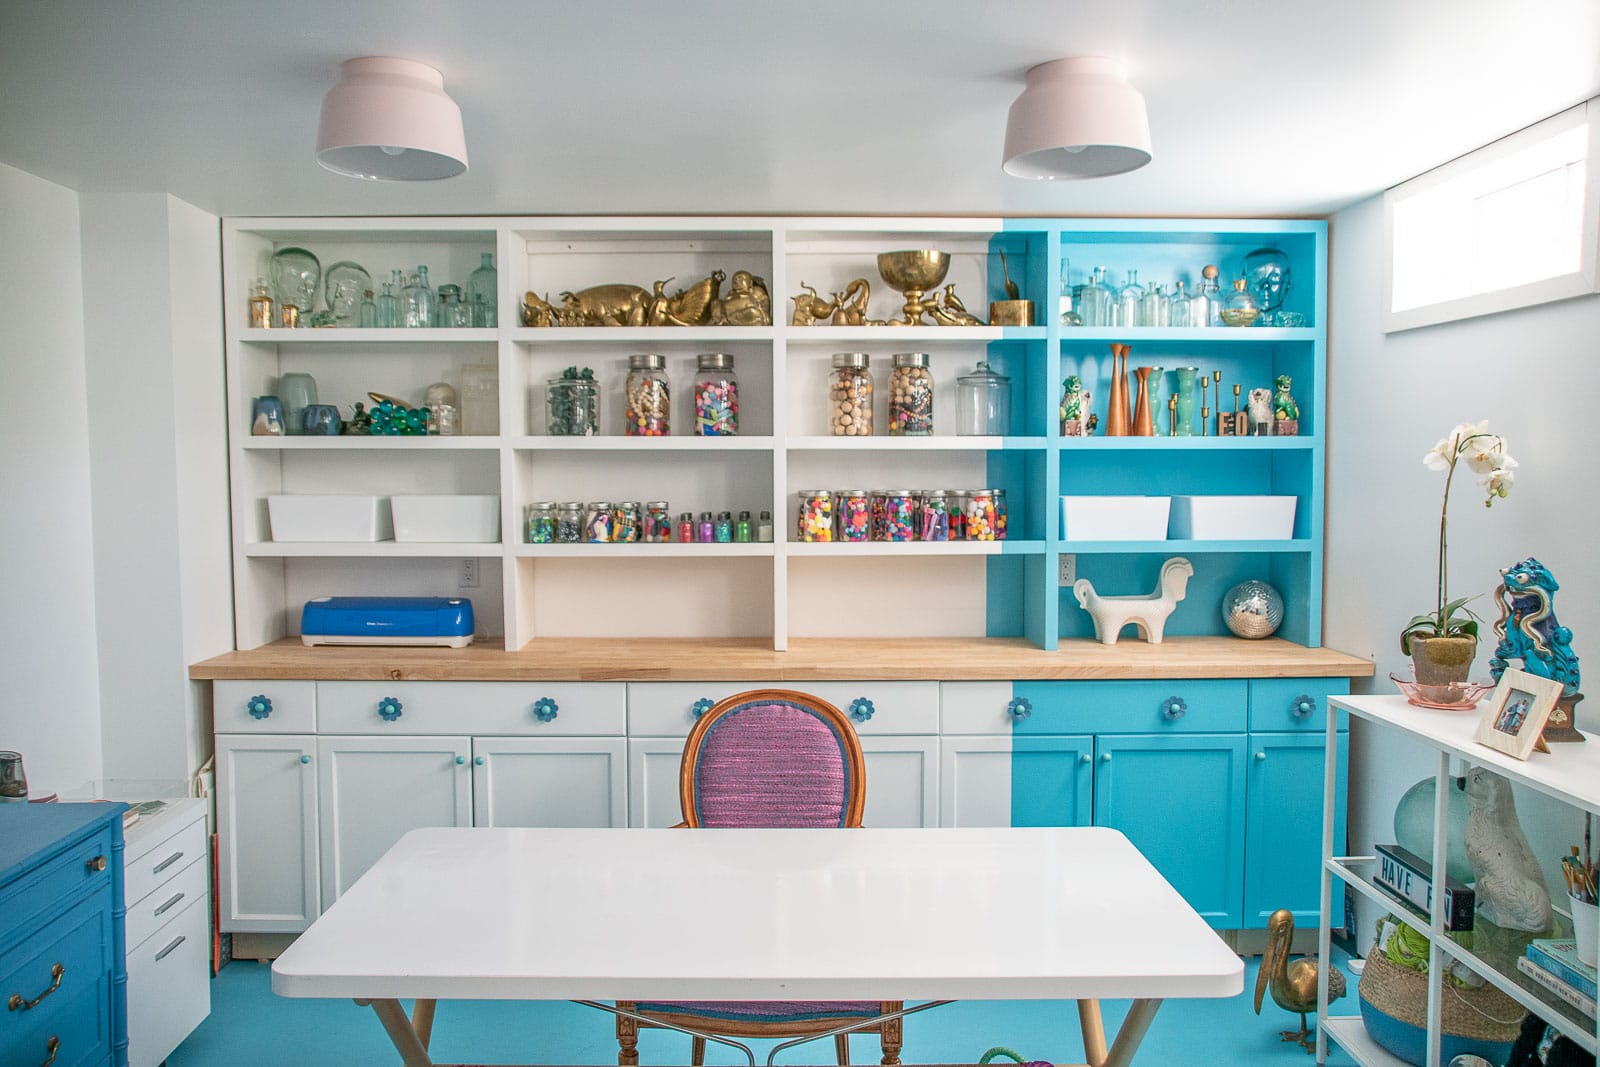
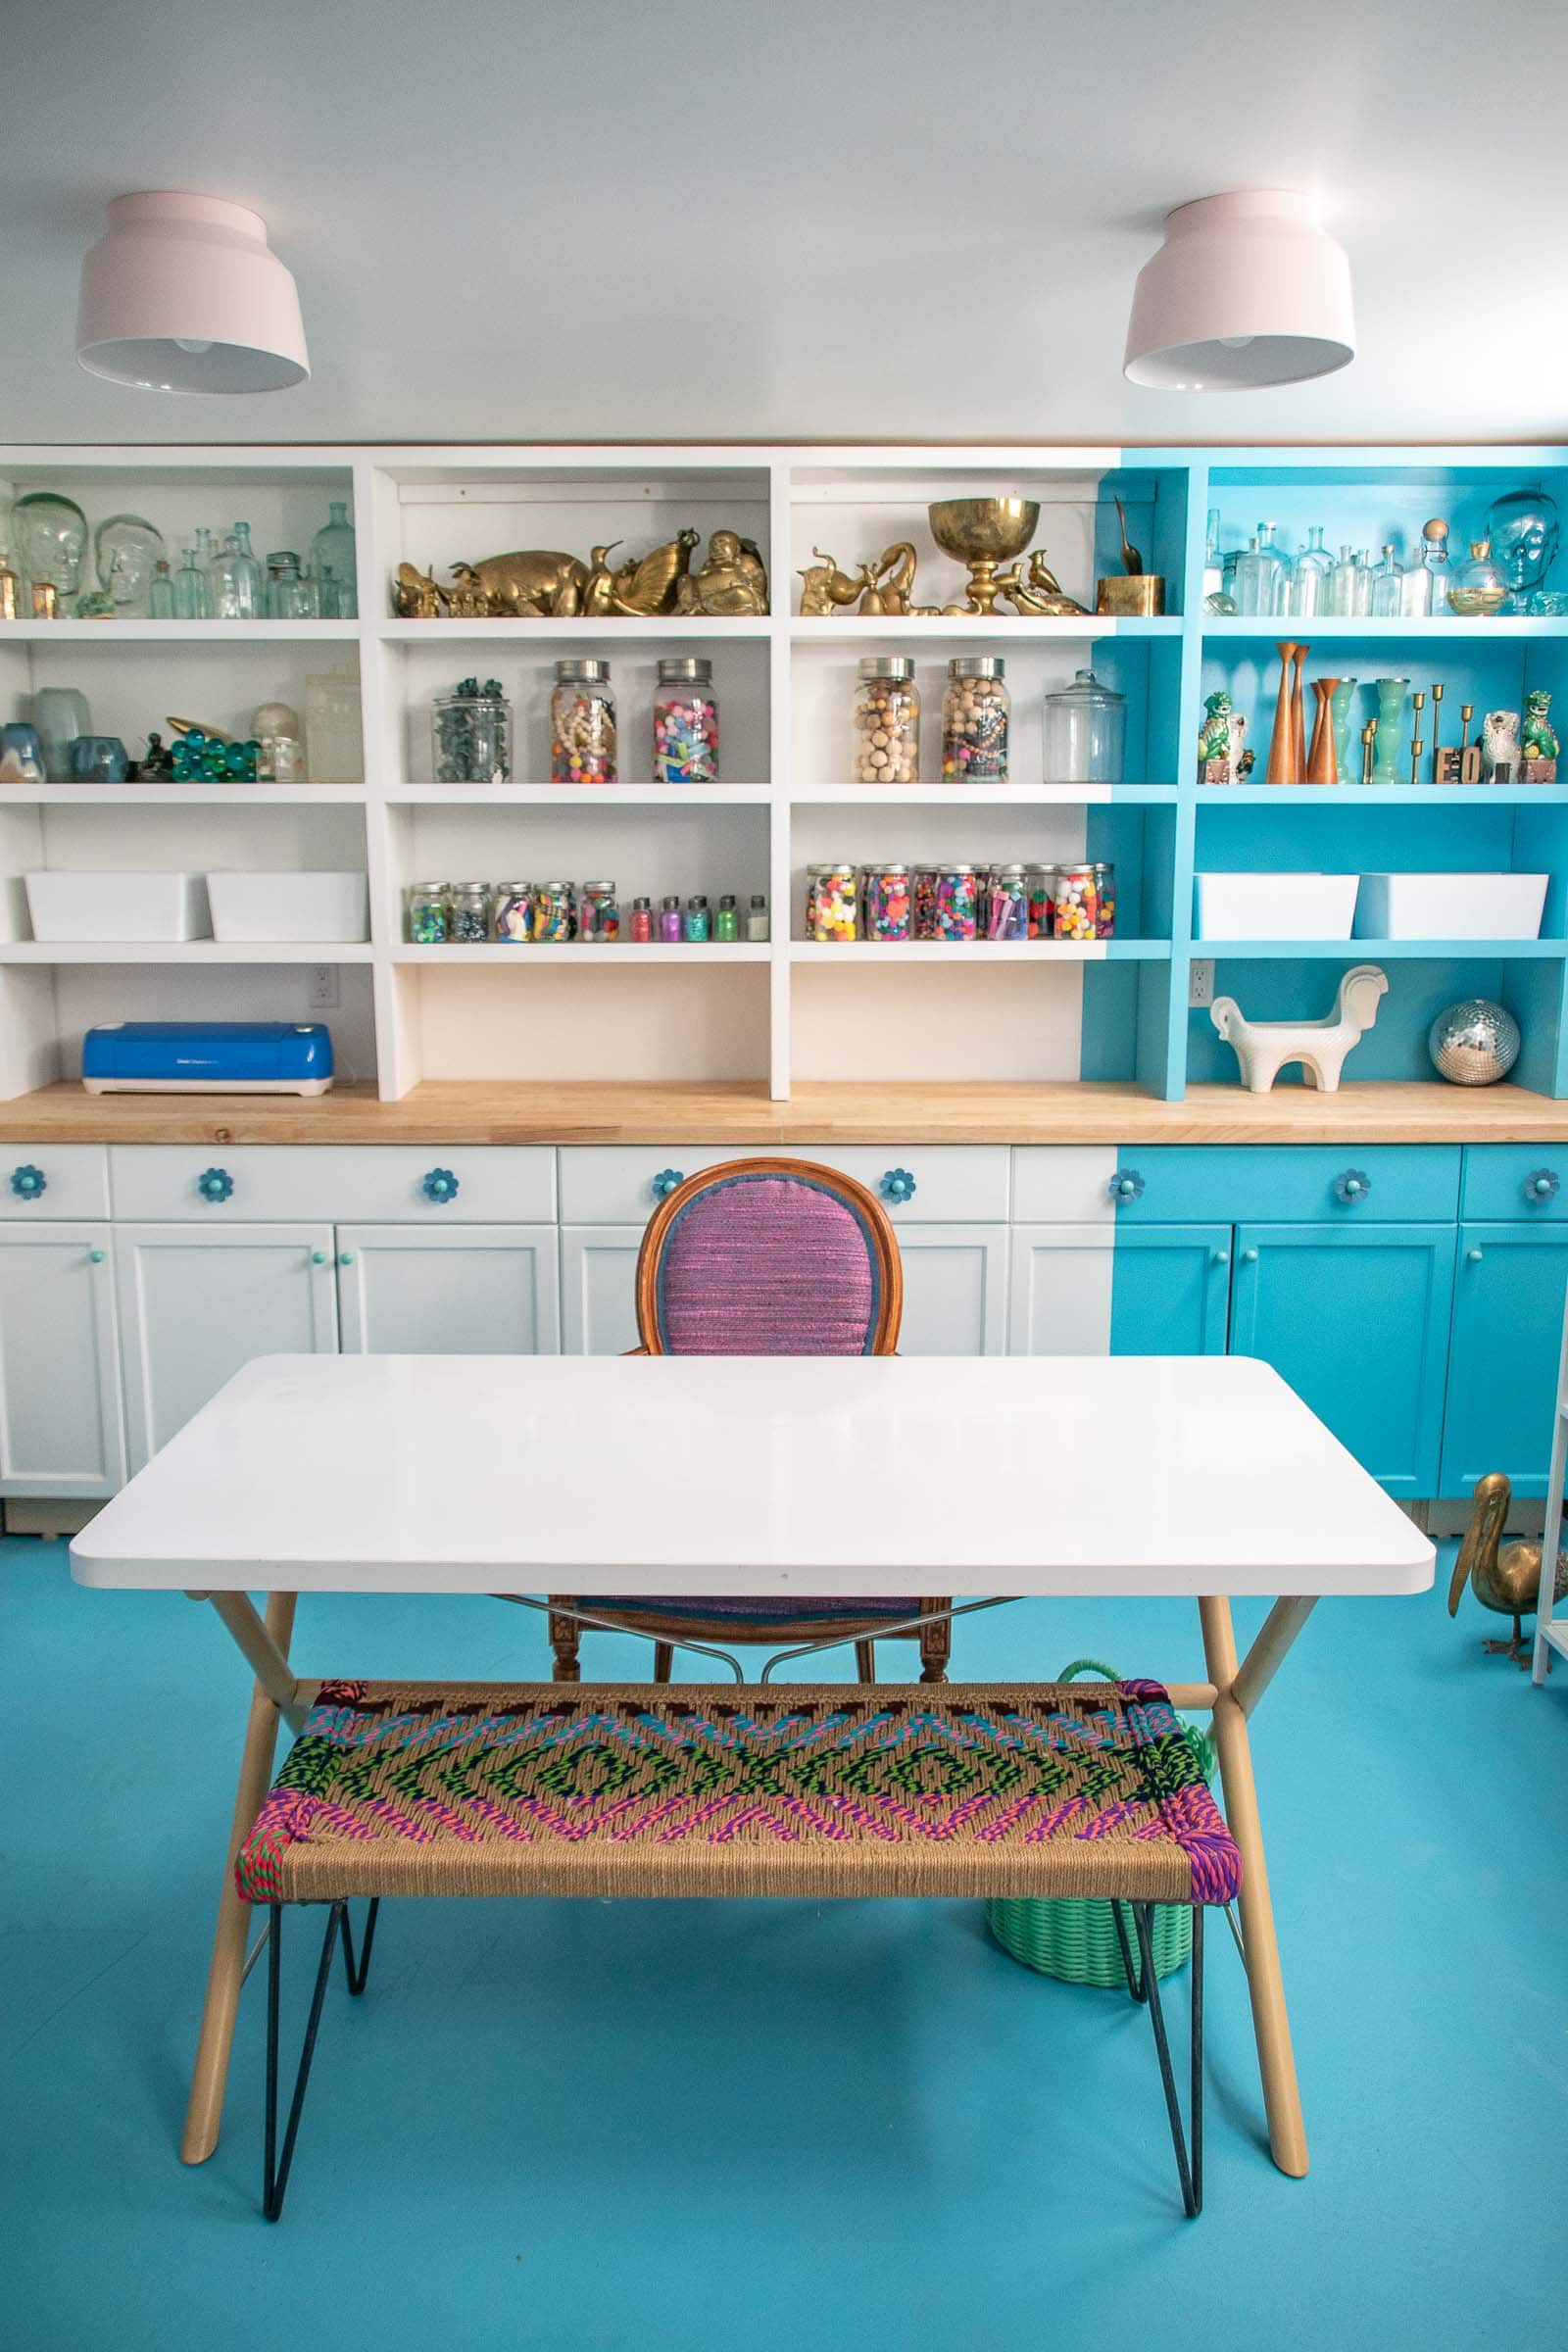
Step 6. Storage
I admit that coming back to build out this storage wall took a while. I had a bit of project fatique after painting the whole space so I needed to recharge my DIY batteries. I ordered these unpainted base cabinets from Home Depot making sure to order ones that would fit along that back wall. I made sure these cabinets were level and then anchored each of them to the studs in the back wall and to each other. There are lots of counter options (we used a couple upstairs in our kitchen) but I chose basic budget friendly butcher block also from Home Depot. I needed two pieces of it and cut each one down so they would evenly fit. Note: cutting butcher block is no joke. It’s thick and dense and you’ll need a good saw with a sharp blade. I used my circular saw and it was not happy… I was able to make to somewhat ugly cuts but the rough edges are thankfully hiding against either side wall.
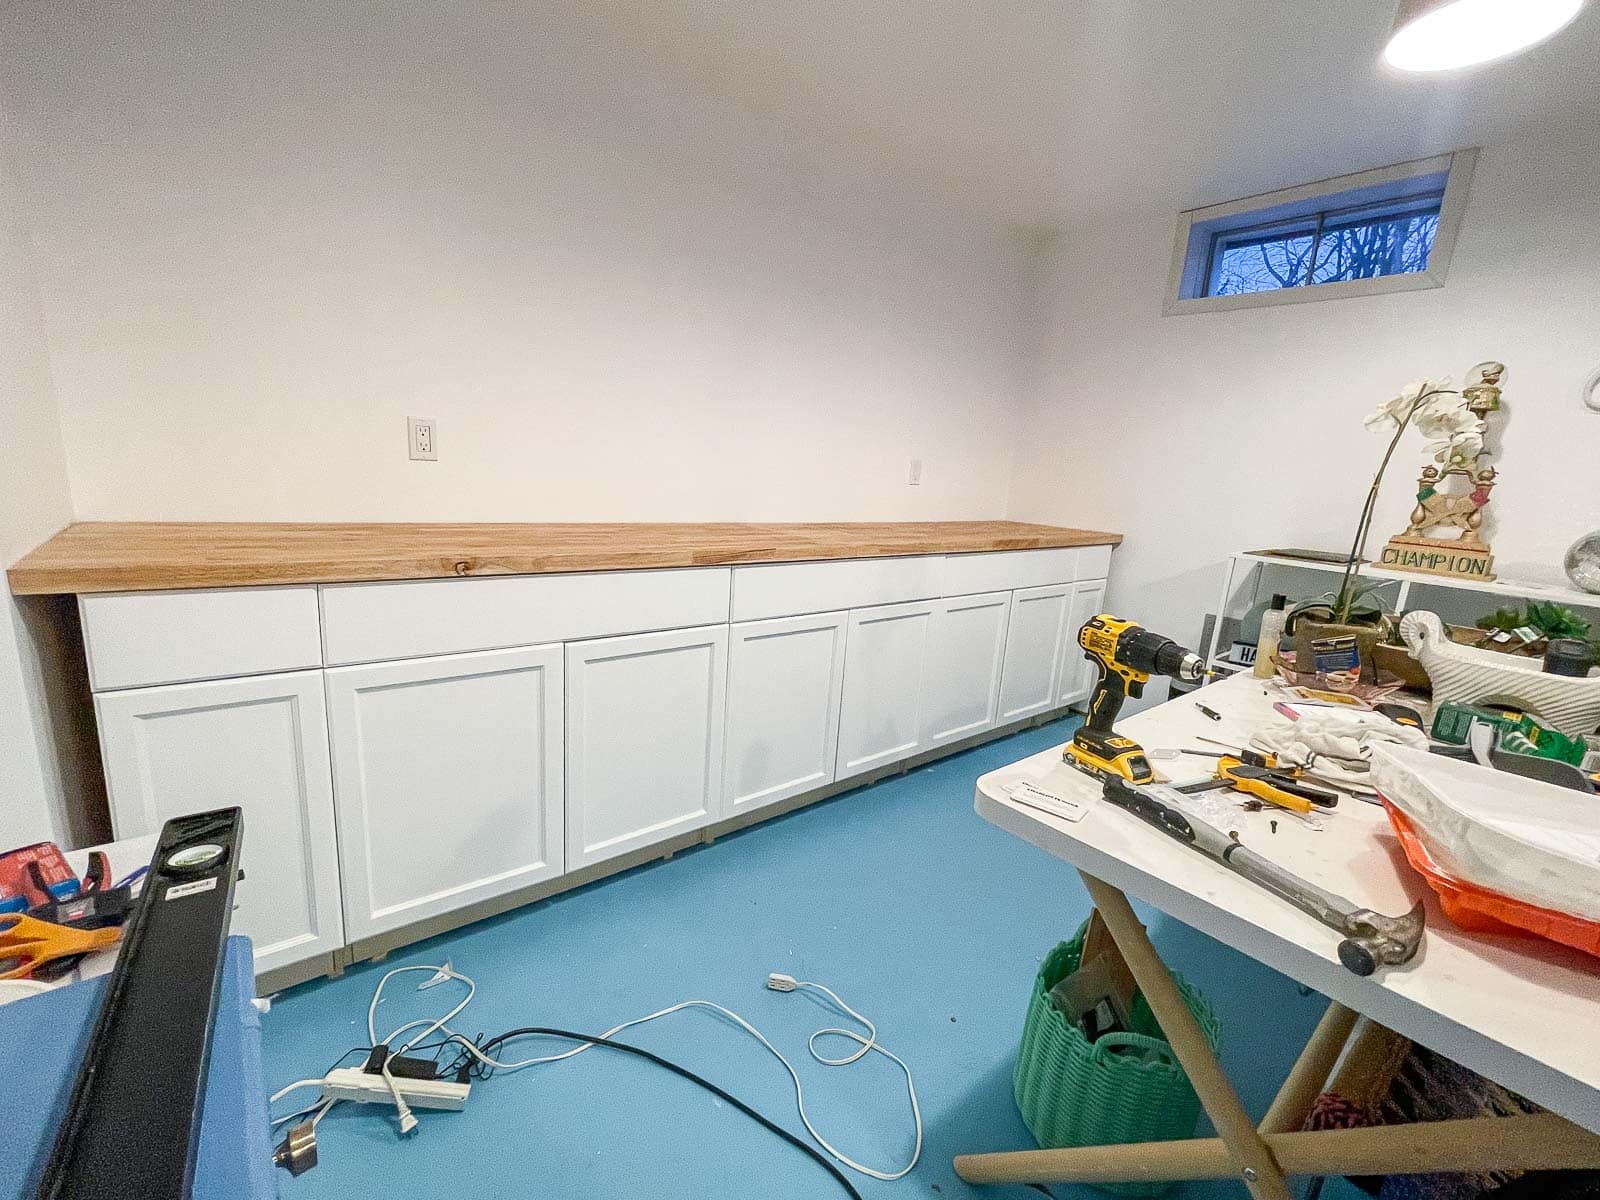

A coat of paint and those amazing fun knobs were the finishing touch.
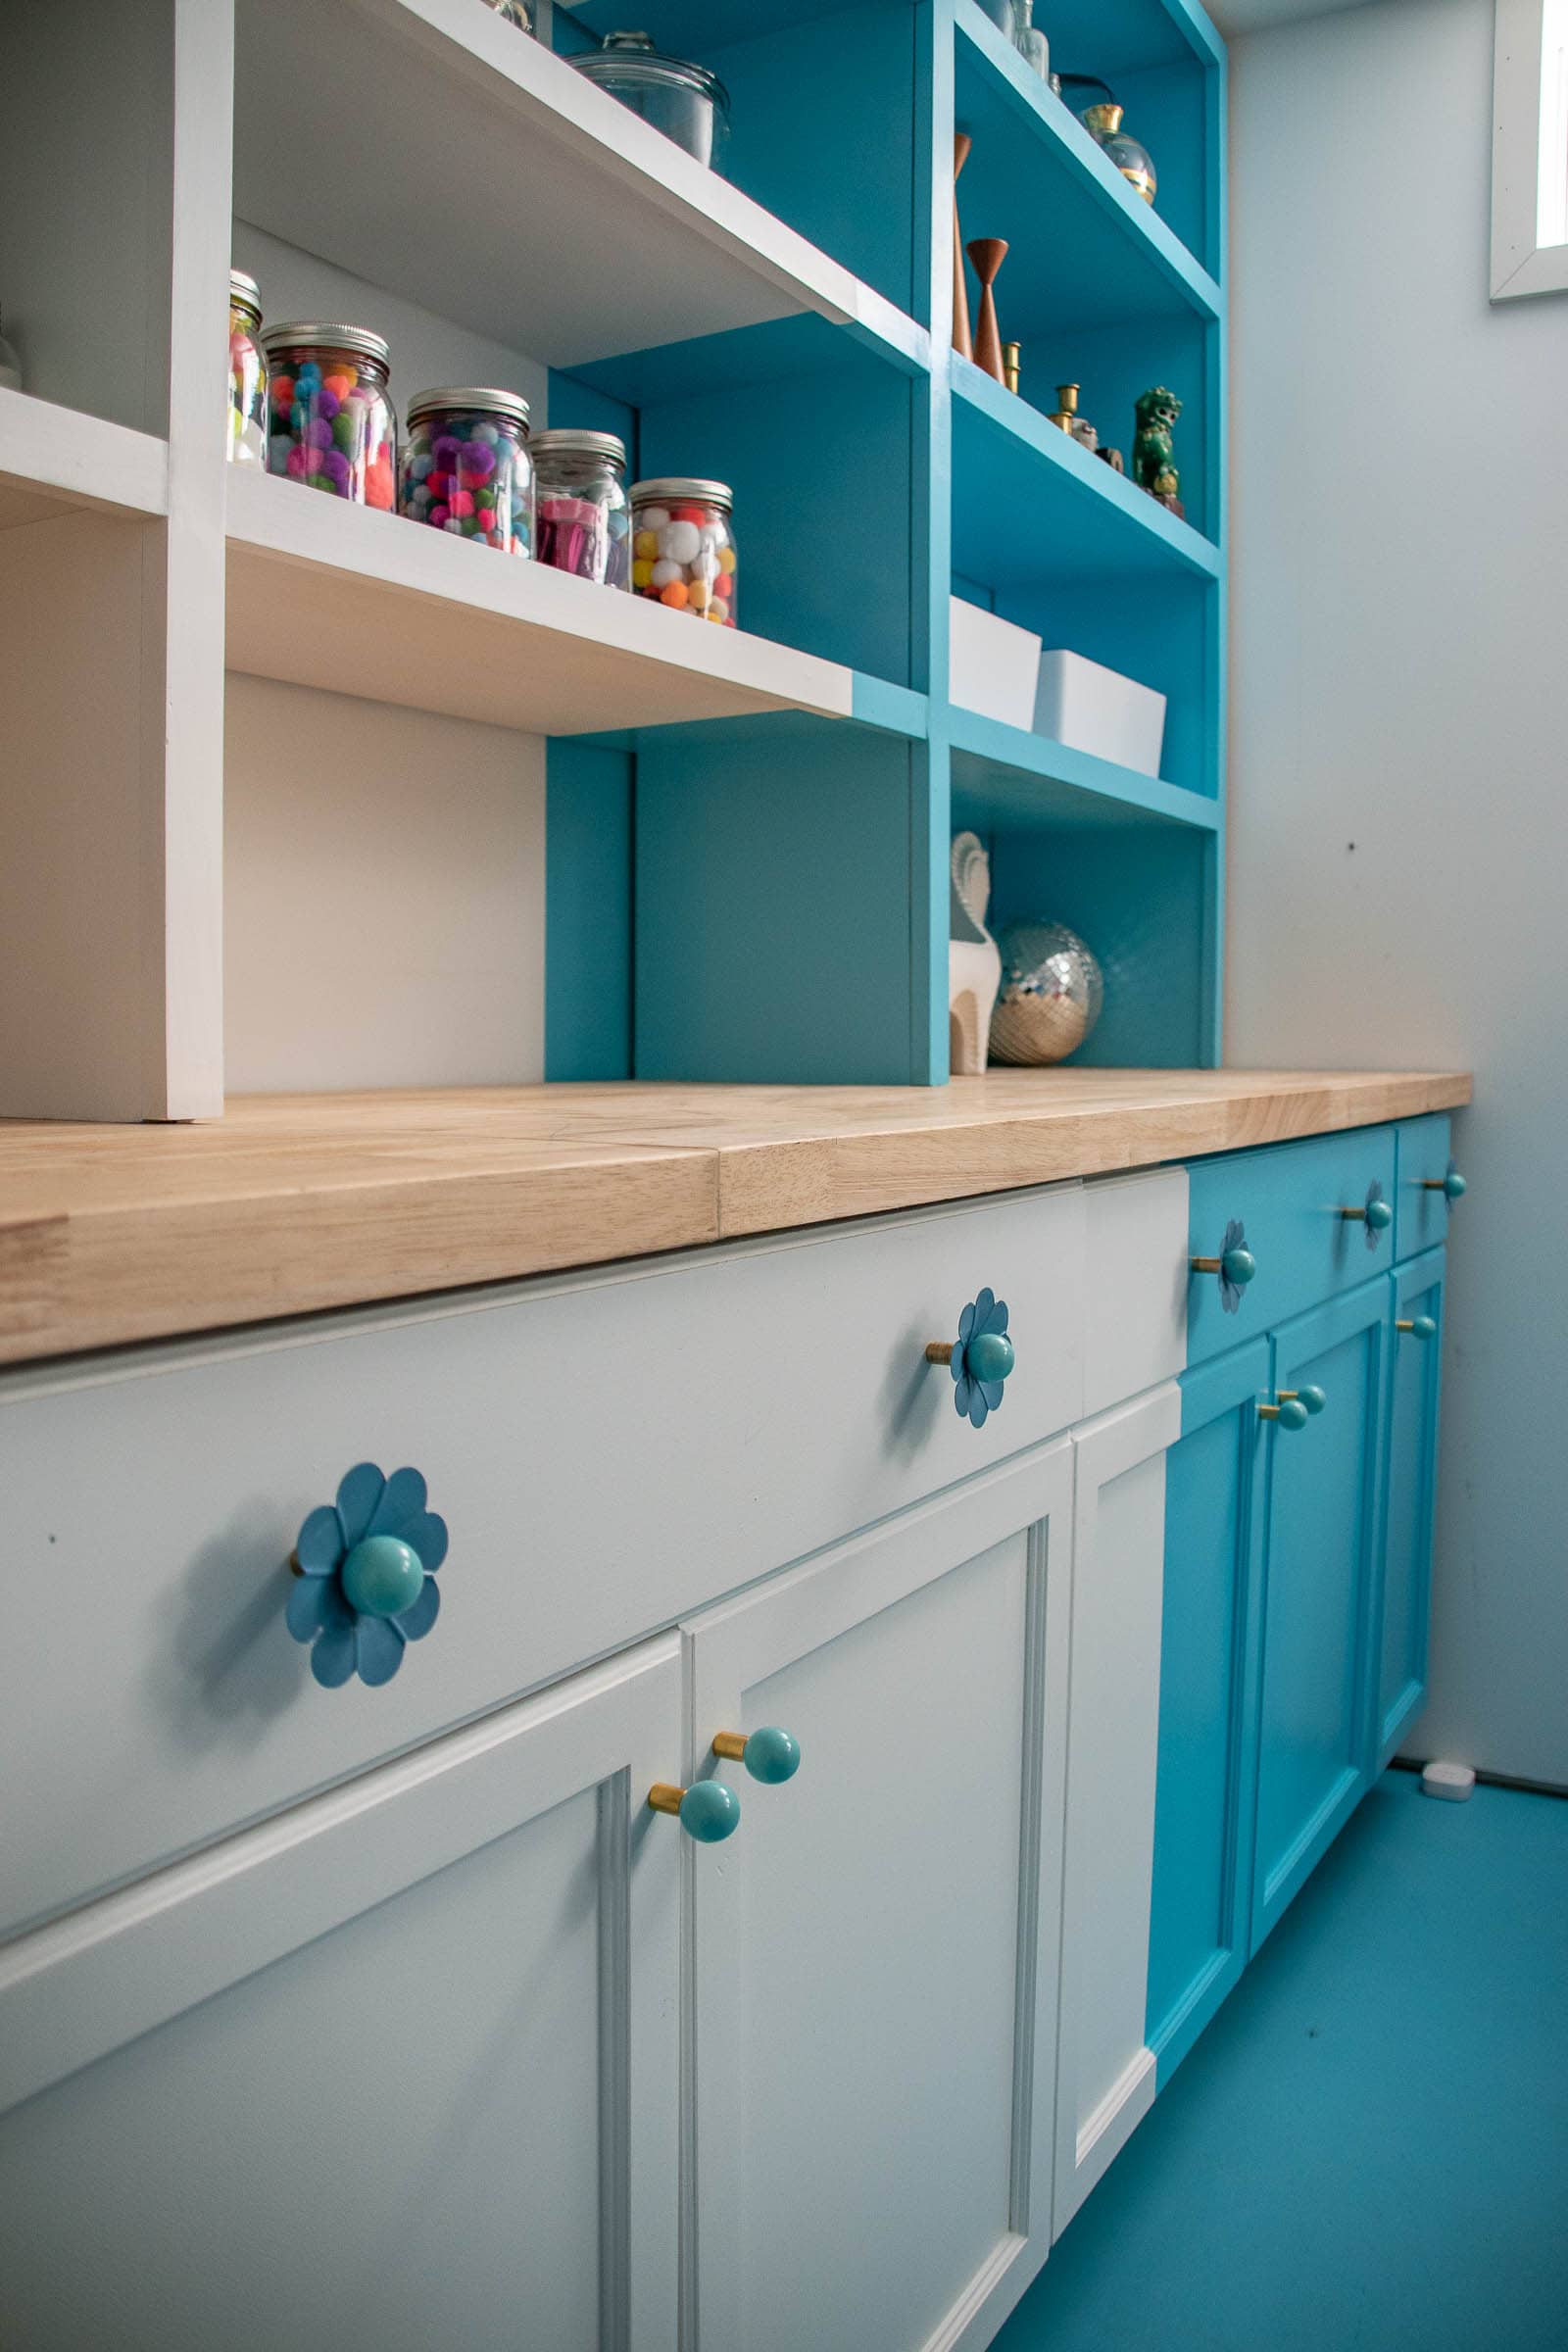
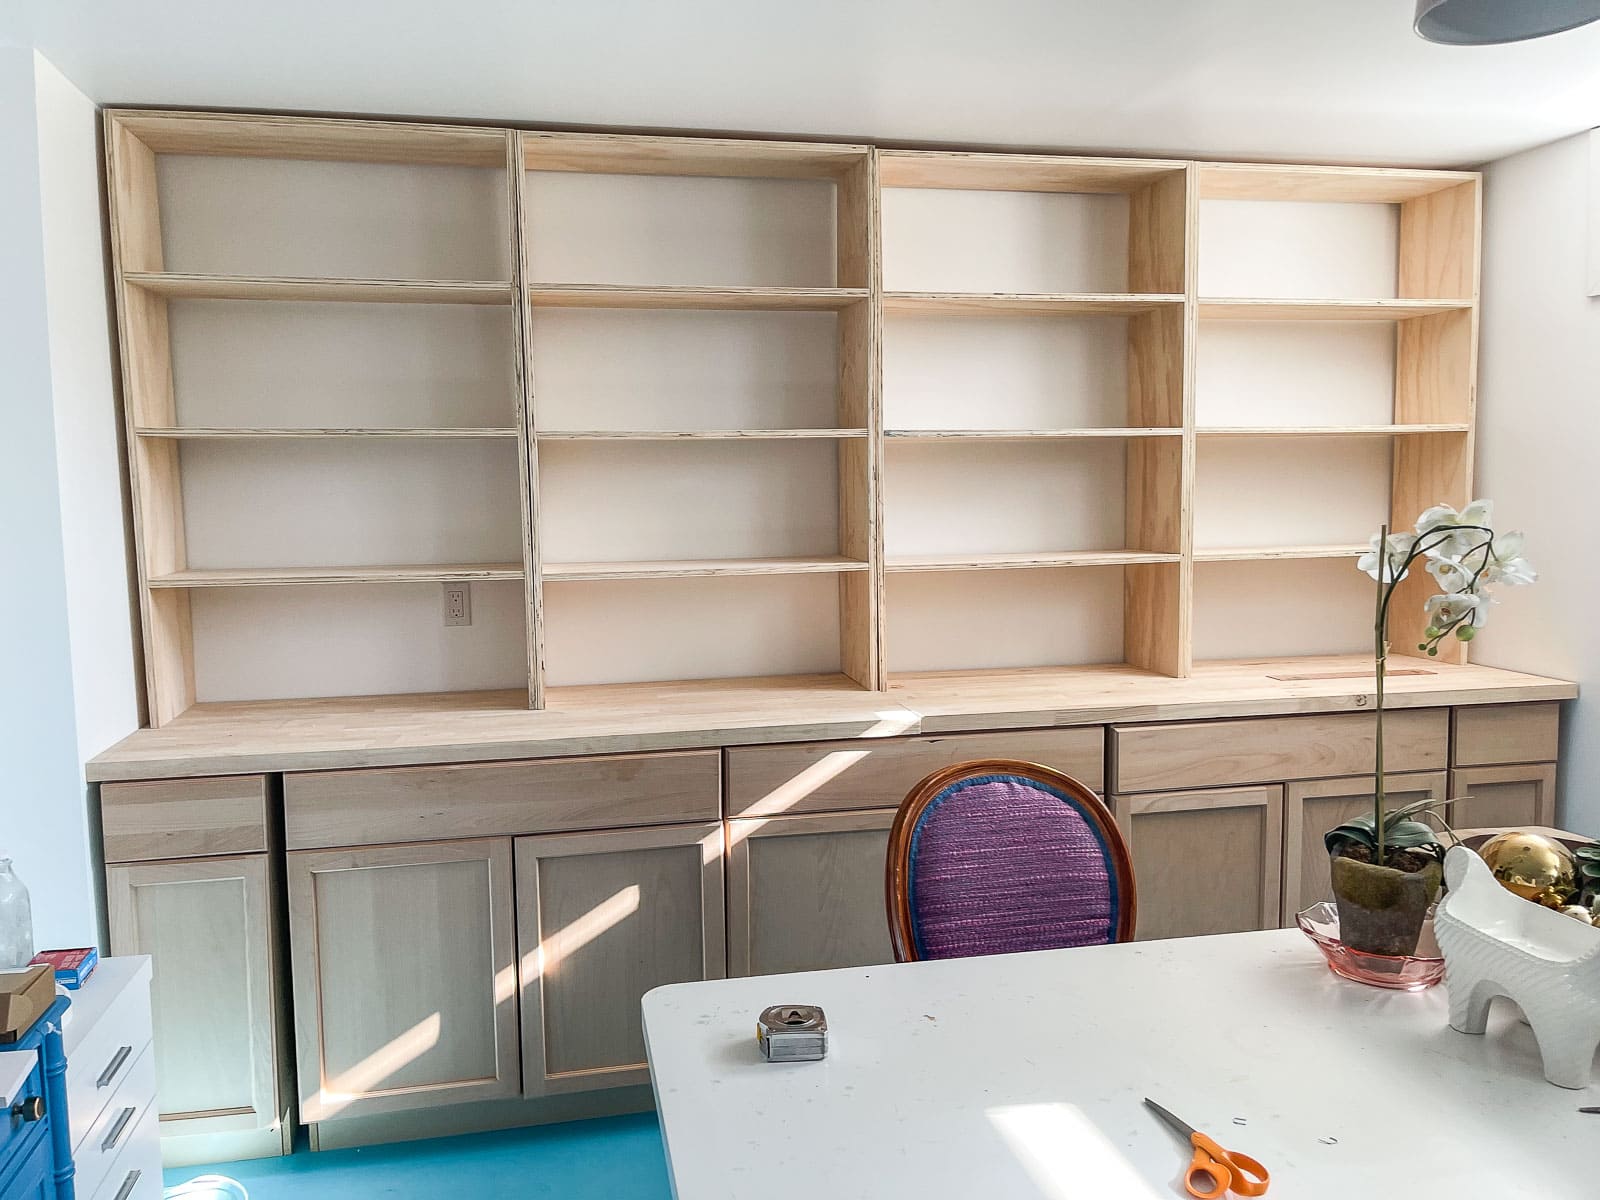
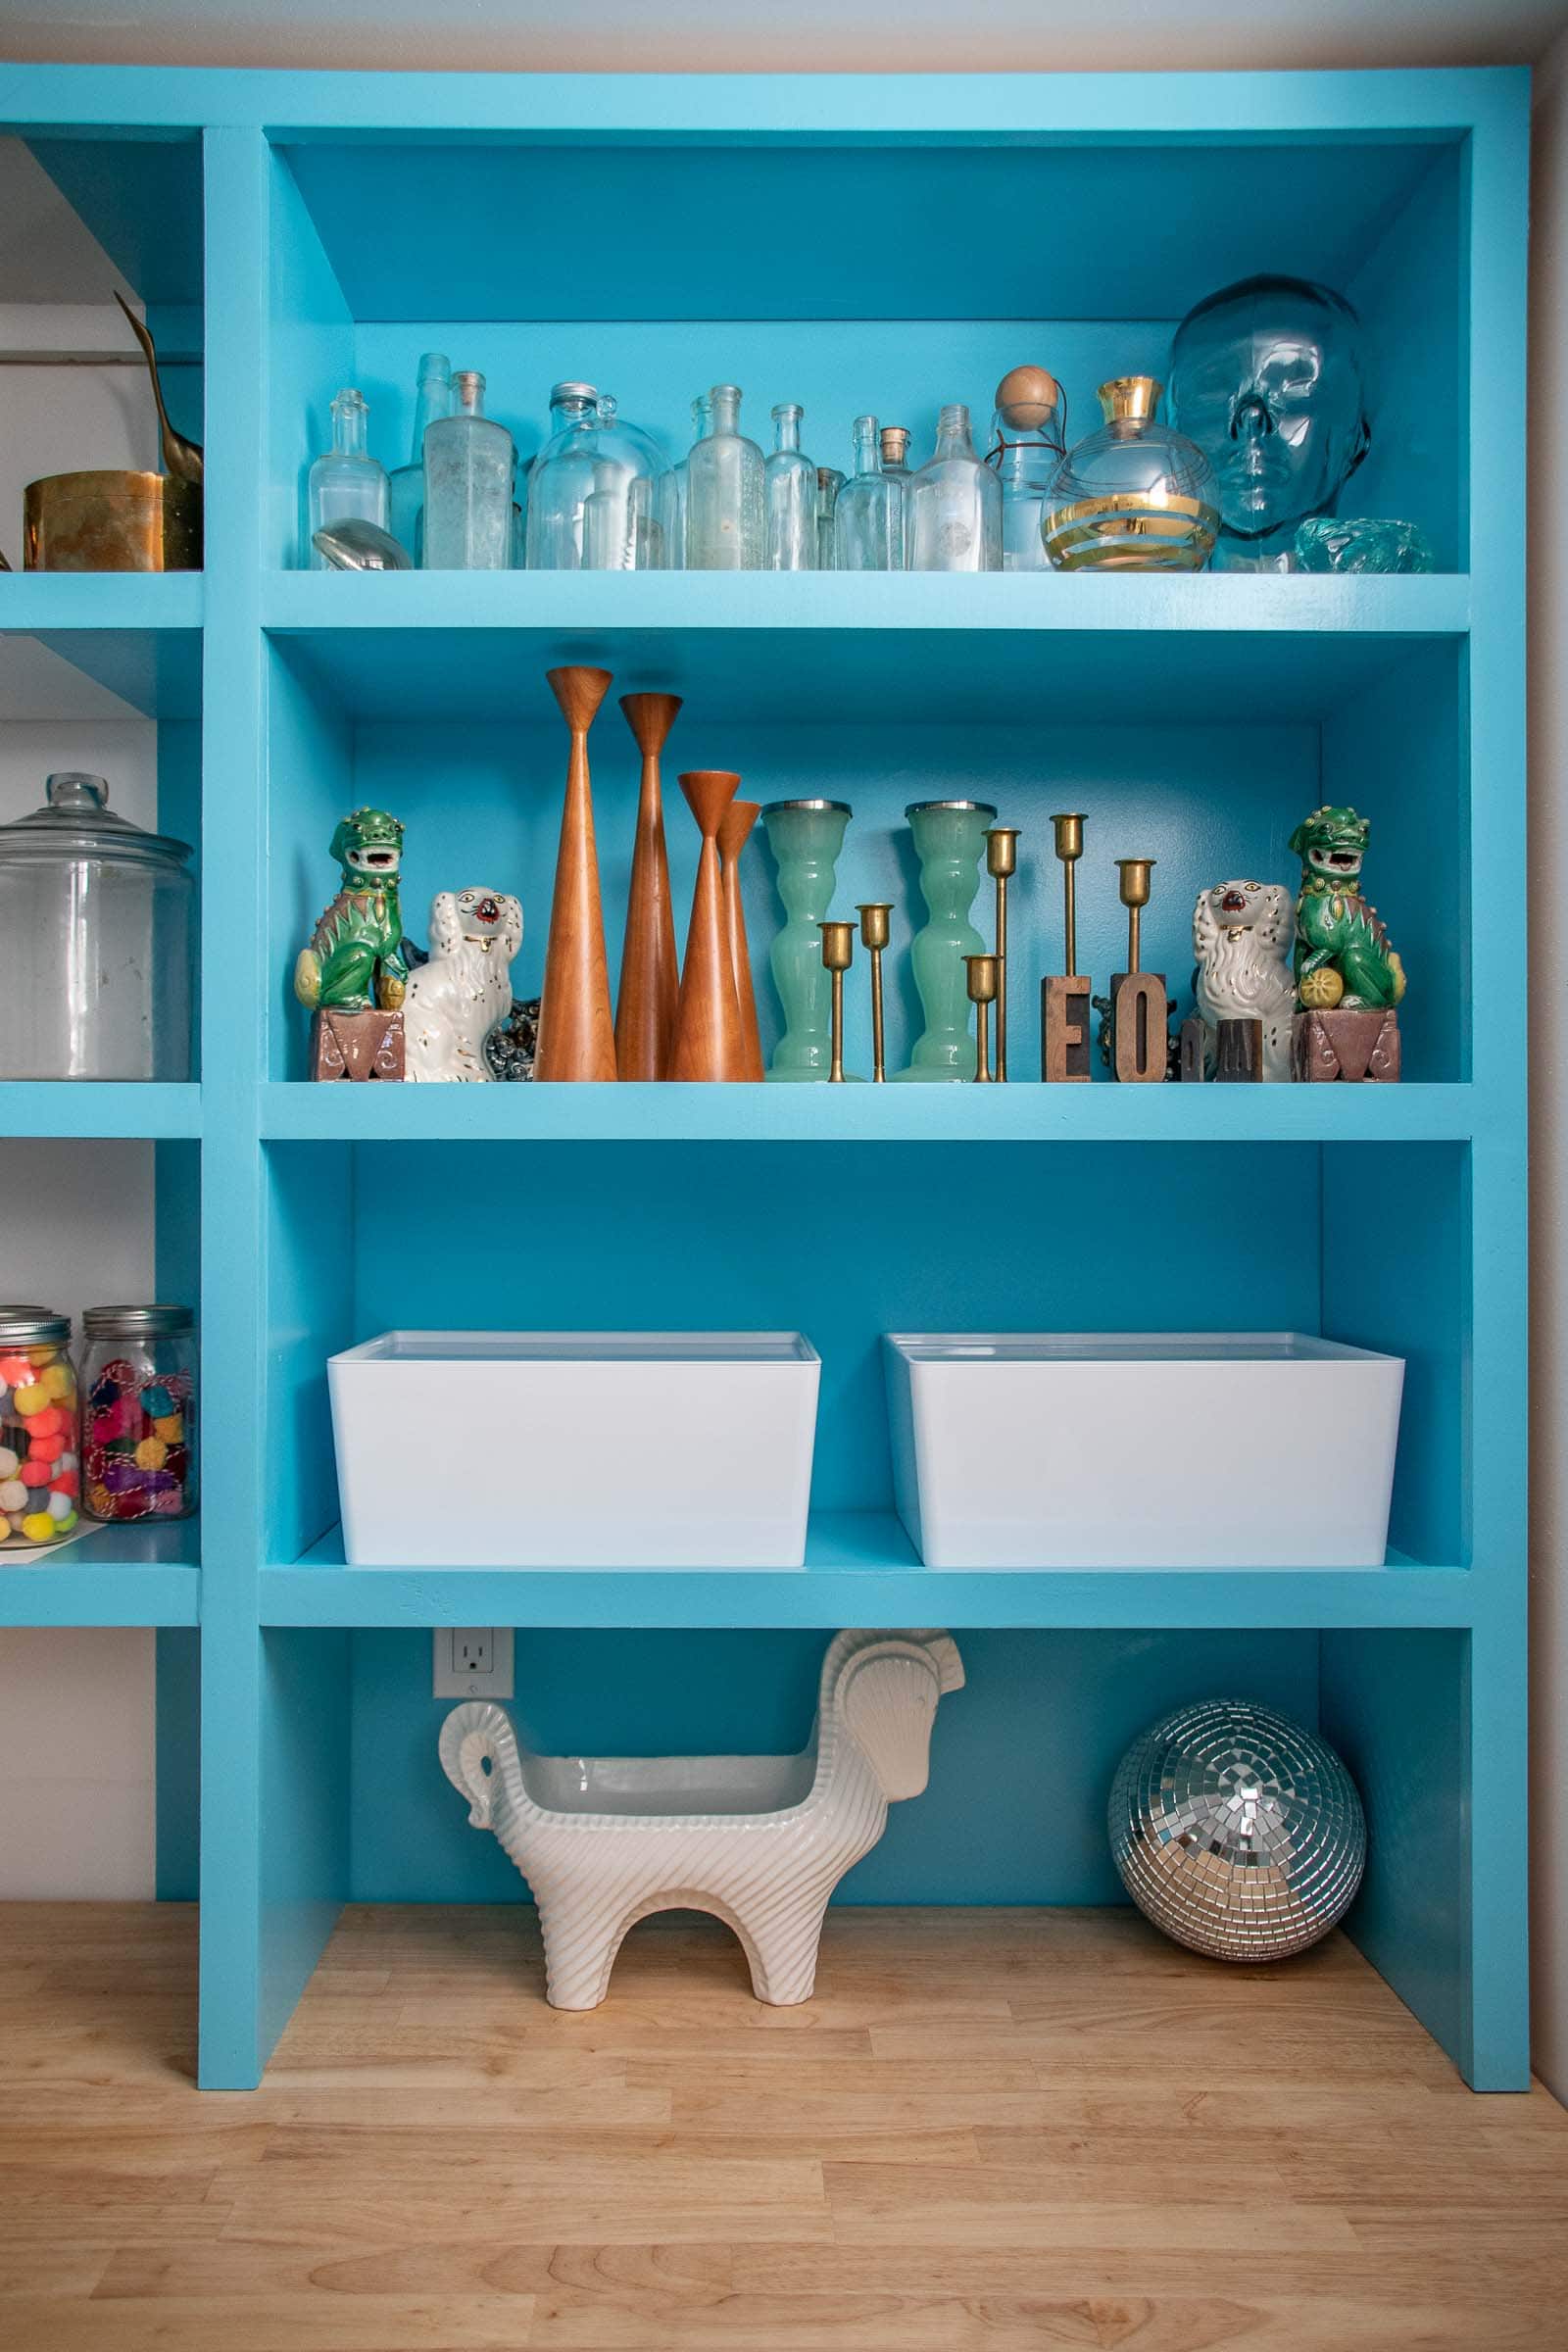
Step 7. DIY Shelves
I’m not posting a tutorial for these shelves mostly because I made a handful of rookie mistakes. I didn’t use quite the right thing to cut down my sheets of plywood and ended up cutting the shelves with a slight curve to the front. I corrected as best I could, but they weren’t perfect. Essentially I built four shelves that would each rest on the butcher block and anchor into the back wall. I used 3/4-inch sanded plywood and trimmed out the fronts with select pine 1x2s. I painted the base cabinets in the space and then brought the bookshelves outside to spray before the final installation.
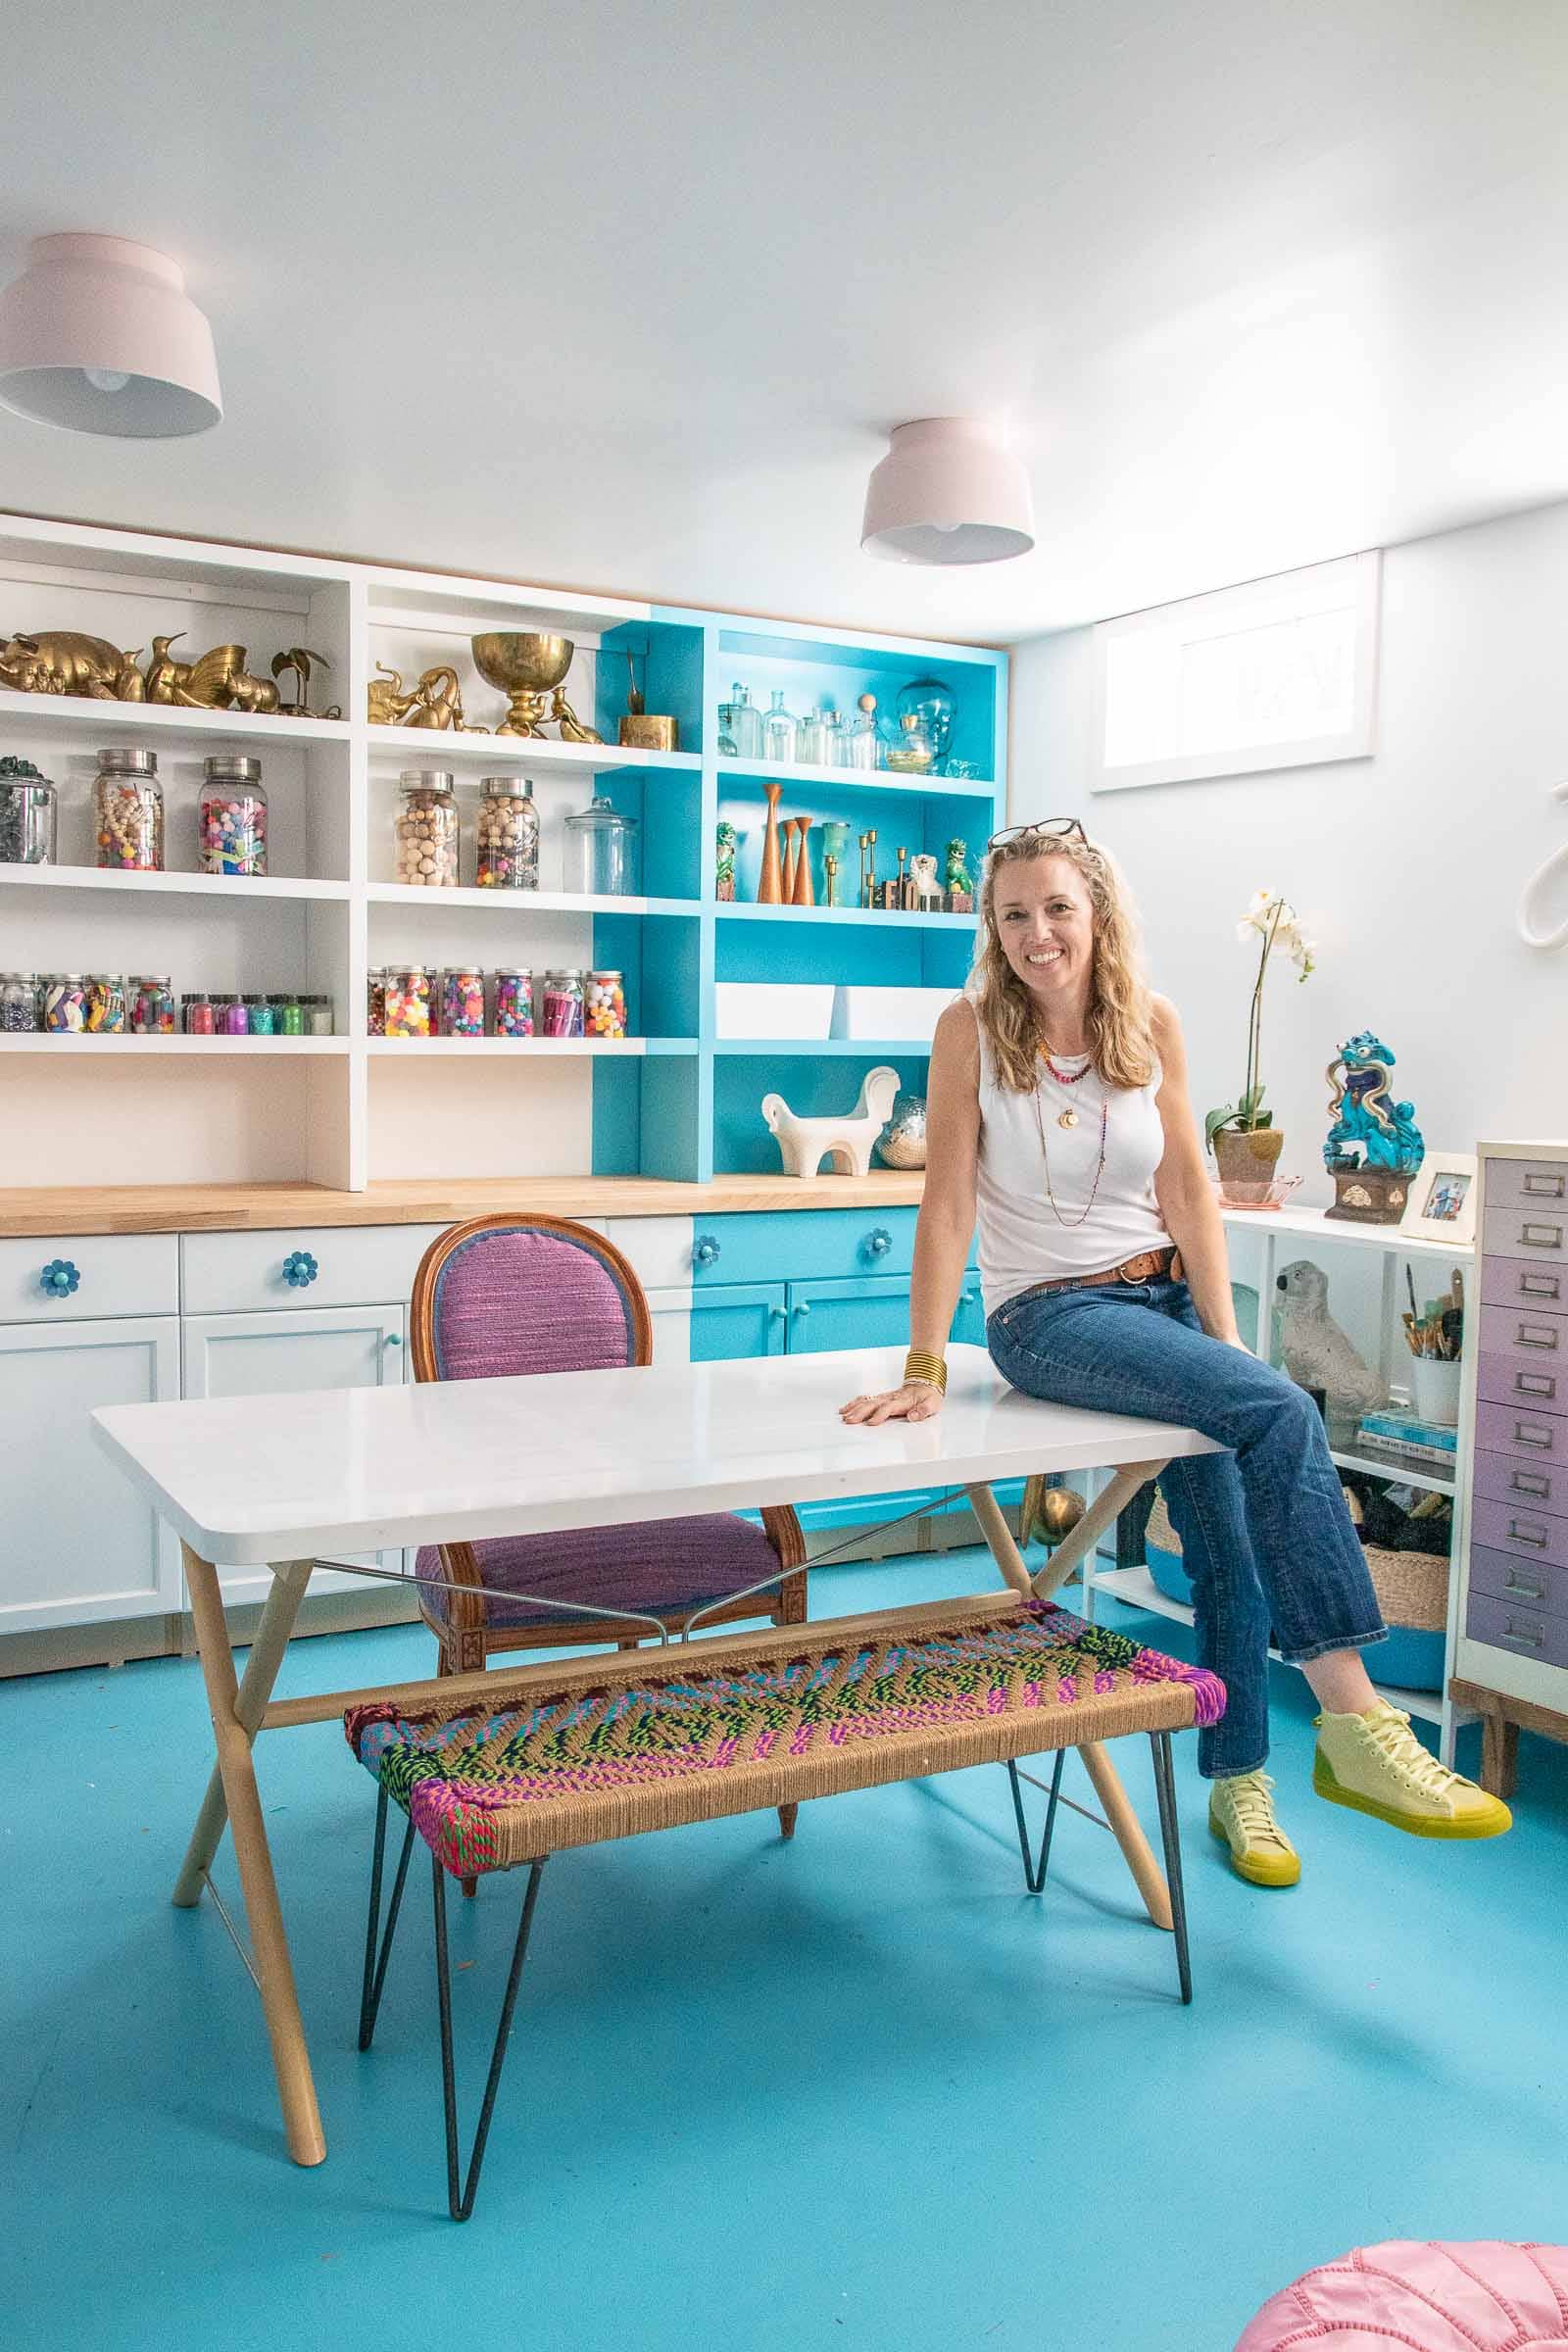
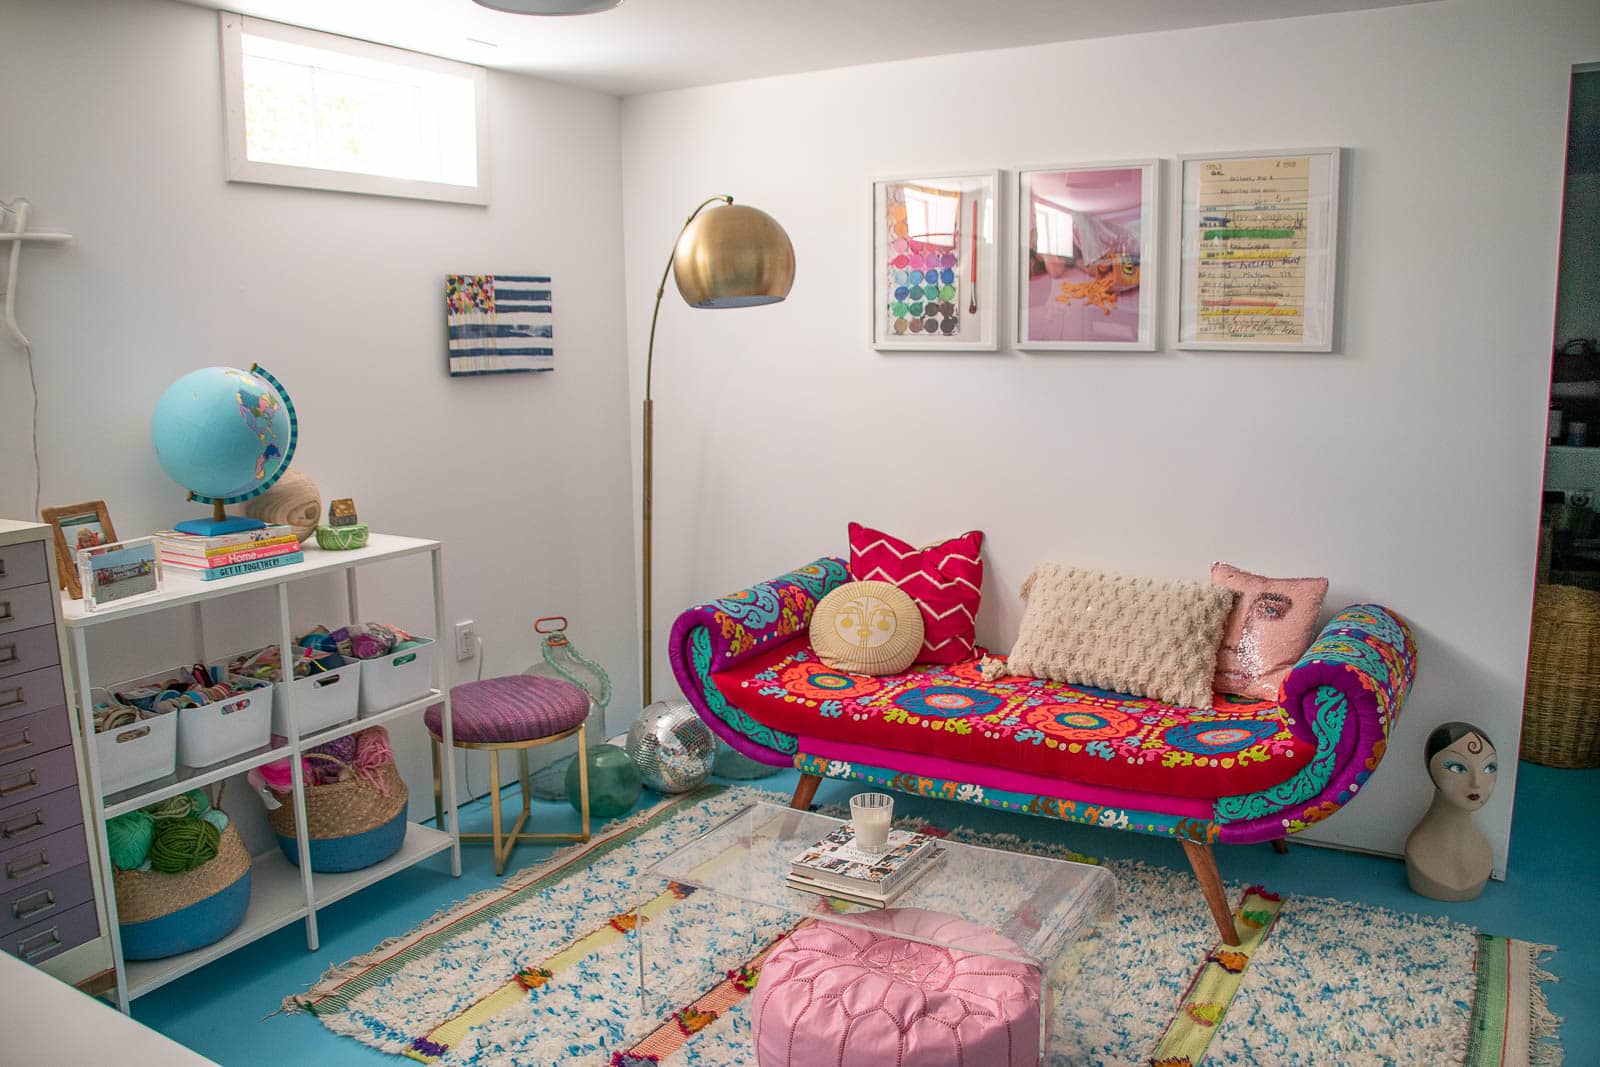
Overall, I am SO happy with this space. I spent money on the contractors who helped get this room office ready and the cabinets, but recycled old furniture and shelves everywhere else. This space is a *work horse* and it holds ALL of my craft supplies and tools. Everything from fabric to paper to wallpaper to yarn… it’s all in there! Do I need to purge and get rid of some things? Yes. Does it all somehow fit? ALSO YES.

I still find myself sitting up in the kitchen working and crafting with the kids moving all around me, but there are definitely times when it’s nice to set up down there and have the ability to just stand up, leave the room and close the door behind me. It’s a bright and cheerful space and it has all of my favorite things.
Source List
- Large Embroidered Bench: Homegoods
- Rug
- Custom Neon Light
- White Shelving
- Ombre File Cabinet (DIY tutorial here)
- Desk: no longer available but it’s a dining table from Ikea
- Bench
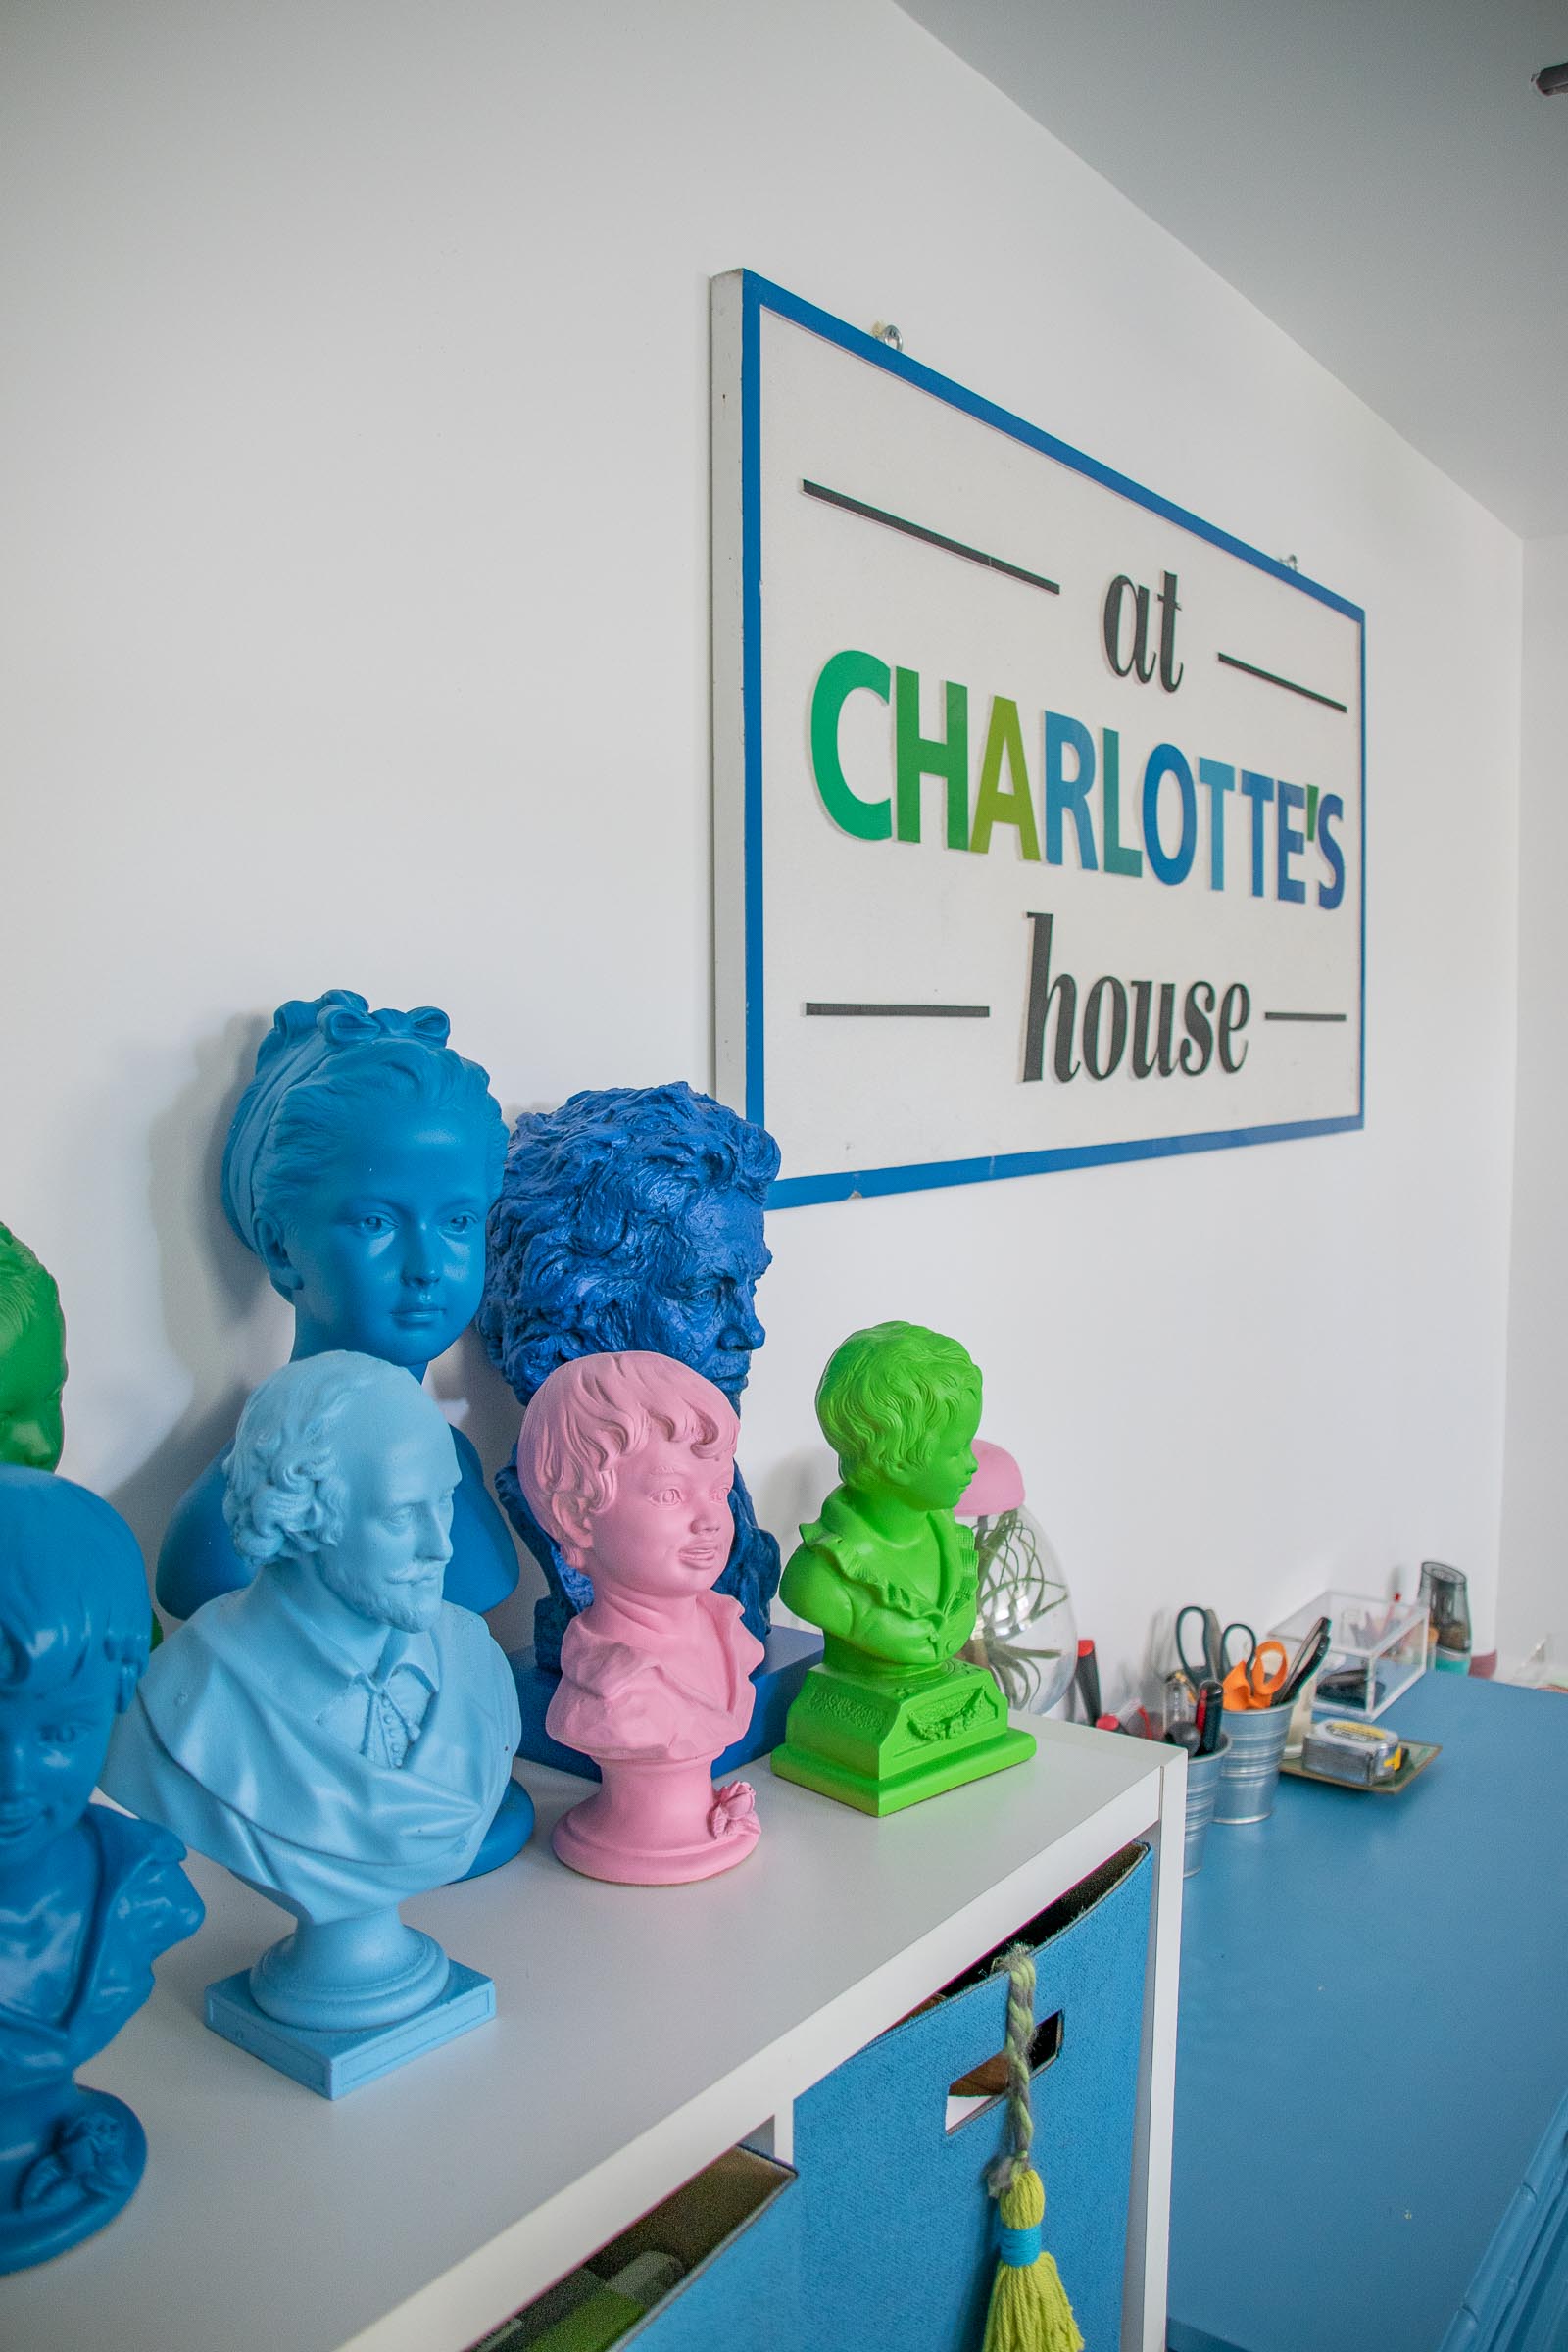
- Painted Busts (DIY tutorial here)
- Base Cabinets
- Cabinet Knobs
- Pink Pendant Lights
- Butcherblock Counters
- Drywall primer
- Paint Sprayer
- Watercolor Print
- Library Card Print
- Cheetos Print no longer available from Society 6

WOW your house is so gorgeous!! WHere is that cute colorful little woven bench from?? Did you make it yourself?
Hi there! That’s an old purchase from Homegoods! Thanks!
Charlotte you are so incredibly inspiring! I am just renovating my home office, your design has given me so many ideas on ways to add vibrancy and color to my pretty vanilla home!
Awww!! Thanks, Clare! Love hearing that! xx
Wow! Look how much fun this space is with color and function. I’m impressed. My craft space is a 3 ft desk tucked in the primary bedroom with a rolling Ikea cart loaded with art supplies. The rest of my craft supplies are stashed in 1/2 of the guest/office room closet on a utility shelf we brought from our old home.
Our shared office space is a desk I assembled from a Masonite board, stained brown, one iron leg and a gifted file cabinet, topped with storage cubbies and shelves. The printer rolls out from underneath on its own little cart.
It’s cheap but attractive and functional. Managed to finally finish writing my murder mystery at this desk. Now that’s done and published, time to play with crafts and art. So far, I’ve needle felted mushrooms and made tissue paper plum blossoms (glued to wind-blown branches) for a spring scene on the mantel.